Articles / Guidesupdated for DaVinci Resolve 21.0.3 (July 2026)
Nikon Z8 N-Log Color Grading Settings for DaVinci Resolve
Quick answer
Set DaVinci Resolve's Color Space Transform to Input Color Space Rec.2020, Input Gamma Nikon N-Log, output DaVinci Wide Gamut then Rec.709. Shoot N-Log at the Z8's base ISO of 800 or 4000. N-RAW decodes natively in Resolve, but Nikon's own documentation states rendering it requires the paid Studio version.
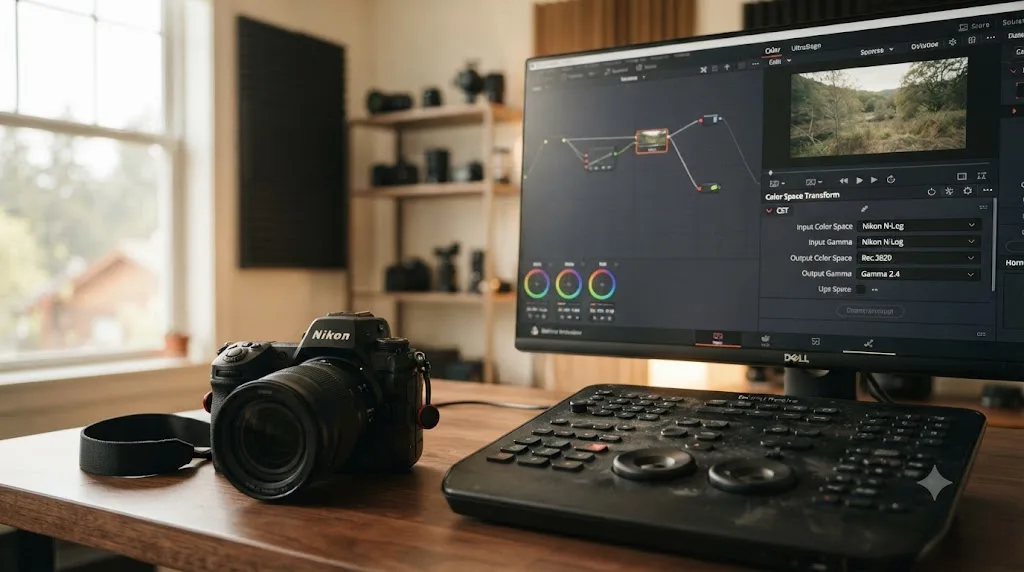
Your Nikon Z8 shoots N-Log, you pull the clip into DaVinci Resolve, and it sits there flat and grey while the Color Space Transform dropdown offers you a dozen manufacturer presets with no obvious "Nikon" label jumping out. That's not a broken import. It's a conversion Resolve hasn't run yet, and Nikon actually documents the exact settings, spread across three or four different manual pages instead of one place anyone would think to check first.
We've spent seven-plus years cutting commercial video in DaVinci Resolve, including projects for Fortune 500 clients, and camera-specific Color Space Transform questions, N-Log among them, are some of the most recurring color threads in our 100,000+ member editing community. As of July 2026, the Z8 is still Nikon's most popular full-frame body for hybrid stills-and-video work, more than three years after launch, with a current firmware sitting at C:Ver.3.10. Here's the exact Color Space Transform setup Nikon's own documentation is built around, the dual base ISO N-Log's curve actually expects, the N-RAW workflow that behaves differently from a standard Log file, and the Studio requirement Nikon states outright but most third-party guides skip, updated for DaVinci Resolve 21.0.3 as of July 2026.
What does the Z8 actually record when you shoot N-Log?
"N-Log footage" from a Z8 can mean at least four different file types, and which one you have decides whether you're reaching for a Color Space Transform node or Resolve's Camera RAW panel.
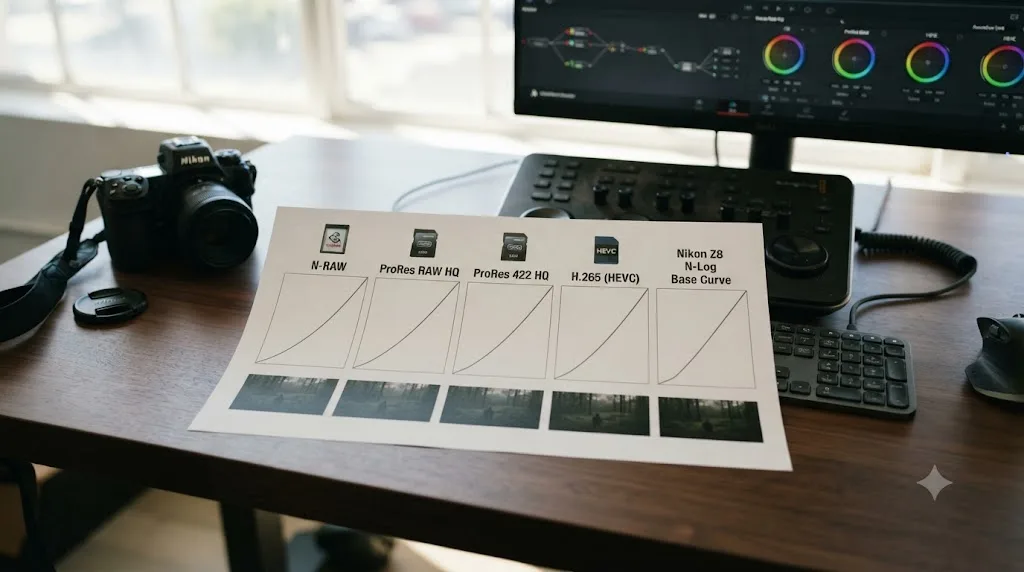
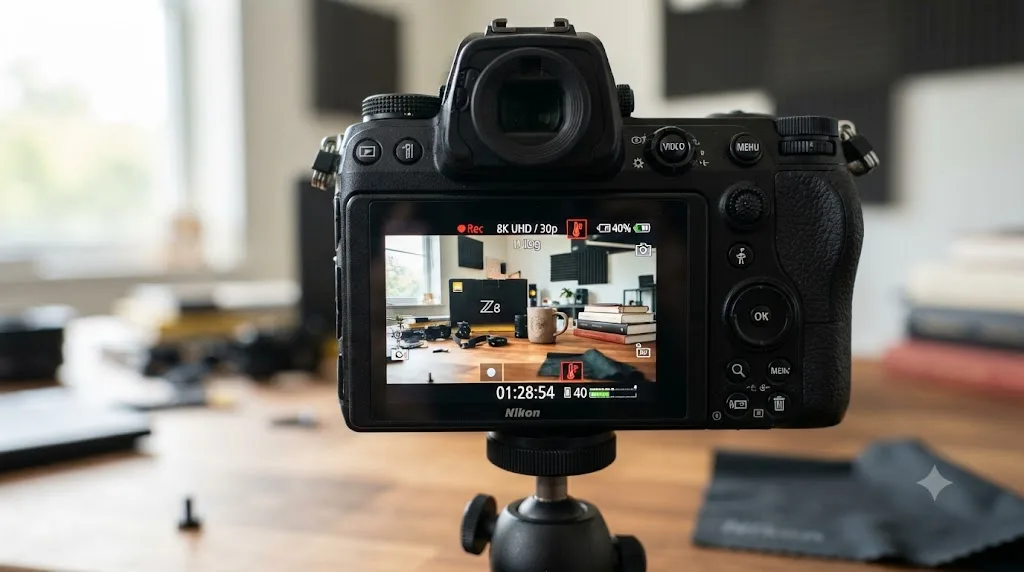
Nikon built the Z8 around a 45.7-megapixel full-frame stacked, back-illuminated CMOS sensor paired with its EXPEED 7 processor, launched at $3,999.95 body-only and made available on May 25, 2023, per Nikon USA's own press release. N-Log is available across four internal recording paths: N-RAW at up to 8.3K 60p in 12-bit, ProRes RAW HQ at up to 4.1K 60p in 12-bit, ProRes 422 HQ at 10-bit, and H.265 10-bit MOV, all sharing the same flat N-Log tone curve underneath. Nikon's own recording-duration figures put continuous 8K/30p N-RAW at roughly 90 minutes and 4K UHD/60p at over two hours before you hit the camera's thermal ceiling, per the same press release and B&H's product listing.
| Format | Bit depth | Resolution ceiling | Type |
|---|---|---|---|
| N-RAW | 12-bit | 8.3K at 60p | Internal RAW, Nikon's own codec |
| ProRes RAW HQ | 12-bit | 4.1K at 60p | Internal RAW, Apple codec |
| ProRes 422 HQ | 10-bit | Standard 4K modes | Internal, not RAW |
| H.265 (MOV) | 10-bit | Standard 4K/8K modes | Internal, not RAW |
N-Log on the Z8 isn't one file type, it's a gamma curve that can show up wrapped in a genuine RAW codec or baked into a standard compressed file, and those two cases need entirely different tools in DaVinci Resolve. Confirm which one you have in Clip Attributes before you touch a node, since applying a Color Space Transform meant for a compressed N-Log MOV to an already-decoded N-RAW clip produces a visibly wrong, doubly converted image.
What Color Space Transform settings does N-Log footage need in DaVinci Resolve?
This is the core mechanism for standard N-Log files, H.265, ProRes 422 HQ, or ProRes RAW HQ, all use the same two-node pattern.
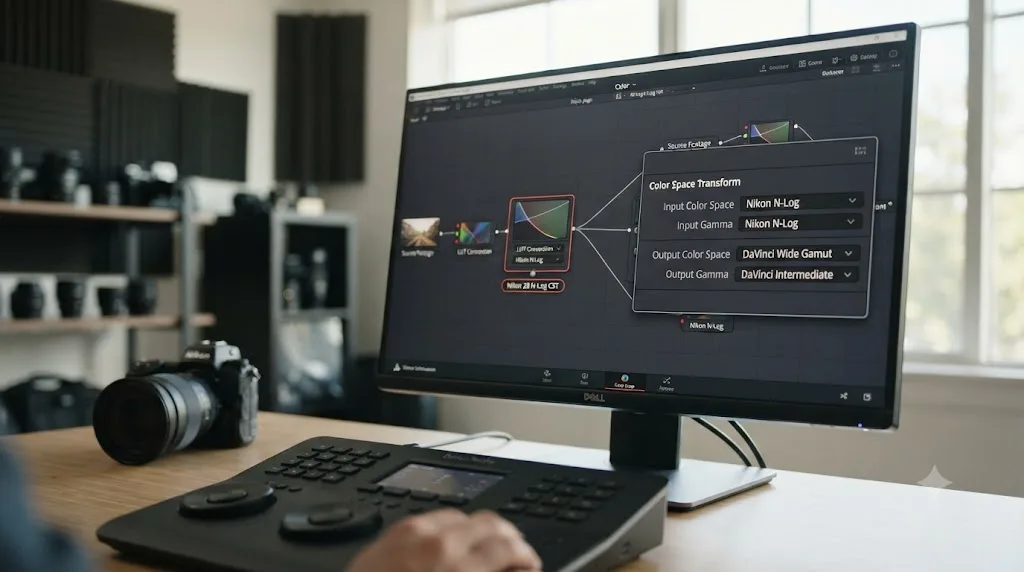
Add a Color Space Transform to your first node. Set Input Color Space to Rec.2020. Set Input Gamma to Nikon N-Log. Set Output Color Space to DaVinci Wide Gamut and Output Gamma to DaVinci Intermediate. That moves the flat N-Log source into Resolve's own working space, where your actual grading happens. This exact pairing, Rec.2020 as the input color space and Nikon N-Log as the input gamma, comes straight from Nikon's own online manual for editing Log-format footage in DaVinci Resolve, which also specifies Tetrahedral for 3D lookup table interpolation under Project Settings.
On your last node, before final output, reverse it: Input Color Space DaVinci Wide Gamut, Input Gamma DaVinci Intermediate, Output Color Space Rec.709 (or Rec.2100 for an HDR delivery), Output Gamma Rec.709 (Scene) on Windows or Rec.709-A on Mac, per the same Nikon documentation.
| Node | Input Color Space | Input Gamma | Output Color Space | Output Gamma |
|---|---|---|---|---|
| First (in) | Rec.2020 | Nikon N-Log | DaVinci Wide Gamut | DaVinci Intermediate |
| Last (out) | DaVinci Wide Gamut | DaVinci Intermediate | Rec.709 | Rec.709 / Rec.709-A |
One Color Space Transform converting a flat N-Log source into DaVinci Wide Gamut, and a second one converting your finished grade back out to Rec.709, is the entire mechanism this workflow needs for any standard N-Log file. Everything else in this guide, dual ISO, N-RAW handling, the Studio requirement, sits around that two-node core rather than replacing it.
Is N-Log really Rec.2020, and why does that matter?
Yes, and it's a directly documented fact, not an inference carried over from a different camera's menu.
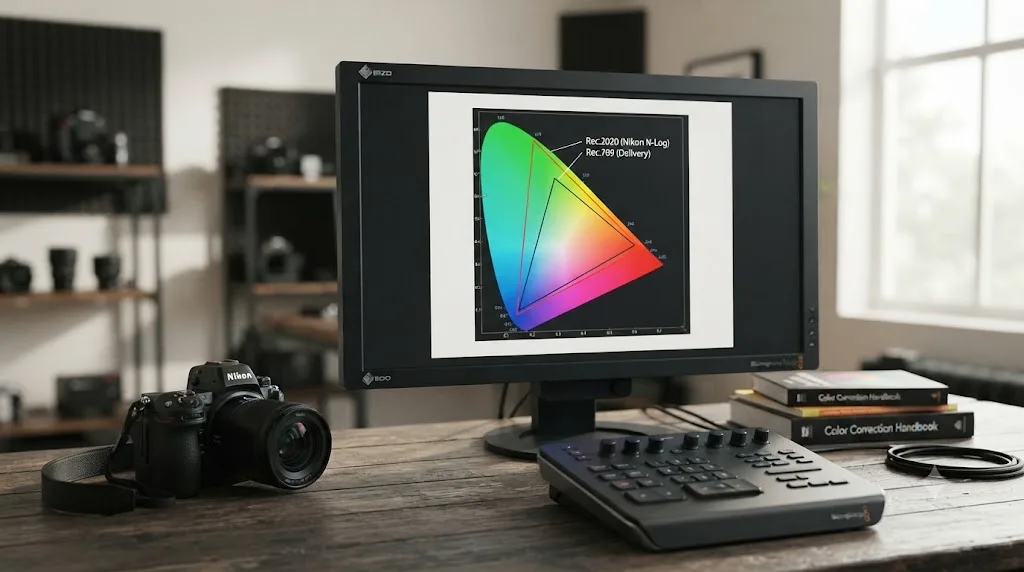
Nikon's own N-Log Specification Document, published in 2018, defines N-Log's color gamut as matching ITU-R BT.2020, the same standard behind the "Rec.2020" preset in Resolve's Color Space Transform dropdown, with a D65 white point. CineD's coverage of Nikon's later RWG/Log3G10-to-Rec.2020 LUT release confirms the same pairing directly, describing the tool as one that "matches Nikon's N-Log look within a Rec.2020 container."
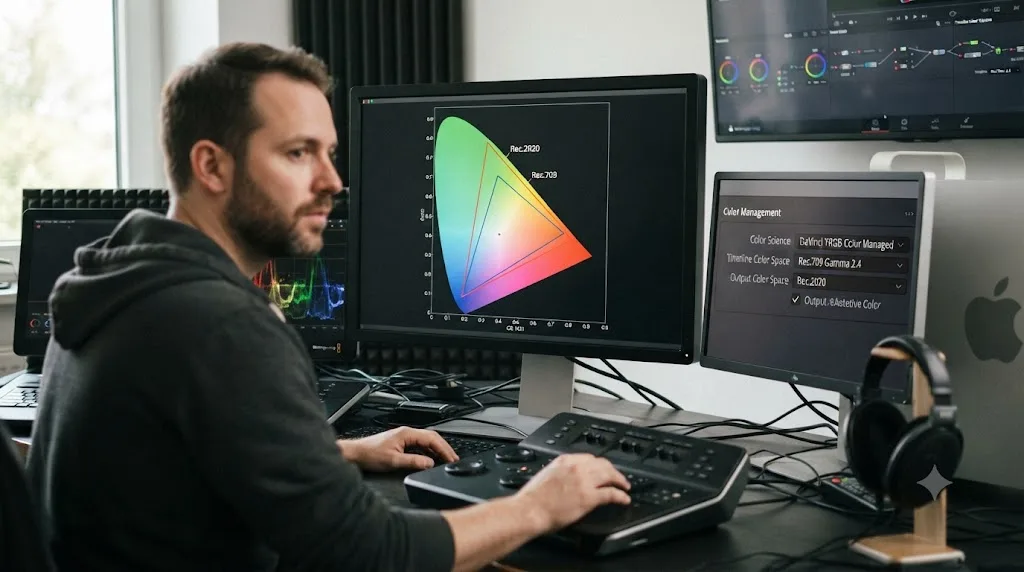
That's a different design choice than Canon's Cinema Gamut or Panasonic's V-Gamut, both proprietary color spaces with no equivalent broadcast standard behind them. Nikon instead built N-Log around an existing ITU recommendation, the same one behind Resolve's SDR Rec.2020, HDR Rec.2020, and Rec.2100 PQ/HLG delivery presets. Our guide to Rec.709 versus Rec.2020 in DaVinci Resolve covers what that gamut actually covers, roughly 76% of visible color against Rec.709's 36%, and why Resolve treats it as a delivery target in its own right, separate from being N-Log's carrier gamut here.
Nikon didn't invent a proprietary color space for N-Log the way Canon and Panasonic did for their own Log systems, it built N-Log's gamut directly on Rec.2020, an existing ITU broadcast standard Resolve already ships as a Color Space Transform preset. That's one fewer manufacturer-specific unknown to verify against your own footage compared with a Log system that only exists inside one company's cameras.
Resolve Color Management or a manual Color Space Transform, which one?
Both reach the same finished image, and Nikon's own documentation actually describes two slightly different recommended project setups depending on which type of N-Log file you're working with.
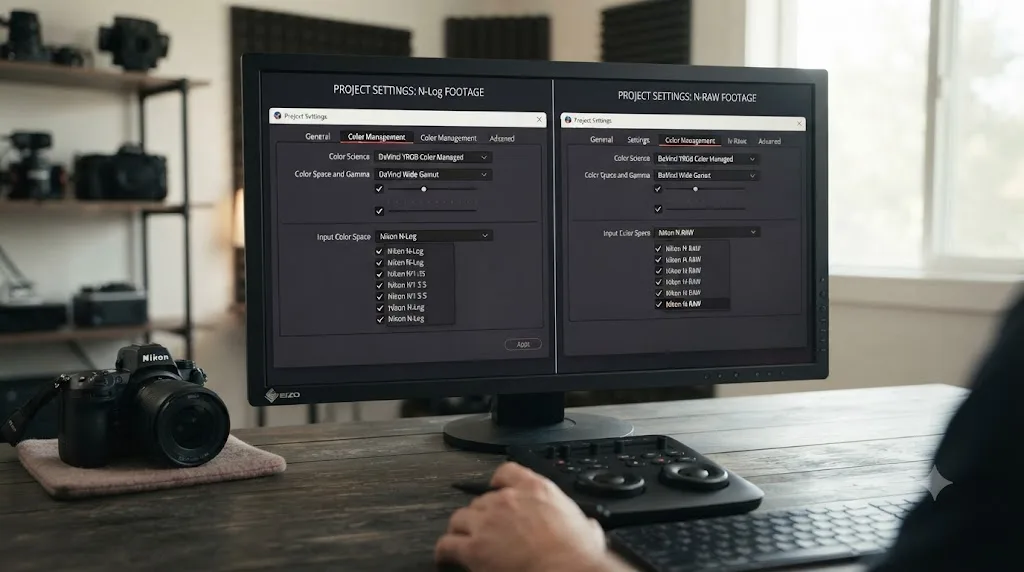
For standard N-Log MOV or ProRes files, Nikon's Log/RAW editing manual recommends Color science set to DaVinci YRGB, Timeline color space set to DaVinci WG/Intermediate, and Output color space set to Rec.709 (Scene) on Windows or Rec.709-A on Mac, letting Resolve Color Management apply the conversion automatically once a clip's Input Color Space and Input Gamma are tagged through Clip Attributes. For N-RAW footage specifically, Nikon Professional Services' separate N-RAW editing guide recommends a different Timeline color space, Rec.709 Gamma 2.4, with Output color space set to Same as Timeline, since RAW footage is decoded through Camera RAW rather than tagged like a standard clip.
A manual Color Space Transform node gives you more control per clip, which matters the moment you're mixing N-Log with HLG footage from the same body, or mixing Z8 footage with a different camera brand entirely. Our guide to color matching different cameras in DaVinci Resolve covers that cross-camera normalization step once each source is individually corrected into DaVinci Wide Gamut.
| Situation | Better fit |
|---|---|
| Project is entirely standard N-Log footage, shot consistently | Resolve Color Management, per Nikon's Log/RAW manual settings |
| Project is entirely N-RAW footage | Resolve Color Management with Rec.709 Gamma 2.4 timeline, per Nikon's NPS N-RAW guide |
| Mixing N-Log with HLG, or with another camera brand | Manual Color Space Transform per camera or gamma-curve group |
| You want per-clip override flexibility | Manual Color Space Transform |
Nikon documents two separate recommended DaVinci Resolve project setups, one for standard N-Log files and a different one specifically for N-RAW, which is easy to miss if you only ever find one of the two manual pages. Confirm which file type is actually sitting in your Media Pool before copying either set of project settings wholesale.
What ISO should you shoot N-Log at on the Z8?
The Color Space Transform math assumes you exposed the footage the way N-Log's curve was actually designed for, and the Z8 gives you exactly two ISOs that setup was built around.
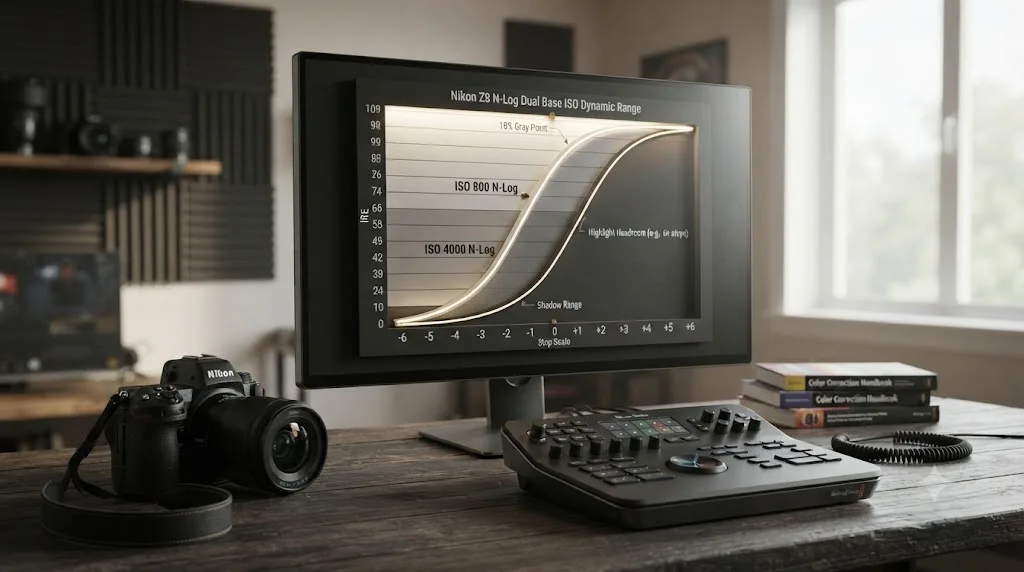
Nikon's own digitutor guide states directly: "The base sensitivities for the Z9 and Z8 are ISO 800 and ISO 4000," per Nikon's Exposure Control for N-Log Recording page, a dual-gain design that mirrors the dual native ISO approach found on some Panasonic and Sony Log-capable bodies. Nikon's guidance for controlling exposure once you're at one of those two points is specific: rather than nudging ISO up or down mid-shot, "you mainly need to control exposure using the aperture and an ND filter," keeping the sensor sitting at whichever native gain the shot calls for.
The reason N-Log's floor sits at ISO 800 rather than a camera's normal base ISO is a deliberate highlight-protection trick, not a limitation. The camera reports ISO 800 on N-Log while the sensor itself is actually running closer to its native ISO 100 gain, per widely documented behavior across Nikon's N-Log-capable bodies, forcing a controlled underexposure that reserves extra headroom for the highlight detail N-Log's curve is built to hold. Nikon's own H.265 dynamic range figure states plainly: "The dynamic range for videos shot with H.265 10-bit (MOV) selected for Video file type and ISO sensitivity set as low as possible (ISO 800) is 12 stops (1300%)."
| Setting | Value |
|---|---|
| N-Log base sensitivity (lower) | ISO 800 |
| N-Log base sensitivity (upper) | ISO 4000 |
| Nikon's recommended exposure tool | Aperture and ND filter, not ISO |
| Documented dynamic range, H.265 10-bit, ISO 800 | 12 stops (1300%), per Nikon |
Exposing N-Log below ISO 800 on the Z8 throws away the highlight headroom the curve was specifically built to protect, since the camera is quietly running the sensor near its true base ISO underneath that reported 800. If Z8 footage clips highlights or looks unexpectedly noisy after a correct Color Space Transform, check the original ISO before spending more time in the color node; a curve exposed below its designed floor won't grade the way one exposed at 800 or 4000 will.
Do you need a Nikon LUT, and where do you get it?
Not for the core Color Space Transform workflow covered above, but Nikon does provide a free official LUT if you want a one-node shortcut to a finished Rec.709 look instead of building the two-node CST pattern yourself.
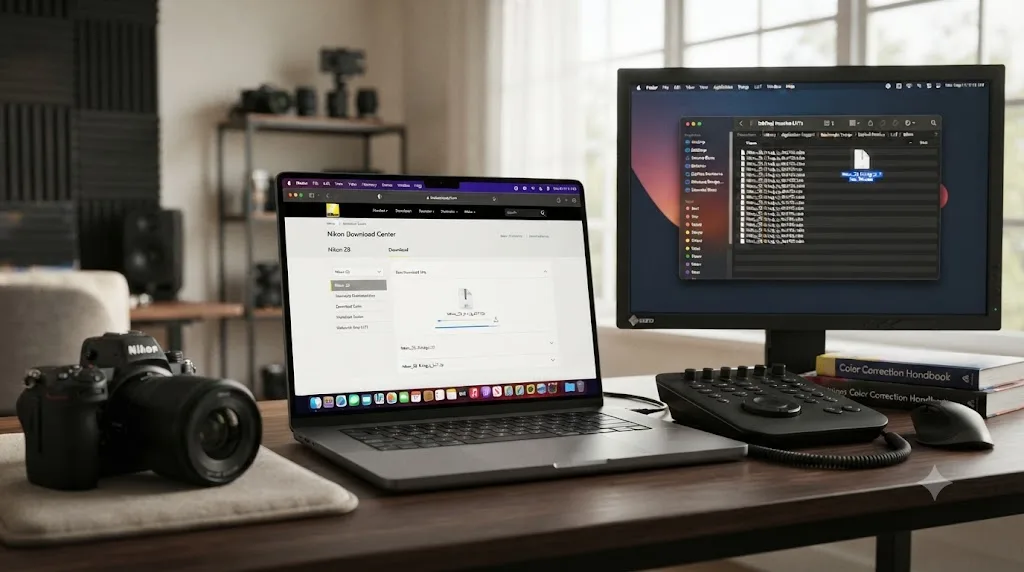
Nikon's Download Center for the Z8 lists an N-Log LUT, version 2.00, released September 12, 2024, alongside a separate RWG/Log3g10-to-Rec2020/N-Log LUT, version 1.00, released October 23, 2025. The first is the standard N-Log-to-Rec.709 conversion LUT most editors want. The second solves a narrower problem entirely: it exists because Adobe Premiere Pro's beta N-RAW support currently interprets N-RAW footage using RED's own RWG/Log3G10 primaries rather than Nikon's native Rec.2020/N-Log pairing, so the LUT bridges that specific mismatch. Resolve doesn't need it, since Resolve's own N-RAW decoding already targets Nikon's native color space directly rather than routing through RED's primaries.
Nikon's own documentation describes what the standard N-Log LUT is for plainly: "Applying N-Log 3D LUTs during color grading produces video that displays beautifully on monitors compatible with Rec. 709," per Nikon's N-Log video recording manual. To install it, drop the downloaded .cube file into Resolve's LUT folder, C:\ProgramData\Blackmagic Design\DaVinci Resolve\Support\LUT on Windows or Library/Application Support/Blackmagic Design/DaVinci Resolve/LUT/ on Mac, inside a Nikon subfolder, then click Update Lists in Resolve's LUT panel so it shows up as an applyable node effect rather than a Color Space Transform preset.
| LUT | Version | Released | What it's for |
|---|---|---|---|
| N-Log LUT (Full) | 2.00 | September 12, 2024 | Standard N-Log to Rec.709 conversion |
| RWG/Log3g10 to Rec2020/N-Log LUT | 1.00 | October 23, 2025 | Fixes Premiere Pro's temporary N-RAW color interpretation only |
Nikon's own N-Log LUT is a free, optional shortcut to a Rec.709 look, not a requirement, since the two-node Color Space Transform pattern earlier in this guide reaches the same destination with more control over the intermediate grading space. The second LUT solves a Premiere-specific problem and does nothing useful in a Resolve project.
How do you set up N-RAW footage specifically?
Internal N-RAW takes a genuinely different path through Resolve than standard N-Log, because RAW footage doesn't carry a fixed Input Color Space and Input Gamma the way a compressed clip does.
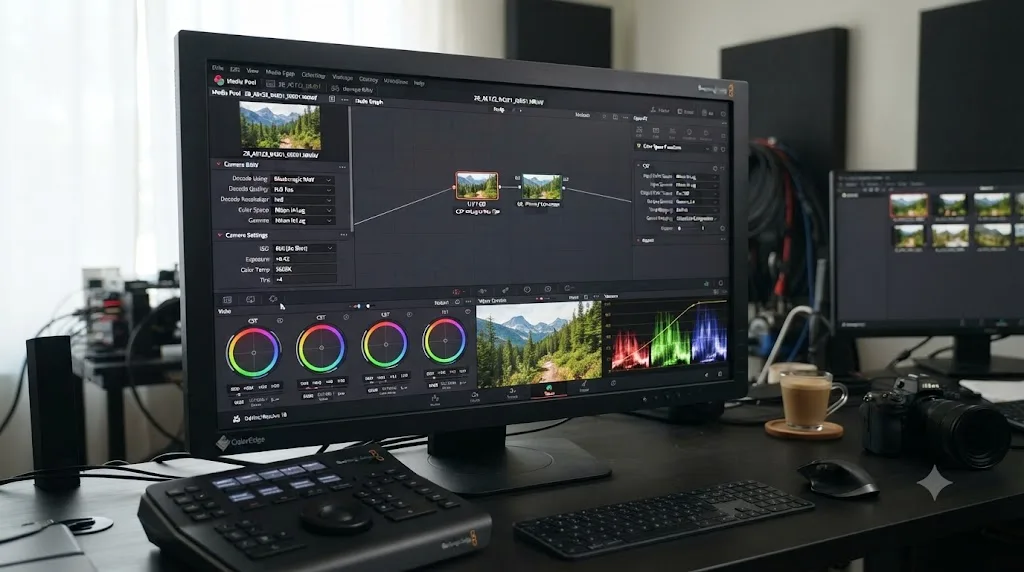
DaVinci Resolve has decoded Nikon RAW natively since version 17.4.6, released in March 2022, per CineD's coverage of that update and Nikon Rumors' report on the same release, which arrived more than a year before the Z8 shipped. Drag a .NEV file into the Media Pool and it opens its own Camera RAW tab in Clip Attributes or the Color page inspector, not the standard Input Color Space and Input Gamma fields a compressed N-Log clip exposes.
Nikon Professional Services' own step-by-step N-RAW editing guide lays out two ways to finish an N-RAW clip. The direct route sets each clip's Decode Using mode to Clip, with Color Space set to Rec.709 and Gamma set to 2.4, letting the RAW decoder itself handle the N-Log-to-Rec.709 conversion in one step. The LUT route instead selects Nikon's own N-Log-to-Rec.709 LUT, listed under LUT, Nikon, in the node editor, once that LUT is registered with Resolve the way the previous section describes. Either path skips the standard two-node Color Space Transform pattern entirely, since RAW footage never needs a manual Input Color Space tag the way a compressed file does.
| N-RAW finishing route | What you set |
|---|---|
| Direct decode | Decode Using: Clip; Color Space: Rec.709; Gamma: 2.4 |
| Nikon LUT | Apply Nikon's registered N-Log-to-Rec.709 LUT on a node |
An N-RAW clip's color space gets set through the Camera RAW panel at the point of decode, not through a second Color Space Transform node stacked on top of it the way a standard N-Log MOV needs. Treating an N-RAW clip like a compressed Log file that still needs a manual CST-in node is the most common way this specific workflow goes wrong.
Does N-RAW require DaVinci Resolve Studio?
For the final render, yes, and this is a genuinely different answer from the standard N-Log workflow covered earlier in this guide, sourced directly from Nikon's own documentation rather than a general Resolve rule.
Nikon Professional Services' N-RAW editing guide states outright: "Paid version of DaVinci Resolve 17.4.6 or later is required for editing work including rendering." That's Nikon's own recommendation for the N-RAW workflow specifically, and it means you can decode, preview, and even build a color grade on N-RAW footage in the free version, but the final export step needs Studio. Standard N-Log footage, by contrast, whether it's H.265, ProRes 422 HQ, or ProRes RAW HQ, isn't RAW at all, and the Color Space Transform effect that drives its grading works fully in the free version with no Studio requirement, per Blackmagic's own free version product page.
Where Studio also genuinely enters the picture, for any N-Log format: Temporal or Spatial noise reduction on high-ISO 4000 footage, Dolby Vision metadata authoring or HDR10+ delivery if you shot toward an HDR target, and the 45 additional Resolve FX Blackmagic reserves for Studio, all listed on Blackmagic's Studio product page. Our full DaVinci Resolve Studio price breakdown covers what the $295 license changes across the rest of the app if you're weighing it for other reasons.
| Footage type | Studio required for basic grade | Studio required to render final export |
|---|---|---|
| Standard N-Log (H.265, ProRes 422 HQ) | No | No |
| N-RAW | No (free version decodes and previews) | Yes, per Nikon's own NPS guide |
Getting standard N-Log footage to grade correctly is a color management problem, and Blackmagic doesn't gate that behind Studio, but Nikon's own N-RAW workflow guide states directly that rendering an N-RAW export needs the paid version. Confirm which file type you're actually working with before assuming either answer applies to your project.
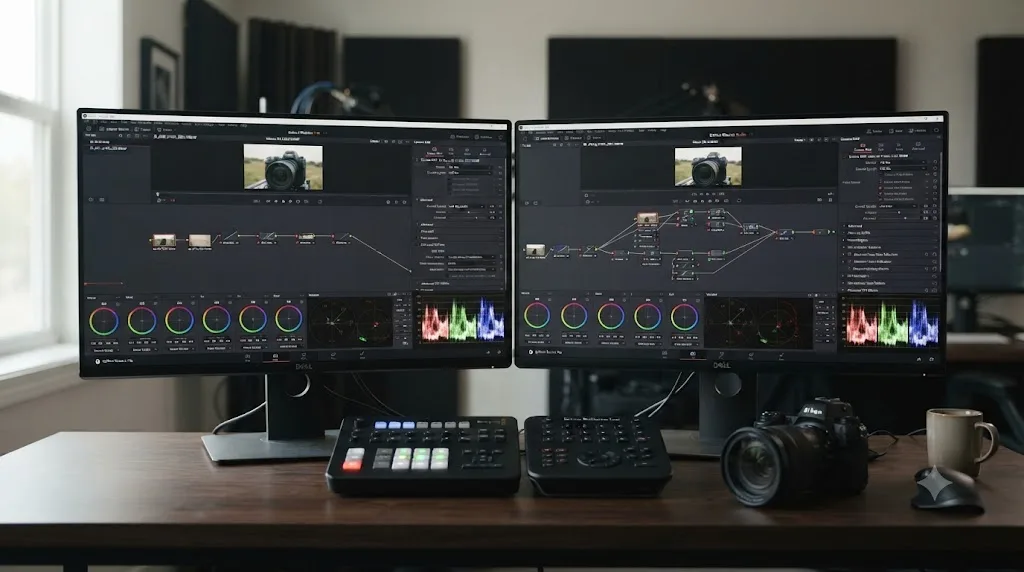
Why does N-RAW footage sometimes show a blue channel or noise floor problem?
If N-RAW footage looks oddly clipped in the blue channel, or shadows feel like they're cutting off harder than the dynamic range figures on this page would suggest, that's a known workflow quirk with a documented community fix, not a settings mistake on your end.
Colorist Michael Ahlén documented the issue directly: renaming a Nikon .NEV file's extension to .R3D causes DaVinci Resolve to process the clip through RED's own IPP2 color pipeline instead of Resolve's native Nikon RAW decoder, with "no conversion or plugins needed." Per his writeup, the trick "fixes blue channel clipping issues" and can recover "up to three stops of highlight detail" compared with the standard decode path, and he reports it's worked consistently across the Z9, Z8, and newer bodies since Resolve 20.2. It's an entirely unofficial workaround. Ahlén's own caveat is direct: "Entirely unofficial, future Resolve builds could close the door." The Creative LUT button won't function on a renamed clip, and the output won't match a genuine RED sensor's native color science, since it's borrowing IPP2's tone mapping, not RED's actual sensor data.
Cinema Tools reaches a related conclusion from a different angle, describing "the blue channel clipping issue presented when working in N-RAW" as common enough that they sell a dedicated third-party N-Log LUT pack meant to address it directly, a paid alternative to either the rename trick or Nikon's own free LUT.
| Approach | Official | What it fixes | Risk |
|---|---|---|---|
| Nikon's own N-Log LUT or CST | Yes | Standard N-Log to Rec.709 conversion | None |
| Standard N-RAW Camera RAW decode | Yes | Basic RAW decode and grading | Some reports of blue channel clipping |
| Rename .NEV to .R3D | No, community workaround | Blue channel clipping, extra highlight recovery | Unsupported; could break in future Resolve updates |
A Nikon N-RAW clip that clips in the blue channel or crushes shadows harder than expected isn't necessarily exposed wrong, it's a known limitation of Resolve's native Nikon RAW decoder that a community workaround, renaming the file to trick Resolve into using RED's pipeline instead, has reliably worked around since Resolve 20.2. Keep your original files if you try it, since it's explicitly unofficial and not something to build a permanent archive workflow around.
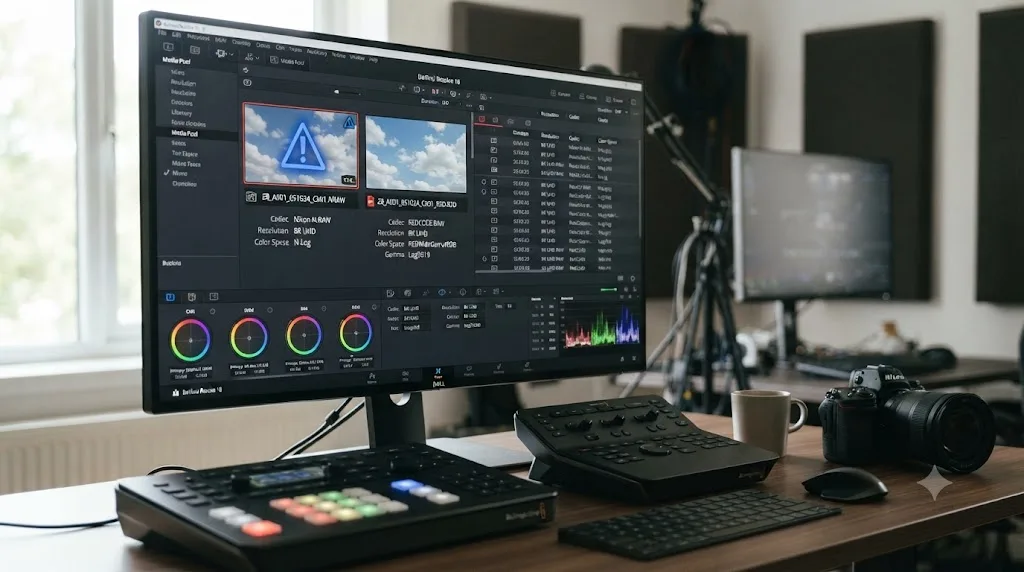
What does independent lab testing show about Z8-class dynamic range and rolling shutter?
CineD hasn't published a dedicated Z8 lab test as of this writing, but the Z8 and Z9 share the same sensor and processor closely enough that the Z9's published numbers are the most credible stand-in available, with the honest caveat that they're Z9 measurements, not Z8-specific ones.
Digital Camera World's own Z8-versus-Z9 comparison confirms the two cameras share "the same sensor, autofocus system and video capability," a 45.7-megapixel stacked sensor and EXPEED 7 processor, a finding Mirrorless Comparison's teardown backs up in more detail. On that basis, CineD's Z9 lab test measured rolling shutter at 14.5ms for both 8K H.265 at 25fps and 4K ProRes HQ full-frame, dropping to 4.9ms at 4K 120fps. Dynamic range at ISO 800 in 8K H.265 came in at 11.6 stops (SNR=2) and 12.7 stops (SNR=1) via IMATEST, with the article noting directly: "N-Log as it is designed for now cannot hold more than 13 stops."
CineD's separate N-RAW lab test on firmware V3.00 found a genuinely counterintuitive result: N-RAW measured lower on IMATEST's strict dynamic range scale than the H.265 encode, at 10.2 stops (SNR=2) and 11.9 stops (SNR=1), despite recovering more exposure latitude, 4 stops of overexposure recovery against H.265's 3-stop ceiling. The article's own explanation: "N-Log, as it is now, is very flat in the shadows, almost cutting off the noise floor," a curve-design tradeoff rather than a defect in the RAW codec itself.
| Measurement | Result | Source |
|---|---|---|
| Rolling shutter, 8K H.265 25fps | 14.5 ms | CineD Z9 lab test |
| Rolling shutter, 4K ProRes HQ full frame | 14.5 ms | CineD Z9 lab test |
| Rolling shutter, 4K 120fps | 4.9 ms | CineD Z9 lab test |
| Dynamic range, 8K H.265, ISO 800 (SNR 2 / SNR 1) | 11.6 / 12.7 stops | CineD Z9 lab test |
| Dynamic range, N-RAW, ISO 800, FW 3.00 (SNR 2 / SNR 1) | 10.2 / 11.9 stops | CineD Z9 N-RAW lab test |
| Exposure latitude, N-RAW overexposure | 4 stops recoverable | CineD Z9 N-RAW lab test |
| Exposure latitude, N-RAW underexposure | 3 stops recoverable | CineD Z9 N-RAW lab test |
| Documented dynamic range, H.265 10-bit MOV | 12 stops (Nikon's own figure) | Nikon Z8 online manual |
Rolling shutter and dynamic range are physical properties of the sensor and codec, not settings a Color Space Transform can change, and CineD's own Z9 testing puts N-Log's practical ceiling under 13 stops even though the curve is mathematically capable of encoding more. Since the Z8 shares that sensor and processor, treat these as the closest available real numbers until CineD publishes a Z8-specific test.
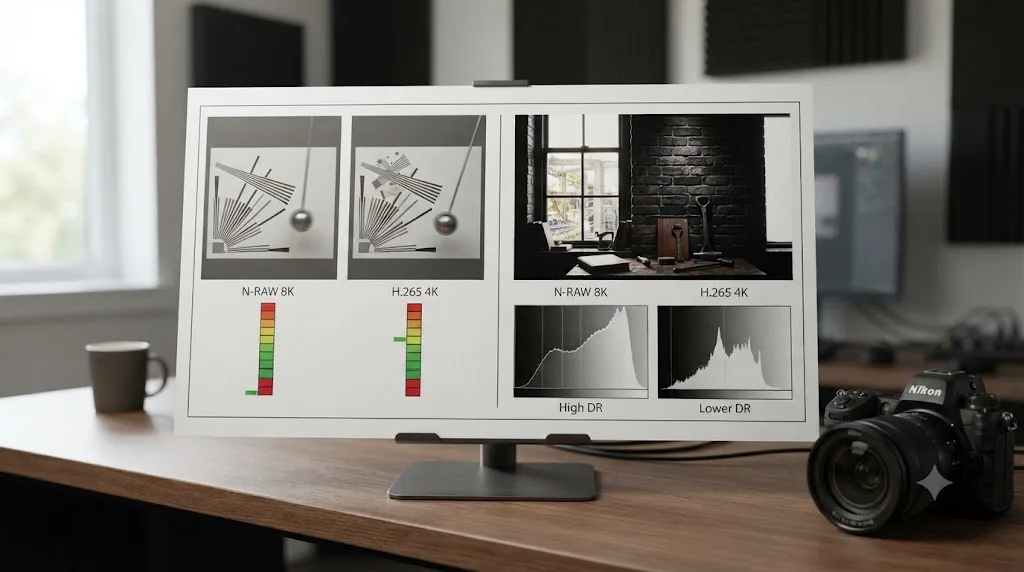
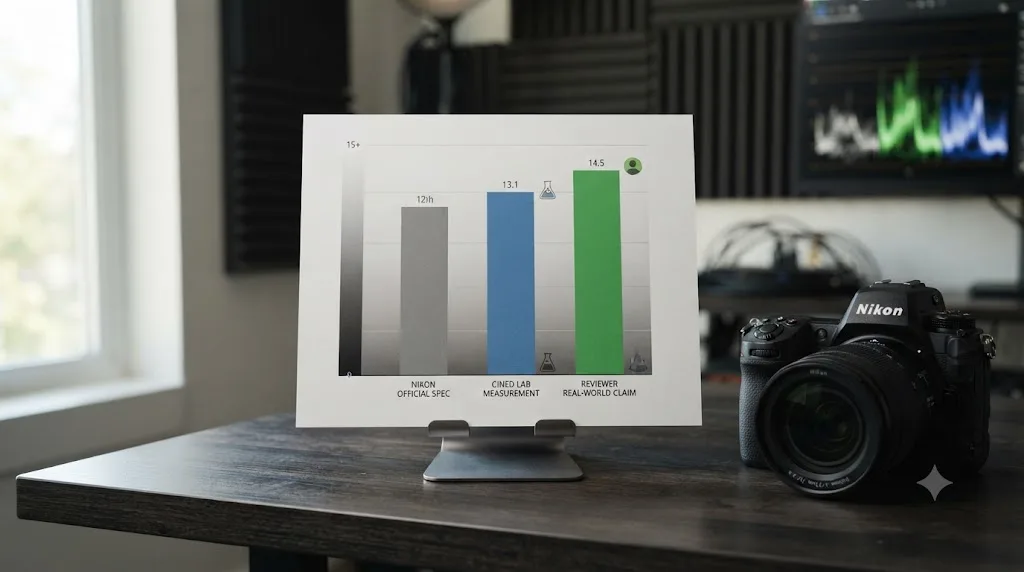
Do these dynamic range numbers actually agree with each other?
Not exactly, and the gap between them is worth understanding rather than picking whichever number sounds best.
Nikon's own manual states H.265 10-bit MOV footage at ISO 800 delivers "12 stops (1300%)" of dynamic range. CineD's independent IMATEST measurement of the same H.265 mode on the Z9 landed close to that, 11.6 to 12.7 stops depending on the SNR threshold used. Videomaker's Nicole LaJeunesse reported a notably higher figure from her own hands-on testing: "When we tested the dynamic range of the Nikon Z 8, we saw a maximum of 14 stops of dynamic range," she wrote, adding that "in the real world, the Z 8's 14 stops of dynamic range allow that camera to capture more details in challenging lighting situations."
None of these figures are wrong exactly, they're measuring different things. A manufacturer's own spec sheet, an independent lab's strict IMATEST SNR threshold, and a reviewer's own real-world test each define "usable dynamic range" a little differently, and RAW versus compressed footage, along with which SNR cutoff counts as "visible," moves the number meaningfully. This gap between a vendor figure, a lab figure, and a reviewer's figure is normal across the camera industry, not a defect specific to Nikon or to any one source cited here.
Three credible sources put Nikon's N-Log dynamic range somewhere between 12 and 14 stops depending on how "usable" gets defined, and that spread is the honest answer, not a sign that one of the three got it wrong. Watch your own scopes on your own footage rather than treating any single number as a guarantee.
How long can you record N-Log before the Z8 overheats?
Longer than a typical mirrorless body at high resolution, and Nikon documents the ceiling directly rather than leaving it to trial and error.
Per Nikon USA's press release and B&H's product listing, the Z8 records for roughly 90 minutes continuously at 8K/30p and over two hours at 4K UHD/60p before its thermal limit becomes the bottleneck rather than card capacity or battery life. Those figures sit well above what most APS-C and Micro Four Thirds bodies manage at comparable resolutions, a benefit of the Z8's larger full-frame body relative to genuinely compact hybrids, even though it runs smaller and warmer than its own sibling, the Z9. Real-world recording time varies with ambient temperature, which resolution and codec you're actually shooting, and whether you're using external cooling or a cage with ventilation, the same variables that affect thermal limits on any high-resolution mirrorless camera, not a Z8-specific quirk.
A roughly 90-minute ceiling at 8K/30p and over two hours at 4K UHD/60p are Nikon's own documented thermal limits for the Z8, numbers that hold up well against most cameras in this resolution class. If a shoot genuinely needs longer unbroken 8K takes than that, the Z9, with no continuous-recording ceiling at all, is the camera in Nikon's own lineup built for it.
What happens if you intercut Z8 footage with a Z9?
Multi-camera Nikon kits are common enough on run-and-gun and documentary shoots that this deserves a direct answer, and the news here is better than it is for most cross-camera pairings.
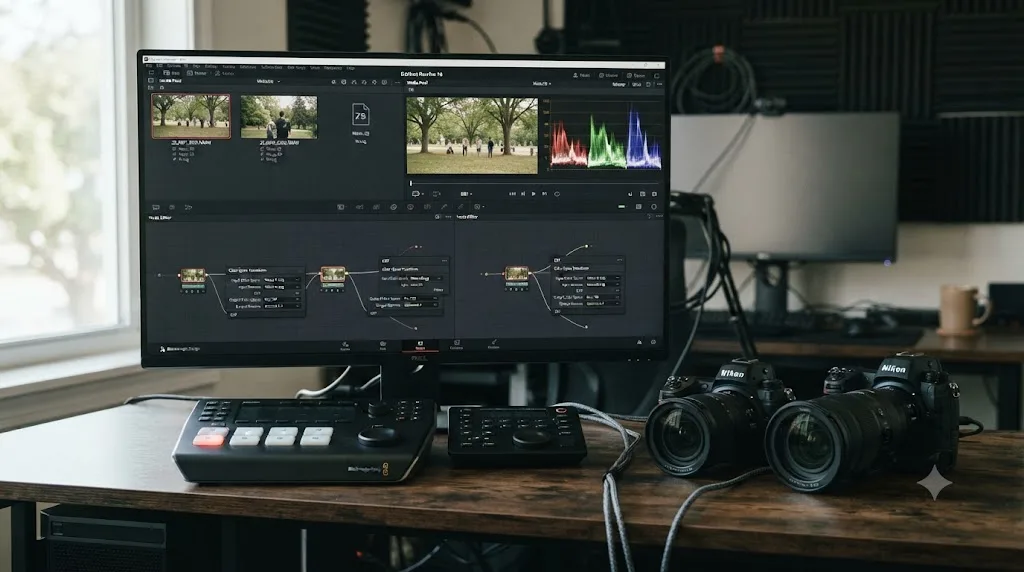
The Z8 and Z9 share the same 45.7-megapixel stacked sensor and the same EXPEED 7 processor, per both Digital Camera World's and Mirrorless Comparison's side-by-side breakdowns, and both cameras record the identical N-Log and N-RAW formats with the same base ISOs, 800 and 4000. The primary difference that actually matters for a working shoot is recording duration: the Z9 has no continuous-recording ceiling in any mode, where the Z8 is limited by the thermal figures covered in the previous section.
Because both cameras share sensor and processor generation, the same Color Space Transform preset, Rec.2020 input, Nikon N-Log gamma, applies identically to footage from either body, with far less risk of the kind of color-space mismatch that shows up when intercutting, say, a Canon R1 with an older R3. A mixed Z8/Z9 bin should need scopes-level fine matching at most, not a rebuilt node tree per camera.
| Camera | Sensor | Processor | N-Log/N-RAW support | Continuous recording limit |
|---|---|---|---|---|
| Nikon Z8 | 45.7MP stacked BSI | EXPEED 7 | Yes, identical formats | ~90 min 8K/30p, 2+ hrs 4K/60p |
| Nikon Z9 | 45.7MP stacked BSI | EXPEED 7 | Yes, identical formats | Unlimited in any mode |
A Z8 and a Z9 sharing the same sensor and processor generation means a mixed-camera Nikon shoot needs the same Color Space Transform settings for both bodies, with recording duration, not color science, the real practical difference between them. That's a meaningfully lower-risk multi-camera setup than pairing bodies from different sensor generations or different manufacturers entirely.
Should you shoot N-Log or HLG on the Z8?
N-Log isn't the only flat profile the Z8 offers, and choosing the wrong one for your delivery target costs you a full extra grading pass, not just a slightly different look.
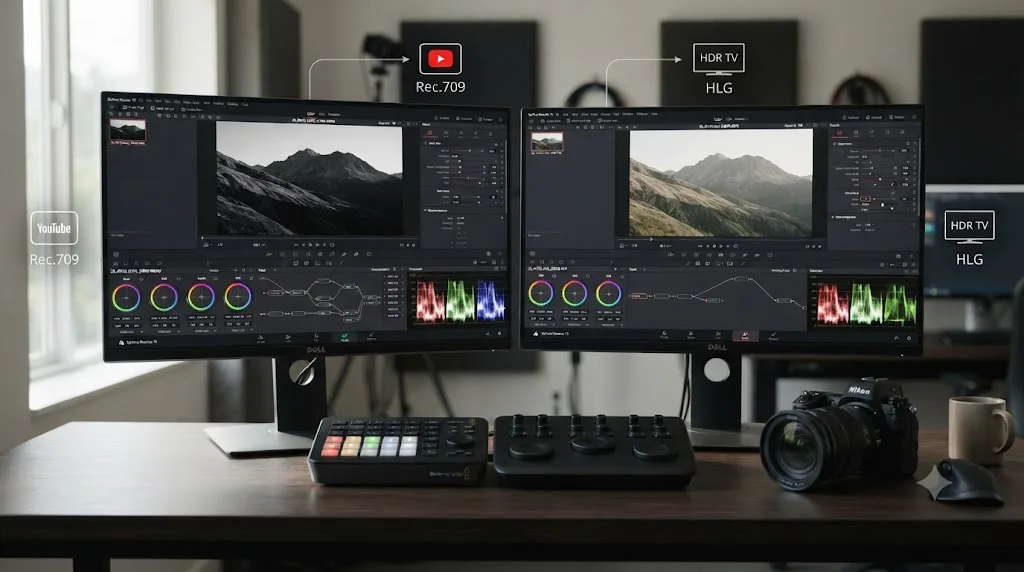
N-Log is built for an SDR intermediate workflow, a flat curve you correct into Rec.709 through the Color Space Transform this guide covers. HLG (Hybrid Log-Gamma) is built for HDR delivery instead, targeting Rec.2100 directly rather than needing a full creative grade to look acceptable, since HLG is designed to degrade gracefully on an SDR display that doesn't support it. If your delivery target is genuinely HDR, our guide to grading HDR video in DaVinci Resolve covers the HLG and PQ delivery path in more depth than fits here, including the specific Timeline and Output color space settings an HDR project needs that differ from everything in this guide.
| Profile | Built for | Needs a Color Space Transform | Best fit |
|---|---|---|---|
| N-Log | SDR intermediate, full grading control | Yes, Rec.2020 to DaVinci Wide Gamut | Any project getting a real color grade |
| HLG | HDR delivery, minimal grading | Different transform, toward Rec.2100 | HDR delivery targets, Dolby Vision/HDR10 workflows |
N-Log is built to look flat until you apply the Color Space Transform this guide covers, and HLG is built for HDR delivery with a different target gamma entirely, so picking between them on a shoot day is a delivery-format decision, not a matter of which one is "more professional." If a project's actual delivery spec never mentions HDR, N-Log through the Rec.709 pipeline is almost always the more direct route to a finished grade.
Do you need noise reduction for high-ISO N-Log footage?
At ISO 4000, more than at ISO 800, and the Color Space Transform itself does nothing to reduce it.
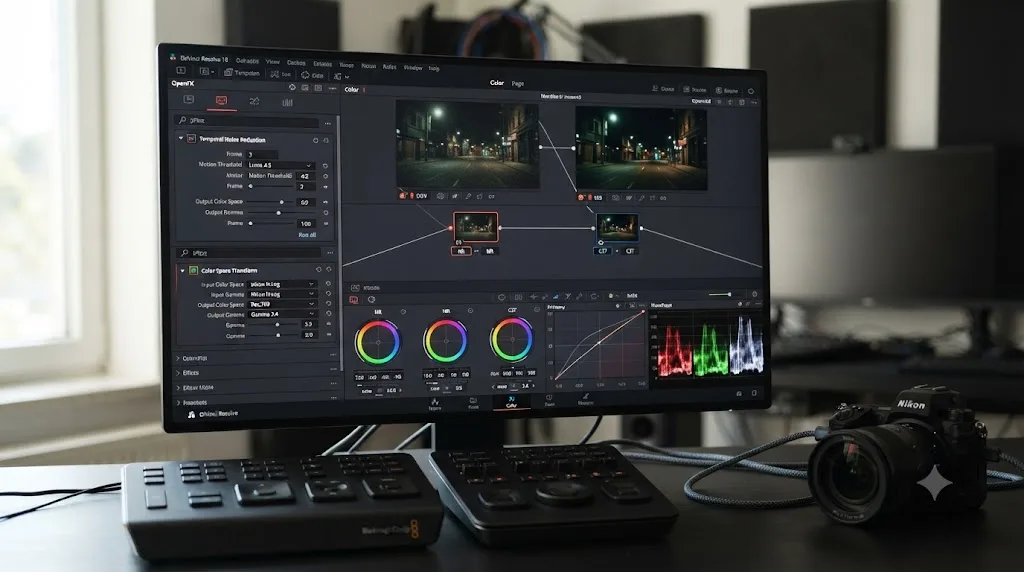
Every stop above the Z8's lower base ISO of 800 buys correct exposure in dimmer conditions at the cost of more visible noise once that flat N-Log image gets stretched into a normal-contrast grade. DaVinci Resolve's Temporal and Spatial Noise Reduction tools, including the AI-driven UltraNR mode, are Studio-exclusive, listed among the Neural Engine features on Blackmagic's own Studio product page. Our full guide to DaVinci Resolve's noise reduction settings covers the specific Temporal frame counts and threshold values in more depth than fits here.
Node placement matters as much as which mode you choose. Apply Noise Reduction on a node before your Color Space Transform pushes the clip out of Log, while the image is still flat and closer to what the sensor actually captured, rather than after contrast and saturation have already amplified the noise pattern.
Shooting as close to ISO 800 as the light allows keeps most Z8 N-Log footage out of the noise reduction workflow entirely, and reaching ISO 4000 is a shooting-day tradeoff, not a Resolve setting you can undo after the fact. When conditions genuinely call for the higher base ISO, place Noise Reduction before the Color Space Transform node, not after.
Do you need proxies to edit Z8 8K footage smoothly?
Often yes, and the reason splits depending on whether you're cutting internal N-RAW or the standard H.265 and ProRes 4K/8K modes.
N-RAW is real GPU and CPU work regardless of file size on disk, since every frame needs a debayer pass before Resolve can display it at all, a cost any RAW format carries on any camera. The debayer resolution setting inside the Camera RAW panel is the first lever to pull, Half or Quarter Resolution for smooth scrubbing while cutting, full resolution reserved for final render.
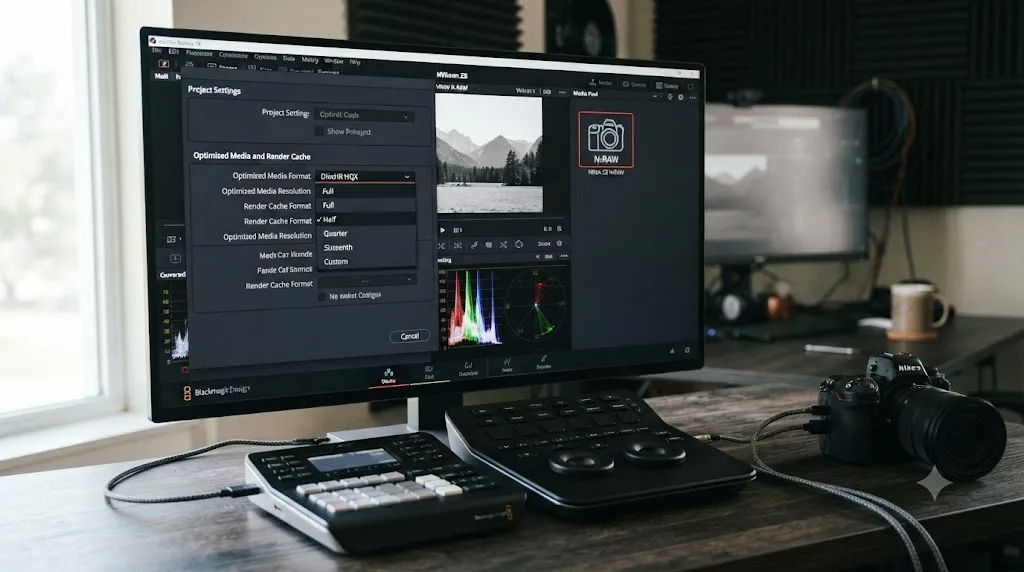
For standard H.265 or ProRes footage, right-click a clip or bin in the Media Pool and choose Generate Optimized Media to transcode a local proxy copy in the background, at a resolution and codec set under Project Settings, Master Settings, Optimized Media and Render Cache. Our guide to setting up DaVinci Resolve proxy media on a slower laptop covers resolution and codec choices, ProRes on a Mac, DNxHR on Windows, in more depth than fits here.
Proxies and a lower debayer resolution fix playback performance, not color. Building optimized media or dropping the debayer setting from Z8 footage doesn't change or skip the Color Space Transform or Camera RAW steps covered earlier in this guide; Resolve relinks to full-resolution originals for the final render regardless of what you cut with.
Why won't some Z8 clips import into DaVinci Resolve at all?
If a clip won't come online or won't generate a thumbnail, that's a different failure mode from a wrong-looking grade, and it's worth ruling out before assuming a color setting is to blame.
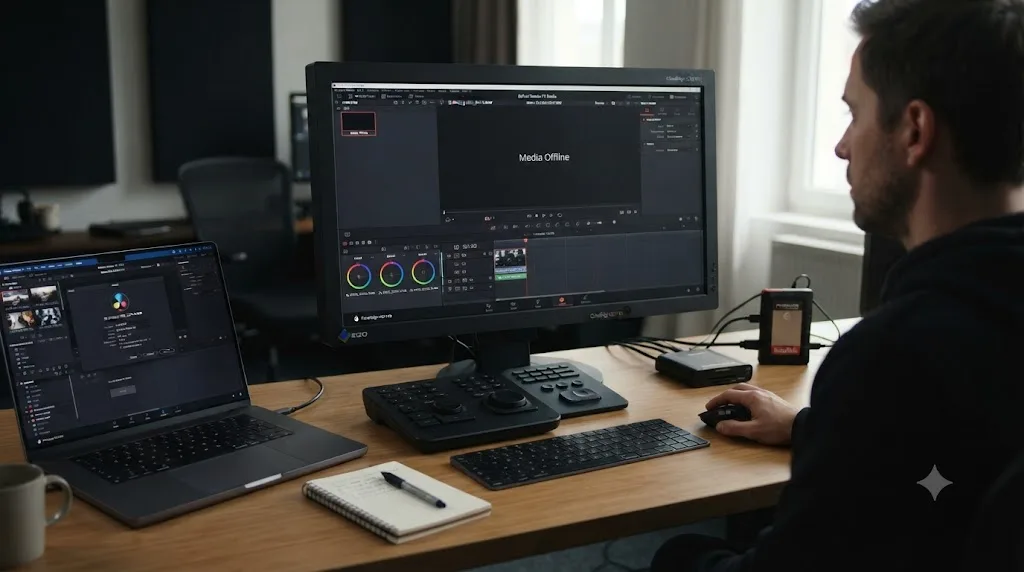
The single most common cause with N-RAW specifically is a Resolve version older than 17.4.6, released in March 2022, per CineD's report on that update. Anyone still running an older Resolve build won't have native Nikon RAW decoding at all, regardless of how correctly the file itself was recorded. Beyond version mismatches, check for a corrupted or partial card-to-drive transfer, the most common cause of a clip that shows a thumbnail but won't play; a project timeline resolution set for standard 4K trying to preview an 8.3K N-RAW clip before Resolve has generated the right cache; or, for standard N-Log H.265 footage on Windows, a missing HEVC decode component at the OS level, since Microsoft doesn't ship HEVC decoding natively with every Windows installation the way macOS has included it since Sierra. Our general DaVinci Resolve media offline guide covers the broader set of causes, moved files, missing render caches, and drive permission issues, if none of the Z8-specific checks above resolve it.
A Nikon Z8 clip that won't come online in Resolve is more often an outdated Resolve version, a corrupted transfer, or a missing render cache than a codec Resolve genuinely can't decode. Confirm which Resolve build you're running and which exact format, standard N-Log versus internal N-RAW, matches what you're assuming before troubleshooting further.
A step-by-step example: taking one N-Log clip from flat to Rec.709
Here's the full sequence in order, from a fresh Z8 clip in the Media Pool to a delivered Rec.709 grade, for standard N-Log footage shot in H.265, ProRes 422 HQ, or ProRes RAW HQ.
- Confirm the source. Check Clip Attributes to confirm the clip is N-Log rather than HLG or a standard Picture Control, and note whether it's a standard file or internal N-RAW, since N-RAW takes a different path covered in the next section.
- Build optimized media if playback is stuttering. For high-bitrate 8K or oversampled 4K footage, generate proxy media at Quarter or Automatic resolution before touching color.
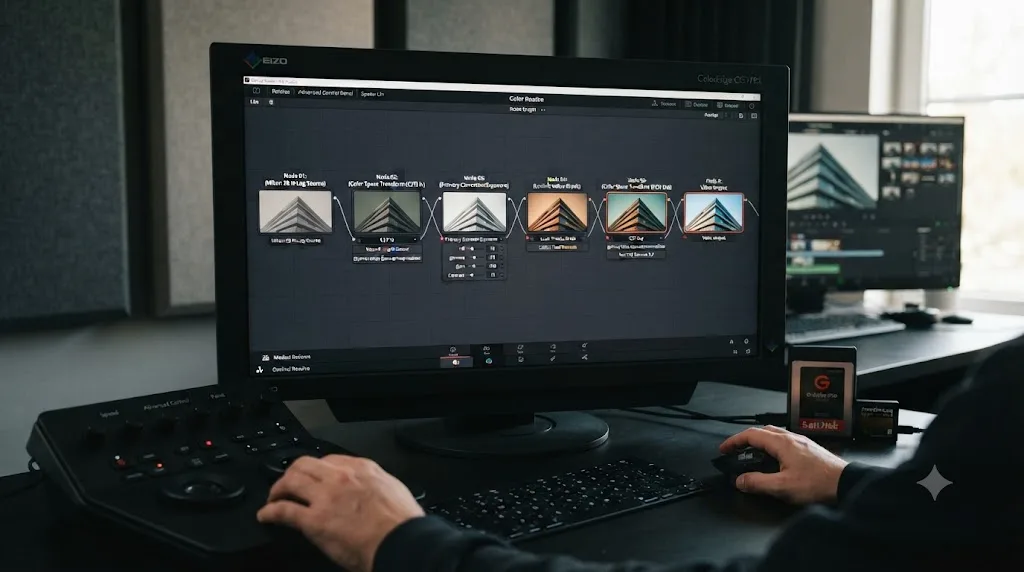
- Node 1, Color Space Transform in. Set Input Color Space to Rec.2020, Input Gamma to Nikon N-Log, Output Color Space to DaVinci Wide Gamut, Output Gamma to DaVinci Intermediate.
- Node 2, Noise Reduction, if the shot needs it. For footage shot at ISO 4000, add Temporal or Spatial Noise Reduction here, right after the Color Space Transform, before any contrast moves.
- Node 3, primary correction. With the clip in DaVinci Wide Gamut, set white balance from a neutral reference if available, then bring black point and white point in using the Lift and Gain wheels, watching the scopes for clipping.
- Node 4, creative grade. Contrast shaping, color balance, secondary qualifiers, and power windows as the shot needs.
- Node 5, Color Space Transform out. Input Color Space DaVinci Wide Gamut, Input Gamma DaVinci Intermediate, Output Color Space Rec.709, Output Gamma Rec.709 or Rec.709-A.
- Check against a second Z8 clip, or footage from a Z9 on the same shoot, before calling the grade final.
Five nodes handle the mechanism end to end, with Noise Reduction as the one optional insertion depending on ISO.
A second worked example: the Z8's N-RAW workflow
Internal N-RAW takes a different path from the first node onward, and it's worth walking through once so the two workflows don't get mixed on the same timeline.
- Confirm the file is actually RAW. In the Media Pool, a
.NEVclip opens its own Camera RAW tab in Clip Attributes or the Color page inspector, rather than exposing Input Color Space and Input Gamma the way a standard N-Log clip does. - Confirm your Resolve version. Native Nikon RAW decoding requires DaVinci Resolve 17.4.6 or later, and per Nikon's own NPS guide, rendering the final export requires the paid Studio version specifically.
- Set your project's Timeline color space. Per Nikon's N-RAW guide, set Color science to DaVinci YRGB, Timeline color space to Rec.709 Gamma 2.4, and Output color space to Same as Timeline.
- Decode the clip. Either set Decode Using to Clip with Color Space Rec.709 and Gamma 2.4 for a direct conversion, or apply Nikon's registered N-Log-to-Rec.709 LUT on a node instead.
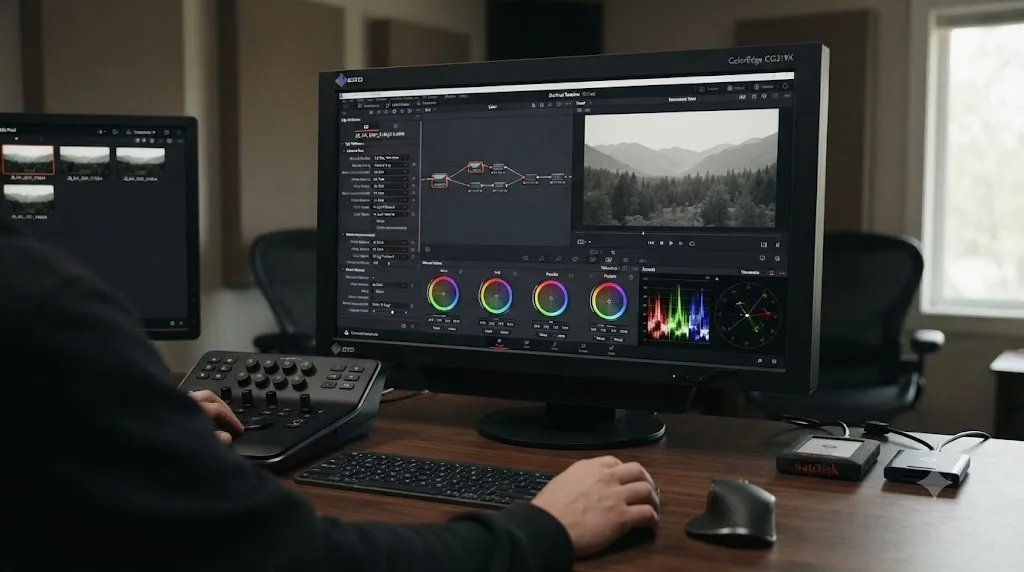
- Set the debayer resolution for editing. Choose Half or Quarter Resolution for smooth scrubbing while cutting, reserving full or premium resolution for final render.
- Grade from the decoded RAW, not through a second Color Space Transform. Stacking a Color Space Transform node on top of an already-decoded RAW clip double-converts the image.
- Match it back to any standard N-Log clips on the same timeline, checking both against the same reference or scopes target so a cut between an N-RAW shot and a standard N-Log shot doesn't show a visible seam.
An internal Z8 N-RAW clip's color space is set through the Camera RAW panel and Nikon's own recommended project settings, not through the standard two-node Color Space Transform pattern built for compressed N-Log footage. Confirm which path a given clip actually took before applying either workflow to it.
Is the Nikon Z8 still worth buying for video work in 2026?
Genuinely yes for most hybrid shooters, and the case has gotten stronger, not weaker, as the camera's street price has settled well below its launch MSRP.
Nikon launched the Z8 at $3,999.95 body-only in May 2023. As of B&H's 4th of July 2026 sale, Imaging Resource reported the camera at $3,396.95, a $900 discount that's become a recurring promotional price point rather than a one-time clearance event. The camera has picked up TIPA World Awards' Best Full Frame Professional Camera for 2024, EISA's Camera of the Year for 2023-2024, and an iF Design Award in 2024, per Wikipedia's summary of the model, a genuine spread of industry recognition across still-photography and design-focused awards, not just video-specific praise.
For a buyer choosing specifically between the Z8 and its bigger sibling, the Z9 offers unlimited continuous recording and a larger grip built for long professional days, at a meaningfully higher price and weight; the Z8 gives up the unlimited recording ceiling for a genuinely smaller, lighter body carrying the identical sensor, processor, and N-Log color science. For most hybrid stills-and-video shooters who aren't running unbroken hour-plus 8K takes as a regular part of the job, that trade favors the Z8.
A camera that shares its flagship sibling's sensor, processor, and full N-Log color science, while costing roughly $900 less at its current street price, is a genuinely strong position for the Z8 to sit in three years after launch. If you already own one, everything in this guide gets its footage grading correctly; if you're choosing between the Z8 and Z9 specifically for video, recording duration and body size, not color capability, is the actual decision to make.
When the menus alone don't get you there fast enough
Everything in this guide is a settings problem with a settings answer, but finding the right menu on a deadline is its own kind of friction, especially when you're bouncing between Project Settings, the node graph, and Clip Attributes trying to confirm exactly what a clip is before you touch its color.
TryUncle is the on-screen assistant for DaVinci Resolve on macOS, ask in plain words and Uncle points at the exact control on your screen. If you're on a Mac asking "why is my N-Log footage still grey" out loud at your screen, that's a faster route to the Color Space Transform panel than searching this page a second time mid-session. It's a paid app, currently in founder pricing at $29.99 a month for the first 100 seats, and it's macOS only, so it won't help a Windows editor working through Resolve's menus. Check TryUncle for current pricing before deciding if it fits your workflow.
It's worth knowing the category has other tools built on a different premise. Sottocut, PremiereCopilot, heyeddie.ai, and cutagent.ai automate parts of an edit or answer chat questions about your footage, rather than watching your live screen and pointing at controls. If your goal is automating a cut, those solve a different problem. If your goal is finding the right Color Space Transform setting faster while you're the one making the decisions, on-screen guidance is the more direct tool for that specific job. Guided help inside Resolve beats pausing a tutorial video shot on a different camera's menu to compare against your own.
What's the full settings cheat sheet at a glance?
Before the table, the one-line version. Input Color Space is Rec.2020, Input Gamma is Nikon N-Log, for any standard H.265, ProRes 422 HQ, or ProRes RAW HQ file. Stay at ISO 800 or ISO 4000, the Z8's dual base sensitivities, and control exposure with aperture and an ND filter rather than pushing ISO between them. N-RAW takes a different path entirely, through Camera RAW and Nikon's own recommended Rec.709 Gamma 2.4 timeline settings, not a manual Color Space Transform, and rendering it needs the paid Studio version per Nikon's own documentation. Plan long uncropped 8K takes around the roughly 90-minute heat limit. And when a clip won't come online, check your Resolve version and the file transfer before assuming a color setting is to blame.
| Setting | Value |
|---|---|
| Shooting ISO for N-Log | 800 or 4000 (dual base sensitivity) |
| Input Color Space (standard N-Log) | Rec.2020 |
| Input Gamma | Nikon N-Log |
| Intermediate Output Color Space | DaVinci Wide Gamut |
| Intermediate Output Gamma | DaVinci Intermediate |
| Final Output Color Space (SDR delivery) | Rec.709 |
| Final Output Gamma (SDR delivery) | Rec.709 (Scene) on Windows, Rec.709-A on Mac |
| N-RAW Timeline color space (Nikon's NPS guide) | Rec.709 Gamma 2.4 |
| N-RAW direct decode settings | Color Space Rec.709, Gamma 2.4 |
| Internal RAW | N-RAW, 12-bit, up to 8.3K 60p |
| Internal ProRes RAW | ProRes RAW HQ, 12-bit, up to 4.1K 60p |
| Native N-RAW decoding added | DaVinci Resolve 17.4.6, March 2022 |
| 8K/30p thermal recording limit | ~90 minutes |
| 4K UHD/60p thermal recording limit | Over 2 hours |
| Documented dynamic range, H.265 10-bit, ISO 800 | 12 stops (Nikon) |
| Lab-measured dynamic range range (CineD, Z9) | 10.2 to 12.7 stops depending on format and SNR |
| Studio required for standard N-Log grade | No |
| Studio required to render final N-RAW export | Yes, per Nikon's own NPS guide |
| Studio required for Noise Reduction | Yes |
| Launch price (body only) | $3,999.95 |
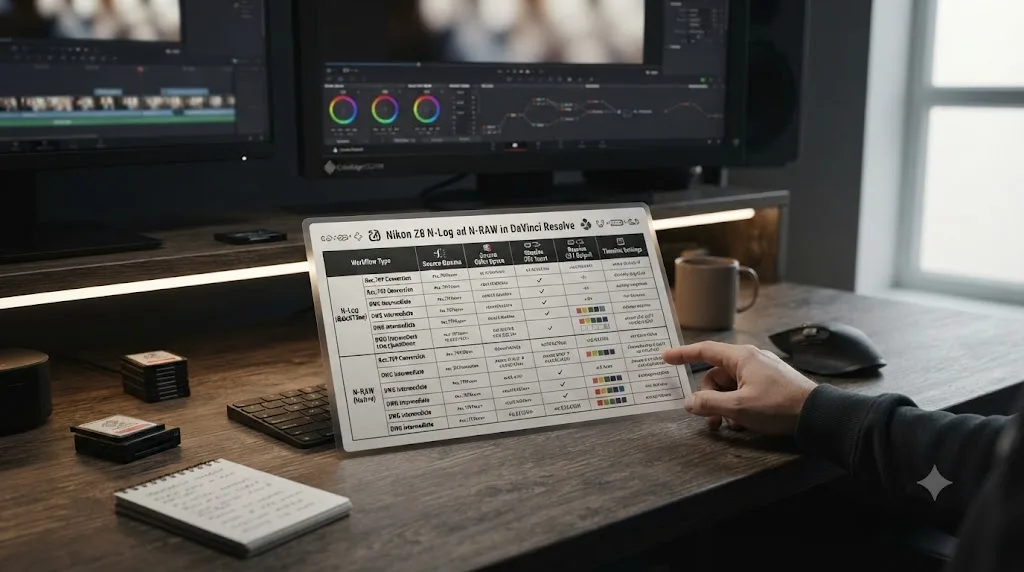
The Z8's N-Log setup is more documented than most camera color workflows, spread across Nikon's own manuals rather than left to third-party guesswork, which is both the good news and the reason this page needed to exist. Rec.2020 in, Nikon N-Log gamma, DaVinci Wide Gamut as the working space, and Rec.709 out handles the standard footage. N-RAW asks for a different project setup and, per Nikon's own word, a paid Resolve license before you can actually render it. Once you've confirmed which of the two you're holding, the rest is the same grading work you'd do on footage from any camera.
Frequently asked questions
- What Color Space Transform settings does Nikon Z8 N-Log footage need in DaVinci Resolve?
- On your first node, set Input Color Space to Rec.2020 and Input Gamma to Nikon N-Log, then Output Color Space to DaVinci Wide Gamut and Output Gamma to DaVinci Intermediate. On your last node before delivery, reverse it: Input DaVinci Wide Gamut and DaVinci Intermediate, Output Rec.709 (or Rec.709-A on Mac). This matches Nikon's own N-Log Specification Document, which sets the gamut at BT.2020 with a D65 white point.
- What ISO should I shoot N-Log at on the Nikon Z8?
- ISO 800 or ISO 4000. Nikon's own digitutor documentation states the base sensitivities for the Z8 and Z9 are 800 and 4000, a dual-gain design similar to some Panasonic and Sony bodies. Nikon recommends controlling exposure with aperture and an ND filter rather than pushing ISO away from those two points.
- Does DaVinci Resolve decode Nikon Z8 N-RAW footage natively?
- Yes. Blackmagic added native Nikon RAW decoding in DaVinci Resolve 17.4.6, released in March 2022, well before the Z8 shipped. You can drag a .NEV file into the Media Pool and it opens through Resolve's Camera RAW panel with no plugin. Some editors additionally rename .NEV to .R3D as an unofficial workaround to route the clip through RED's IPP2 pipeline for extra highlight recovery, but that's an optional trick, not a requirement to get footage on the timeline.
- Do I need DaVinci Resolve Studio to grade Nikon Z8 N-Log footage?
- Not for standard N-Log footage shot in H.265 or ProRes. The Color Space Transform and Resolve Color Management work in the free version. N-RAW is different: Nikon's own Nikon Professional Services guide for editing N-RAW in DaVinci Resolve states plainly that a paid version of DaVinci Resolve 17.4.6 or later is required for editing work including rendering, so a final N-RAW export needs Studio even though you can decode and preview the clip in the free version first.
- Why does my Z8 N-Log footage still look flat or wrong after the Color Space Transform?
- Work through it in order: confirm Input Color Space is Rec.2020 and Input Gamma is specifically Nikon N-Log, not a similarly named preset from another manufacturer; check whether Resolve Color Management and a manual Color Space Transform are both converting the same clip; confirm the clip wasn't actually shot in HLG or a Picture Control profile instead of N-Log; and rule out a low-resolution proxy that never relinked to the original file before export.
- Is N-Log the same as N-RAW on the Nikon Z8?
- No. N-Log is a gamma curve, a flat picture profile you can bake into H.265, ProRes 422 HQ, or ProRes RAW HQ files. N-RAW is Nikon's own RAW codec, and N-Log is simply the tone mode N-RAW records in by default. A standard N-Log MOV clip needs a Color Space Transform node; an N-RAW clip is decoded through Resolve's Camera RAW panel instead, and stacking a Color Space Transform on top of an already-decoded RAW clip double-converts the image.
- Can I intercut Nikon Z8 footage with a Z9 in the same DaVinci Resolve timeline?
- Yes, with fewer surprises than mixing most camera brands. Nikon builds the Z8 and Z9 around the same 45.7-megapixel stacked sensor, the same EXPEED 7 processor, and the same N-Log and N-RAW implementation, per side-by-side breakdowns from Digital Camera World and Mirrorless Comparison. The Z9 simply removes the Z8's recording-duration ceiling, since it has no continuous-recording ceiling. Footage from both cameras should sit close enough after the same Color Space Transform that matching is a fine-tuning pass, not a rebuild.
Sources
- Nikon USA Press Release: Ultimate Hybrid Performance, This is the Nikon Z 8
- Nikon Online Manual: Edit with DaVinci Resolve (Log-Format/RAW Video Recording and Editing Edition)
- Nikon Online Manual, Z 8: Recording N-Log Video
- Nikon Digitutor, Z 8: Video Shooting #6, Exposure Control for N-Log Recording
- Nikon Digitutor, Z 8: Video Shooting #5, N-RAW Videos (Tone Mode: N-Log)
- Nikon: N-Log Specification Document
- Nikon Download Center: Z 8 (N-Log LUT, RWG/Log3g10 to Rec2020/N-Log LUT, firmware)
- Nikon USA: What is Nikon N-Log and Should I Use It to Record Video?
- Nikon Professional Services: Z 9 TIPS, DaVinci Resolve Editing Procedure for N-RAW
- CineD: Nikon Z 9 Lab Test, Rolling Shutter, Dynamic Range and Latitude Test
- CineD: Nikon Z 9 N-RAW Lab Test (FW 3.00), Rolling Shutter, Dynamic Range and Latitude
- CineD: Nikon Z 8 Announced, More Compact but Just as Powerful as Nikon Z 9
- CineD: Nikon Releases RWG/Log3G10 to Rec.2020 N-Log LUT for N-RAW in Premiere Pro
- CineD: DaVinci Resolve 17.4.6 Released, Is Nikon RAW Coming to the Z 9 Soon?
- Videomaker: Unpacking the Nikon Z8 for Video, Is It Right for You?
- Wikipedia: Nikon Z8
- Digital Camera World: Nikon Z8 vs Z9, Getting to Grip With the Big Differences
- Mirrorless Comparison: Nikon Z8 vs Z9, The 10 Main Differences
- Imaging Resource: Nikon Z8 Gets a Massive $900 Discount for B&H's 4th of July Sale
- Michael Ahlén: Unlocking RED's Workflow in Nikon N-RAW, the NEV to R3D Hack
- Cinema Tools: How to Process Nikon N-Raw from Nikon Z8/9 Cameras
- Nikon Rumors: DaVinci Resolve 17.4.6 Update Released With Added Support for Decoding Nikon RAW Files
- Blackmagic Design: DaVinci Resolve product page (free version)
- Blackmagic Design: DaVinci Resolve Studio product page
Keep reading
Guides · Jul 29, 2026 · 36 min
DaVinci Resolve Canon R1 C-Log3 Import Settings
DaVinci Resolve Color Space Transform settings for Canon R1 C-Log3: why it's locked to Cinema Gamut, C-Log2 vs C-Log3, and the HDMI catch most guides skip.
Guides · Jul 25, 2026 · 39 min
Sony A7 IV S-Log3 Color Grading in DaVinci Resolve, Explained
The exact DaVinci Resolve Color Space Transform settings for Sony A7 IV S-Log3 footage: S-Gamut3.Cine, ISO 800, and the HDMI gotcha most guides skip.
Comparisons · Jul 29, 2026 · 37 min
Rec.709 vs Rec.2020 in DaVinci Resolve, Explained
Rec.709 vs Rec.2020 explained for DaVinci Resolve: what each color space is, when Resolve uses which, and how to pick the right preset for delivery.