Articles / Guidesupdated for DaVinci Resolve 21.0.2 (July 2026)
How to Freeze Frame in DaVinci Resolve: Every Method
Quick answer
Park the playhead on the frame you want, right-click the clip, choose Change Clip Speed, check Freeze Frame, and set a duration. For finer control, use Retime Controls (Ctrl/Cmd+R) instead, which lets you drag the freeze's length directly in the timeline. Shift+R freezes the entire clip instantly, which is faster but less flexible.
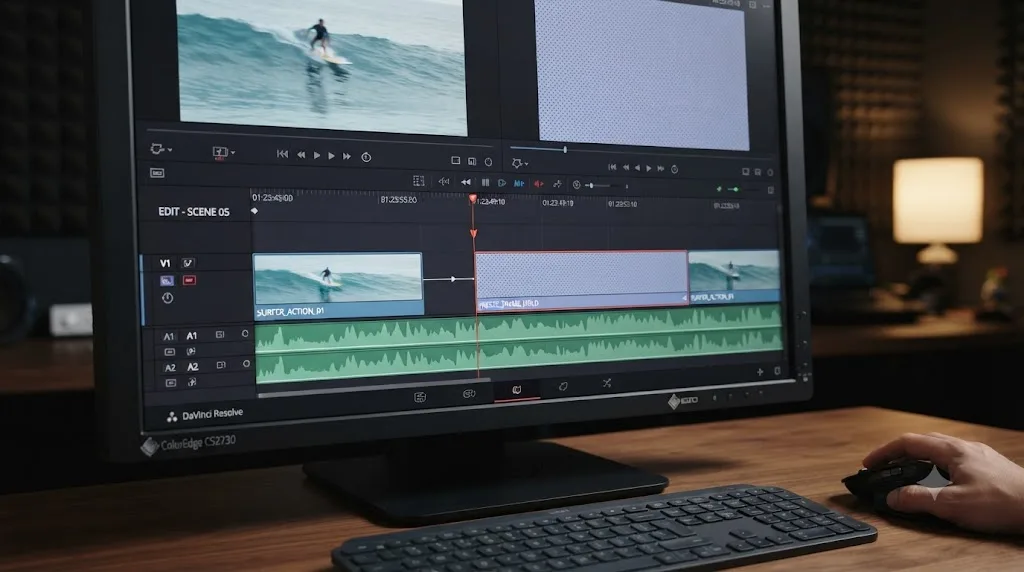
You don't need Fusion, a plugin, or an export round-trip to freeze a frame in DaVinci Resolve. Park the playhead, right-click, check one box. The whole thing takes ten seconds once you know which of Resolve's three overlapping freeze frame tools you actually want.
That "three tools" part is where people get stuck. Resolve has a dialog box, a live retime bar, and a one-key shortcut, and they all do something slightly different. Pick the wrong one and you either freeze the whole clip when you wanted three seconds of it, or you spend ten minutes hunting for a duration field that isn't there.
What's the fastest way to freeze frame in DaVinci Resolve?
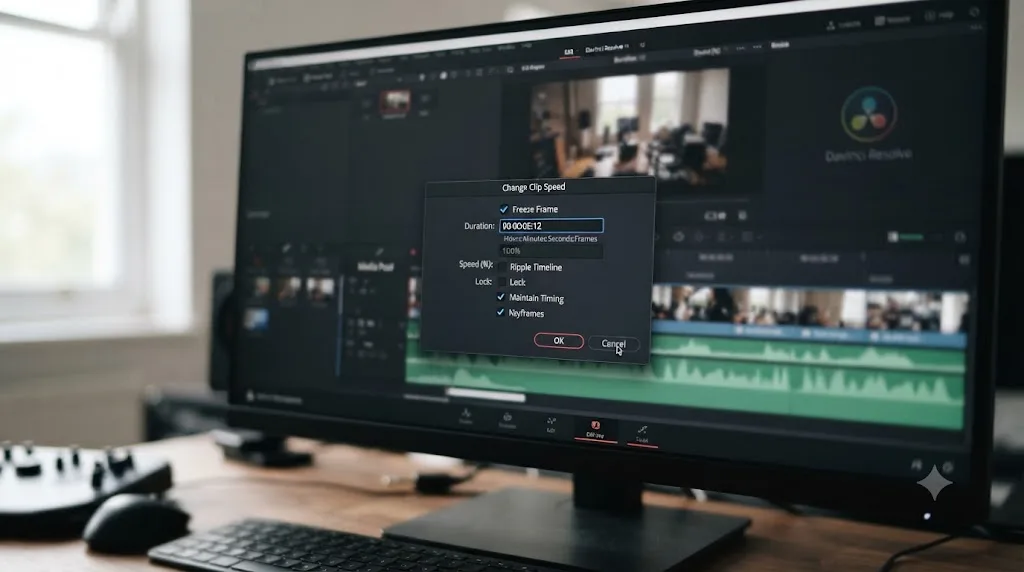
Change Clip Speed. It's a single dialog, it's available from a right-click on the Edit page, and it gives you an exact duration in one pass instead of dragging anything by eye.
Here's the full sequence:
- Park the playhead on the exact frame you want frozen, using the left and right arrow keys to step one frame at a time until you're on it.
- Right-click the clip in the timeline and choose Change Clip Speed.
- In the dialog that opens, check the Freeze Frame box.
- Type in how long you want the freeze to last.
- Decide whether to check the ripple checkbox (covered in detail further down), then click OK.
Freeze Frame will change the clip to a single freeze frame according to where the playhead was when you select this option, which is the exact behavior Boris FX describes in its own walkthrough of the Change Clip Speed dialog. The frame under your playhead is the one that gets held, not the first frame of the clip and not the last, so double-check your playhead position before you open the dialog. Moving it after the fact means reopening the box and redoing the duration.
This method is destructive in the sense that it replaces the clip's in and out points with the frozen duration you typed. If you change your mind about the length two minutes later, you reopen Change Clip Speed and retype the number, which is fine for a quick freeze but gets fiddly if you're still feeling out the right pause length by eye. That's the case Retime Controls handles better, covered next.
How do you freeze a frame with Retime Controls instead?
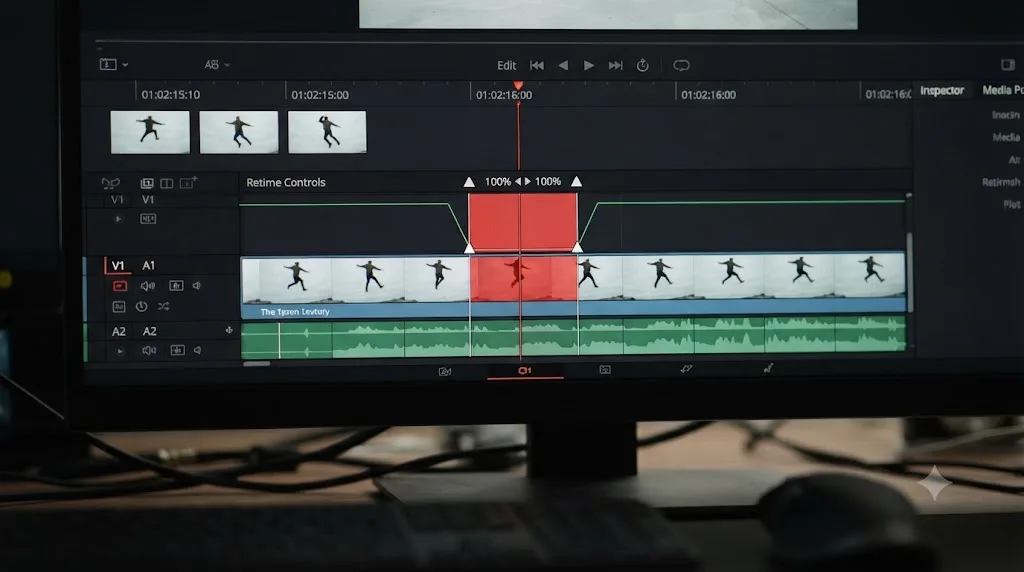
Retime Controls trade the dialog box for a live speed bar you drag directly above the clip in the timeline, and that trade is worth it the moment you're not sure exactly how long the freeze should be.
To use it:
- Right-click the clip and choose Retime Controls, or select the clip and press Ctrl+R on Windows or Cmd+R on Mac.
- A thin bar appears above the clip. Position your playhead where you want the freeze to start.
- Click the small downward-facing arrow on the retime bar to open its dropdown menu, and choose Freeze Frame.
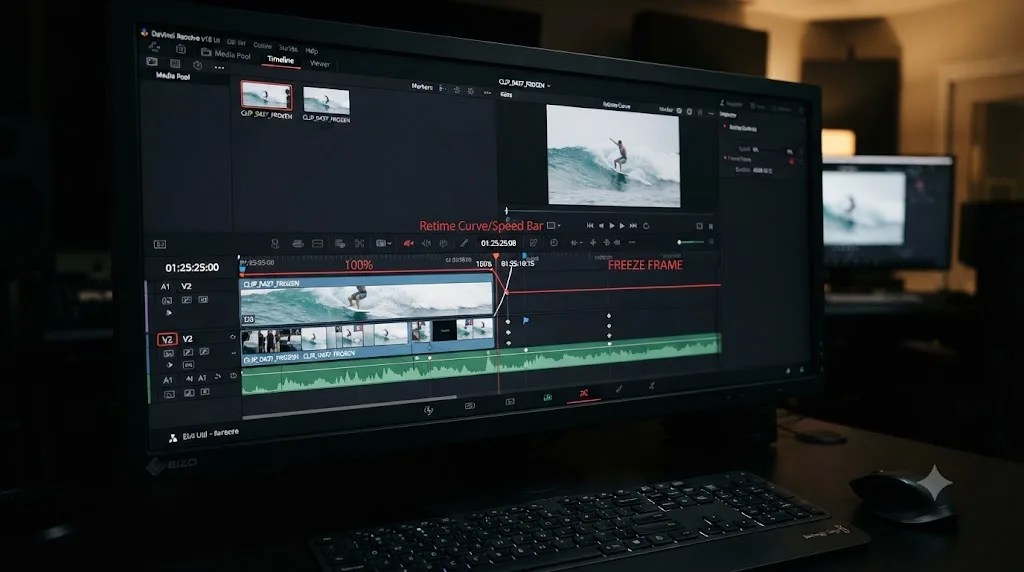
- Two speed points appear, marking the start and end of a frozen segment, and the section between them turns into a flat, red-tinted region instead of the usual blue speed line. The percentage readout drops to 0%, since a frozen frame has no playback speed at all.
- Grab the second speed point and drag it right to lengthen the freeze, or left to shorten it, watching the duration update live in the timeline.
The advantage over Change Clip Speed shows up the instant you need to adjust the pause after building it. You don't reopen anything. You grab the same speed point and drag again, and the timeline updates in real time as you do it, which means you can eyeball a hold against the cut before it or an audio beat rather than guessing a frame count and checking afterward.
A frozen segment inside Retime Controls behaves like an independent block that you can lengthen or shorten by dragging, without touching the speed of the rest of the clip. That's the core difference from Change Clip Speed: Retime Controls can hold one section of a clip frozen while the clip plays normally before and after it, in a single unbroken piece of media, whereas Change Clip Speed turns the entire selected clip into the freeze. If you only want to freeze the middle three seconds of a ten-second clip using Change Clip Speed, you'd need to blade the clip into three pieces first and apply the freeze to the middle piece alone. Retime Controls skips that step entirely.
Which method should you actually use: Change Clip Speed, Retime Controls, or Shift+R?
It depends on how much of the clip you want frozen and how precisely you already know the duration.
| Situation | Best method | Why |
|---|---|---|
| You know the exact freeze length already, in seconds or frames | Change Clip Speed | One dialog, one number, done |
| You want to freeze part of a clip and eyeball the length | Retime Controls | Drag the speed point live, no reopening dialogs |
| You want the entire clip to become one freeze frame instantly | Shift+R | One keystroke, no menu at all |
| You're mid-edit on the Cut page and don't want to switch pages | Retime Controls via the same right-click menu | Available on both Edit and Cut pages |
| You need the frame as a standalone image file, not a timeline clip | Grab Still, from the Color page | Exports a real image, not a timeline hold |
A rule of thumb that covers most situations: reach for Change Clip Speed when you already have a number in mind, like "freeze for exactly one second before the cut," and reach for Retime Controls when you're making a judgment call about pacing and want to see the pause land before committing to it. Shift+R is for a narrower case, covered next, where you genuinely want the whole clip gone and replaced by one frame.
What does Shift+R actually do, and why does it surprise people?
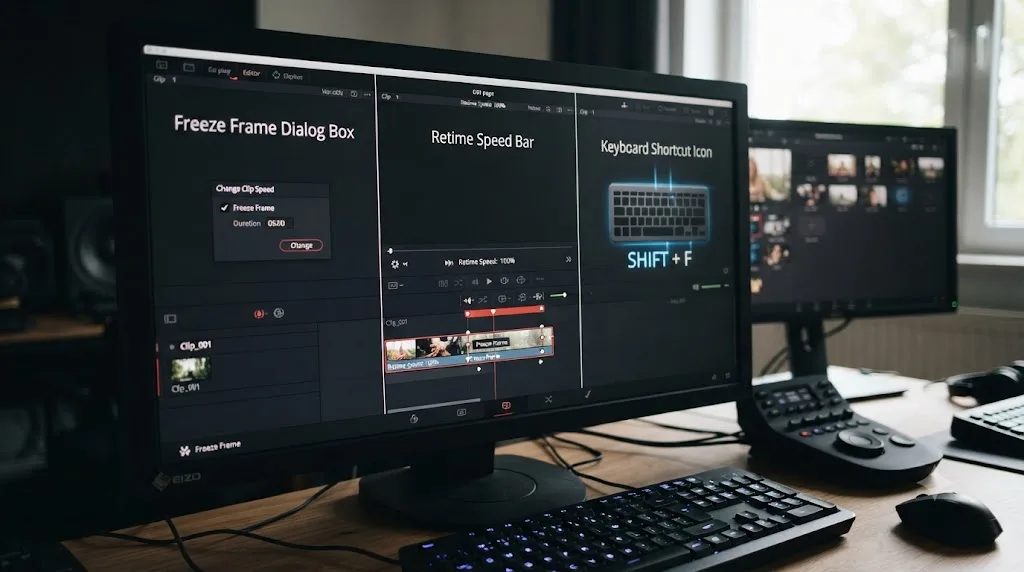
Shift+R, or the equivalent Clip > Freeze Frame menu command, replaces the entire selected clip with a freeze frame of whatever frame the playhead was parked on when you pressed it. Per the DaVinci Resolve reference manual, you "position the playhead over the frame you want to be the freeze frame, and choose Clip > Freeze Frame, or press Shift-R. The entire clip becomes a freeze frame of the frame you parked the playhead over."
That word "entire" is the surprise. Editors coming from other software often expect Shift+R to insert a short frozen beat at the playhead position, the way Retime Controls does, and instead their whole five-second clip collapses into five seconds of the exact same still frame. It's not a bug. It's the command doing precisely what it's documented to do, just not what most people assume from the name.
Shift+R is the right tool exactly once: when you've already isolated the piece of media you want frozen, and nothing else on it. If you first blade the clip so the segment on your timeline is only the portion you want held, Shift+R turns that isolated piece into a clean freeze in one keystroke, no dialog, no dragging. Skip the blade step and you'll freeze footage you meant to keep moving.
To undo it, open Change Clip Speed on the same clip and uncheck Freeze Frame, or use the Remove Attributes dialog to strip the speed effect entirely and restore the clip's original playback. Neither restores the trimmed-out frames automatically if you'd already shortened the clip elsewhere, so check your undo history if the timing looks off afterward.
How do you freeze a frame on the Cut page instead of the Edit page?
The same two right-click options exist on the Cut page: Change Clip Speed and Retime Controls, both reachable by right-clicking the clip in the timeline exactly as you would on Edit. Resolve doesn't hide the freeze frame tools behind a page switch, which matters if you're doing a fast rough cut and don't want to jump between pages for one pause.
The practical difference is screen space, not functionality. The Cut page's default two-timeline layout, with the source viewer stacked over a condensed track view, leaves less room to see the retime speed bar clearly once it appears above a clip, especially on a laptop screen. If you're freezing a single obvious beat, that's not a problem. If you're fine-tuning a freeze's exact length by eye against a music cut, the extra vertical room on the Edit page's timeline makes the speed points easier to grab precisely.
One thing that doesn't change between pages: wherever your playhead sits is the frame that gets frozen, regardless of which page opened the dialog. Parking the playhead first, before you right-click, is the habit that prevents the single most common freeze frame mistake, covered later in the mistakes table.
If you're still finding your way around the Cut versus Edit page split in general, our beginner's guide walks through when each page earns its keep.
How long can a freeze frame last?
As long as you want it to. A freeze frame doesn't pull additional frames from the source media the way a slow-motion clip does, it just repeats the one frame you selected, so there's no ceiling tied to how much footage you actually shot.
This trips people up because every other speed change in Resolve is bounded by available media. Slow a clip to 50% and you need twice as many source frames to fill the new duration; run out of handle and the clip simply can't get any longer without repeating frames itself. A freeze frame skips that constraint entirely, because it's already repeating one frame by definition. You can hold a single frame for one second or for sixty, and Resolve renders it the same way either way, just with more of the identical frame stacked up.
That said, two practical limits are worth knowing:
- In Change Clip Speed, the duration field takes a number and a unit, frames or timecode, and there's no meaningful upper bound worth worrying about for normal editorial use.
- In Retime Controls, dragging the second speed point far enough can eventually push it past what's comfortably visible on your current timeline zoom level. Zoom out first if you're aiming for a freeze longer than a few seconds, so you can see where you're dragging to.
A freeze frame is limited by your patience for watching a still image, not by anything in DaVinci Resolve's engine. The editorial ceiling, not the technical one, is what actually decides how long a freeze should run, and that's a judgment call covered in the editorial section further down.
How do you extend or shorten a freeze frame after you've already created it?
If you built the freeze with Retime Controls, this is the easy case: grab the second speed point, the one marking where the frozen segment ends, and drag it right to add time or left to remove it. The clip's total duration changes to match, and anything after it on the track either shifts to accommodate the new length or gets overwritten, depending on your edit mode.
If you built it with Change Clip Speed, there's no drag handle. Right-click the clip again, reopen Change Clip Speed, and type a new duration into the same field. The freeze frame checkbox stays checked; you're only updating the number.
A third option works regardless of which method created the freeze: treat the frozen clip like any other clip on the timeline and trim its edit point with the standard trim tool. Dragging the out point of a frozen clip extends or shortens the hold exactly like trimming any other clip, because as far as the timeline is concerned, it's just a clip with an unusual playback speed underneath it. This is often the fastest option in practice, since it doesn't require reopening any dialog or menu at all, just a direct drag on the edit point the way you'd trim anything else.
One caution belongs here, and it previews the next section: extending a freeze frame by trimming works cleanly on a freeze that's already on its own isolated segment. Trimming or splitting a clip that has a freeze frame retime applied to only part of it is where Resolve's speed-point handling gets less predictable.
Does freezing a frame affect the audio next to it?
Not by itself, but it usually exposes a problem that was already latent in your edit: a hard cut with no crossfade.
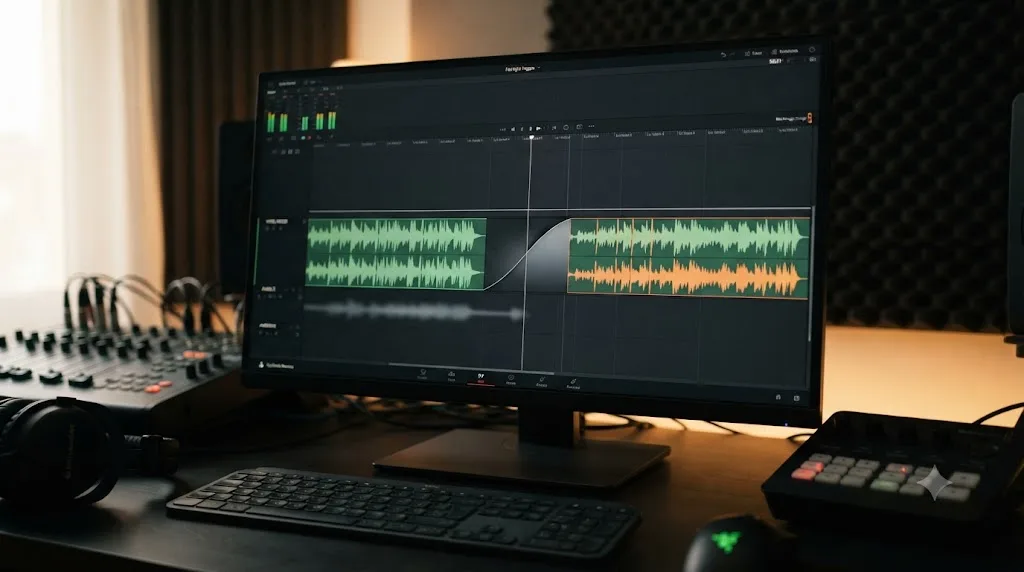
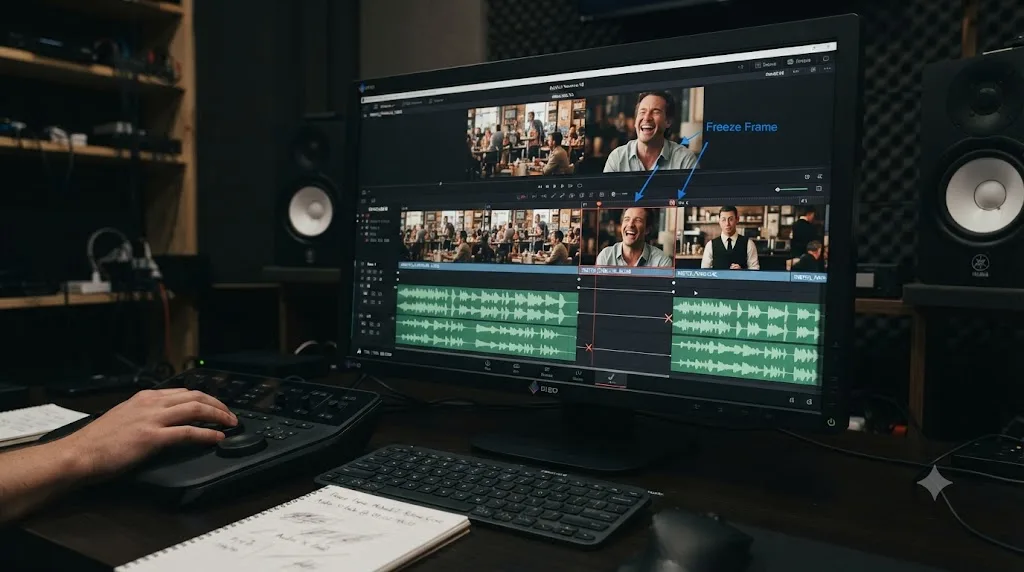
Freezing a frame necessarily creates at least one new edit point in the timeline, the boundary where the moving footage stops and the freeze begins, and often a second one where the freeze ends and motion resumes. If there's audio on that track, or on a track linked to that clip, those new edit points are also new audio edit points, and an audio waveform cut cold with no fade almost always produces an audible click or pop, because the waveform's amplitude jumps discontinuously at the splice instead of crossing zero smoothly.
The fix is the same one editors reach for on any hard audio cut:
- Select the audio on both sides of the new edit point.
- Right-click and choose Add Crossfade, or use the Fairlight page's transition tools.
- A crossfade of just two to five frames is usually enough to eliminate a click, without being long enough to sound like a deliberate audio transition.
For a project with several freeze frames scattered across the timeline, fixing each edit point by hand gets tedious. Batch fading solves that: switch to the Fairlight page, select all the audio regions with Cmd+A or Ctrl+A, open the Fairlight menu and choose Batch Fade Settings, turn on fade in, fade out, and crossfade, set the fade lengths to one or two frames each, and apply. That pass adds a small fade to every audio edit point in the project at once, freeze frames included, and a fade that short is inaudible as a deliberate effect while still killing the pop.
A pop at a freeze frame's edit point is an audio splice problem, not a freeze frame problem, and the fix is the same short crossfade you'd add to any other hard cut. If the audio issue persists after crossfading, it's worth checking whether the underlying recording itself has a click baked in, in which case the Fairlight page's De-Clicker effect, under Noise Reduction, targets that directly rather than the edit point.
Why did my freeze frame disappear or mess up my timeline when I split the clip?
This is the freeze frame quirk that generates the most confused forum posts, and it's worth understanding before it happens to you rather than after.
The short version: when a clip already carries a retime, including a freeze frame, Resolve tracks that retime with speed points anchored to the clip. Split that clip with the blade tool, or apply a second speed change to a piece of it later, and Resolve can reposition an existing speed point to the start of the newly split segment instead of leaving it where you originally placed it. Because everything downstream of a speed point is timed relative to it, moving that point silently shifts every edit that comes after it on the same clip, which can look like a clip vanishing, content jumping to the wrong spot, or timing throwing itself off by a consistent number of frames.
The practical fix is sequencing, not a setting:
- Finish trimming and blading a clip before you apply a freeze frame to it. Once the clip's cuts are locked, add the freeze last, so there's no reason for Resolve to reposition anything afterward.
- If you need a freeze frame on only part of a clip that's already split, apply the freeze to the already-separated segment directly, rather than freezing across a boundary and letting Resolve infer where the split should land.
- If a freeze frame you already built starts producing unexpected shifts after a later edit, undo back to before that edit, check the timeline for accuracy, then redo the edit differently, isolating the retimed segment with the blade tool first instead of cutting through it.
If you hit this and can't isolate the cause, it's faster to remove the freeze frame entirely (Change Clip Speed, uncheck Freeze Frame, or Remove Attributes), redo your cuts on the clean clip, and reapply the freeze once the cuts are final. Rebuilding in the right order takes less time than debugging a shifted timeline after the fact.
Should you enable the ripple checkbox when you freeze a frame?
Yes, if you want the rest of your timeline to make room for the new duration. No, if your timeline has a fixed total length you can't change.
Both Change Clip Speed and Retime Controls include a ripple option, though its exact label has varied across Resolve versions, appearing as Ripple Sequence in some builds and Ripple Timeline in Boris FX's own walkthrough of the Change Clip Speed dialog, which describes it plainly: check it "if you want the following clips in the timeline to accommodate the new speed-up clip's size."
With ripple enabled, adding a two-second freeze frame pushes every clip after it two seconds later on the timeline, preserving all the edits that come after but growing your total runtime. With ripple disabled, the freeze frame instead overwrites whatever's next on the track for its new duration, which keeps your total runtime fixed but risks eating into the start of the next clip if you're not paying attention to what's underneath it.
The decision usually comes down to what you're delivering:
| Delivery constraint | Ripple setting | Reasoning |
|---|---|---|
| A 30-second ad with a hard runtime limit | Off | Runtime must stay fixed; overwrite instead of extending |
| A YouTube video or documentary with no runtime cap | On | Let the freeze add real time; nothing downstream should get eaten |
| Editing to a locked music track | Off, then manually adjust | Ripple would drag the rest of the edit out of sync with the beat |
| An early rough cut, still finding pacing | On | Freely test pause lengths without worrying about overwriting anything |
If ripple is off and you didn't mean it to be, the symptom is usually a clip on the same track losing its first few frames right after the freeze, since the freeze overwrote into it. Undo and re-check the box before trying again.
How do you export a freeze frame as a still image file?
An in-timeline freeze frame and an exported still image are two different things, and mixing them up is a common source of confusion. A freeze frame clip lives inside your project timeline, plays back as part of the video, and exports as part of your final render. A still image file is a standalone JPEG, PNG, or TIFF you can open in Photoshop, post to social media, or use as a thumbnail, entirely separate from your edit.
To get the second one:
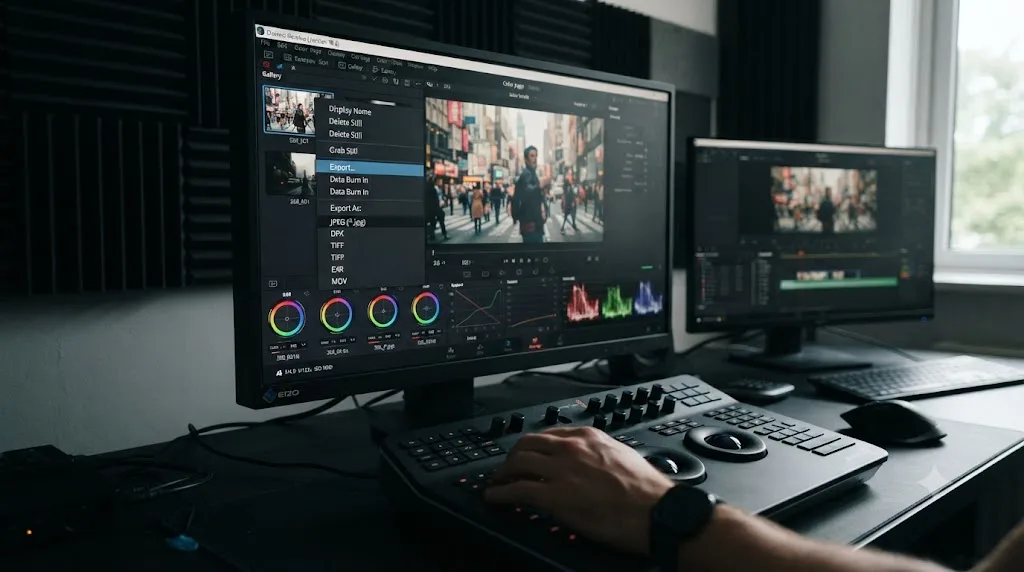
- Switch to the Color page.
- Move the playhead to the exact frame you want.
- Right-click in the viewer and choose Grab Still. A thumbnail of that frame appears in the Gallery panel.
- Right-click that still in the Gallery and choose Export.
- Pick your file format (JPEG, PNG, or TIFF) and save location.
That exported file now exists outside of Resolve entirely. If you want it back inside your project as a clip, import it into the Media Pool like any other piece of media and drop it onto the timeline, where it behaves as a static image clip you can trim to any length, no freeze frame retime required at all since a still image has no playback speed to begin with.
Lewis McGregor, a certified DaVinci Resolve trainer writing for PremiumBeat, put his finger on why editors sometimes reach for this longer path instead of the in-timeline freeze frame tools: "Premiere also has a hold frame function, but the export frame function was more beneficial in many situations." The export-and-reimport route costs more clicks, but it produces a real, portable image file, something neither Change Clip Speed nor Retime Controls gives you on their own.
When should you use Grab Still instead of an in-timeline freeze?
Reach for Grab Still and export whenever the frame needs to leave the timeline entirely: a thumbnail for the video itself, a still for a poster or one-sheet, a reference image to hand off to a designer, or a frame you want to touch up in Photoshop before bringing it back in as a title card background.
Stay with an in-timeline freeze frame, via Change Clip Speed or Retime Controls, whenever the pause is part of the edit itself: a dramatic beat, a comedic pause, a moment you want to hang on before a cut, or a hold at the end of a clip before the next shot. These stay inside the node graph and edit as ordinary clips, which means color, transitions, and titles all continue to apply to them the normal way.
The two aren't mutually exclusive on the same project. It's common to freeze a frame in the timeline for the pacing beat, and separately grab and export a still from a completely different, unrelated frame purely for a thumbnail. Treat them as two answers to two different questions: "should the video pause here" versus "do I need this exact image as a file."
How do you freeze a frame in Fusion instead of on the cut or edit timeline?
Fusion offers its own freeze frame path, and it's worth knowing about even though most editors never need it, because it solves a specific problem the Edit page tools don't: freezing a frame inside a composited effect, or extending a clip's hold well past where its source media would otherwise stop.
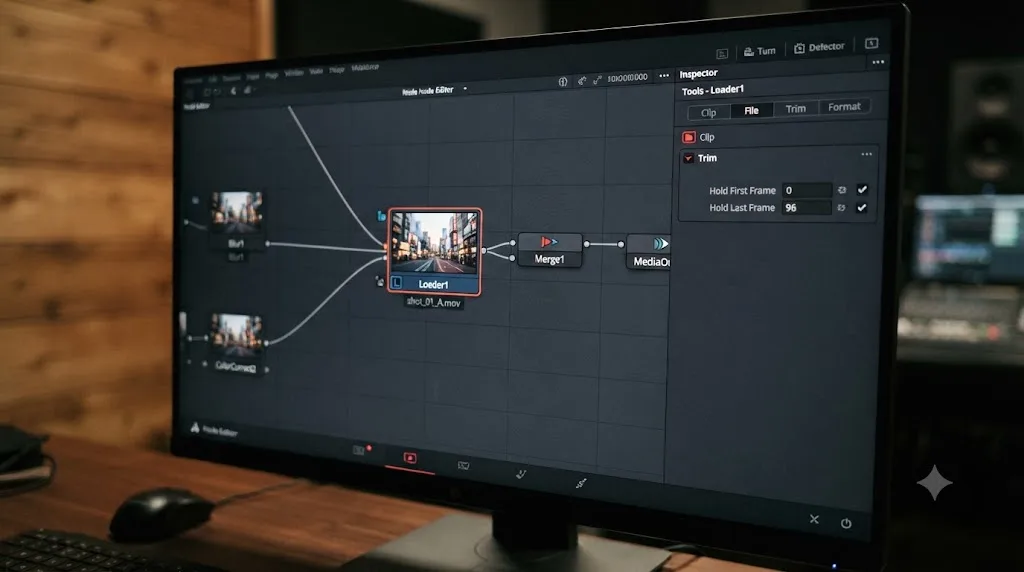
The most direct route is the Loader node's File tab, which, per the DaVinci Resolve reference manual's section on Loader and Saver nodes, includes controls for trimming, freezing, looping, and reversing the clip directly at the source. Two specific controls matter here: Hold First Frame and Hold Last Frame, which hold the first or last frame of the loaded clip for a specified number of frames. If you widen the composition's Global In/Out range beyond the number of frames actually available in the clip, Fusion automatically extends the Hold controls to fill the gap, and marks the extended, held frames in green in the range control so you can see exactly which frames are repeats rather than original footage.
An alternative approach inside a composition uses a TimeStretcher node: enter the frame you want to hold as the last keyframe in the TimeStretcher, and that frame holds for the remainder of the composition. This is the more flexible option when the freeze needs to interact with other Fusion effects layered on top of it, like a title animating in over a held frame, since the TimeStretcher's output feeds directly into the rest of your node tree rather than being fixed at the media source.
Most editors will never touch Fusion just to freeze a frame; the Edit page tools cover that job faster. Reach for Fusion's approach specifically when the freeze needs to live inside a larger composited effect, or when a clip needs to hold well past the length of its actual source media in a way that a simple timeline freeze frame doesn't cleanly express.
How do you freeze the last frame of a clip for an ending or outro shot?
Endings are one of the most common reasons editors reach for a freeze frame, and the mechanics are identical to any other freeze with one added caution: getting the playhead onto the actual last frame, not one frame past it.
- Park the playhead on the final frame of the clip. Step backward one frame at a time from just past the clip's end if you're not sure exactly where it lands; parking on the gap right after the clip selects nothing to freeze.
- Right-click the clip and choose Change Clip Speed, check Freeze Frame, and set how long you want the hold to run before the cut to whatever comes next.
- Alternatively, if the whole clip should simply become that last frame with nothing before it, select the clip and press Shift+R.
For a scripted ending, a freeze on the last frame of an action, a character's expression, a landscape, gives an audience a beat to register what they just watched before the credits or the next scene. It's a technique that shows up constantly in film and television precisely because it works: motion signals "keep watching," and a sudden stillness signals "this moment mattered, sit with it."
One practical note specific to endings: if the shot has audio, particularly ambient sound or a music cue, a frozen final image with audio that keeps playing underneath often reads as more natural than audio that also cuts abruptly. Let the sound continue a beat into the freeze, or fade it out gradually rather than hard-cutting it exactly where the picture stops.
Can you still color grade or add effects to a frozen frame?
Yes, entirely normally. A freeze frame clip is still a clip as far as the Color and Edit pages are concerned; it just happens to display one repeated frame instead of continuous motion. Every node, every ResolveFX effect, every text and transition tool applies to it exactly the way it would to any other clip.
That said, a frozen frame exposes flaws a moving image hides. Motion blur, if the source frame happened to land mid-movement, freezes along with everything else, and a blurry still can look like a mistake rather than an intentional stylistic choice if the audience lingers on it for more than a second or two. Before committing to a duration, scrub a few frames in either direction from your chosen point and pick the sharpest one nearby, especially for fast action or handheld footage, since the exact frame you first parked on isn't always the cleanest one available.
Color grading a freeze frame follows the same node workflow covered in our color grading basics guide: balance in a serial node, check the shot against the waveform and vectorscope, and add a secondary node for anything specific. The one wrinkle worth knowing is that a still frame makes any grading flaw far more visible than the same flaw would be in motion, because the viewer's eye has nothing else to track and settles directly on the image's exposure and color balance. A slightly hot highlight that's invisible for a quarter-second at full speed becomes obvious the moment it holds still for three seconds.
What's the editorial case for a freeze frame, not just the mechanics?
Everything above answers "how." This section answers "why," because a freeze frame that's mechanically correct can still be a bad edit if the reasoning behind it doesn't hold up.
A freeze frame works when it gives the audience a beat to feel something before the story moves on, and it fails when it's used to disguise a cut the editor couldn't otherwise justify. That's the honest test. If you can articulate what emotional or narrative job the freeze is doing, a punchline landing, a reveal registering, a goodbye lingering, it's probably earning its place. If the honest answer is "the footage ran short and I needed to fill time," the freeze will read as padding no matter how clean the technical execution is.
A few situations where freeze frames reliably earn their place:
- Comedic timing. A freeze right after a punchline, sometimes paired with a title card or narration, is a sitcom and sketch comedy staple because it gives the joke a beat to land before cutting away.
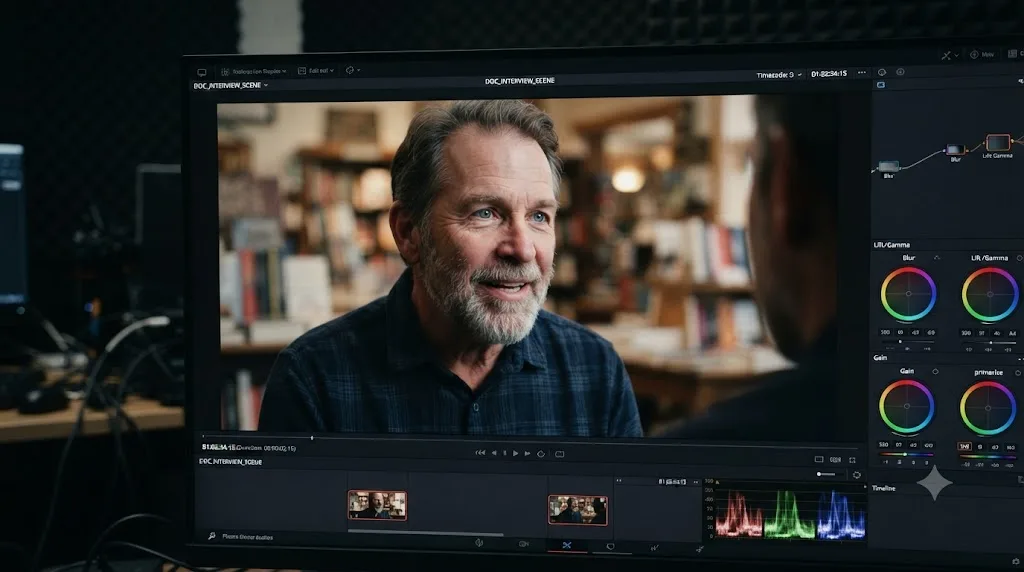
- Documentary emphasis. Freezing on a subject's face at an emotionally loaded moment lets the audience sit with an expression the raw footage would otherwise carry past in real time.
- Action or sports highlights. A freeze at the peak of a jump, a catch, or a stunt lets the audience register the exact moment of impact that motion blur through it.
- Introducing a character or location. A brief freeze with a name or title overlay is a common convention for establishing who or where you're looking at, precisely because the stillness gives text time to be read.
A freeze frame duration that's too short feels like a glitch; one that's too long feels like the video stalled. There's no universal correct number of frames, since it depends on pacing, music, and what surrounds it, but a useful starting habit is to hold roughly as long as it takes to read the emotional beat once, then trim from there rather than guessing a round number like a full second by default.
What does a full freeze frame workflow look like from start to finish?
Concrete beats it out faster than theory, so here's a worked example. Say you're editing a short comedic sketch, and the punchline lands on a specific facial expression that needs a beat to breathe before cutting to the next scene.
- Find the frame. Scrub through the clip in slow motion or one frame at a time and land on the exact moment the expression peaks, not a frame before or after where the mouth or eyes are mid-motion.
- Isolate the segment, if needed. If the freeze should only cover part of a longer clip, blade the clip at that point first so the freeze frame tool only affects the isolated piece.
- Apply the freeze. Right-click the isolated segment, choose Change Clip Speed, check Freeze Frame, and set an initial duration, something like 20 to 30 frames as a starting point for a comedic beat.
- Watch it in context. Play through the cut before and after the freeze at normal speed, with any music or sound effects active, not in isolation. Comedic timing especially depends on what's happening around the pause, not the pause alone.
- Adjust with Retime Controls if it's not quite right. If Change Clip Speed already applied the freeze, switch to Retime Controls on the same clip, since Resolve will show the existing frozen segment as a red region you can still drag to adjust, rather than forcing you to undo and start over.
- Fix the audio edit point. Select the audio on both sides of the new cut and add a short crossfade to prevent a click, especially if there's dialogue or a sound effect crossing that boundary.
- Check the frame for sharpness. Zoom in on the frozen still and confirm it's not carrying motion blur that reads badly held still for a full second or more; nudge the frame selection by one or two if it is.
- Lock it and move on. Once the pacing feels right against the surrounding cut, treat the freeze frame clip like any other clip in the timeline for grading, titles, or further trims.
That sequence, find the frame, isolate it, freeze it, test it in context, fix the audio, check for blur, lock it, covers the entire practical loop this guide describes. Everything else in this article is a deeper look at one of these eight steps.
What are the most common freeze frame mistakes editors make?
Most freeze frame problems trace back to one of a handful of repeatable habits, so it's worth naming them directly.
| Mistake | Why it hurts | The fix |
|---|---|---|
| Freezing on the wrong frame because the playhead wasn't parked precisely | The freeze holds a mid-motion, blurry, or awkward frame instead of the intended one | Step frame by frame with the arrow keys before opening any freeze dialog |
| Using Shift+R expecting a partial freeze | The entire clip becomes one still frame, not a short pause inside it | Blade the clip first to isolate the segment, or use Change Clip Speed / Retime Controls instead |
| Splitting or re-retiming a clip that already has a freeze frame | Speed points can shift and throw the rest of the timeline out of sync | Finish all trims and splits before applying the freeze frame |
| Ignoring the ripple checkbox's effect on downstream clips | A fixed-runtime timeline grows unexpectedly, or a freeze overwrites the next clip | Decide on ripple deliberately based on whether your runtime is locked |
| No crossfade at the freeze frame's new edit points | An audible click or pop appears in the audio track | Add a short crossfade, or batch-fade the whole timeline from Fairlight |
| Holding a blurry, mid-motion frame for several seconds | The still reads as a mistake rather than an intentional pause | Scrub a few frames in either direction and pick the sharpest nearby frame |
| Freezing without an editorial reason | The pause reads as padding rather than a deliberate beat | Only freeze where the moment earns a beat to breathe; cut elsewhere |
| Confusing an in-timeline freeze with an exported still image | Wasted time trying to get a video clip to behave like a portable image file, or vice versa | Use Change Clip Speed or Retime Controls for a timeline pause, Grab Still and Export for a standalone image |
Nearly every freeze frame problem traces back to the playhead being in the wrong place or a clip being retimed in the wrong order, not a bug in the software. Fix the sequencing, and the tools behave exactly as documented.
Does the free version of DaVinci Resolve support freeze frames?
Yes, completely. Freeze frame, Retime Controls, Shift+R, and Grab Still all live on the Edit, Cut, and Color pages, and none of them sit behind Resolve's Studio license. Per Blackmagic's own product page, the free version ships with the full editing toolset, and the paid Studio version adds things like the DaVinci Neural Engine's AI tools, HDR delivery, and resolutions and frame rates above 4K/60fps, none of which have anything to do with freezing a frame.
If you're weighing whether Studio is worth the one-time $295 for other reasons, features like Magic Mask, film grain, or 10-bit HDR grading, our free versus Studio guide breaks down the full feature gap. For freeze frames specifically, there's no gap to weigh: every method in this guide works identically whether or not a Studio license is active on your machine.
Does your OS or hardware change how freeze frame works?
The freeze frame tools themselves behave identically on Windows, Mac, and Linux; there's no platform-specific menu or shortcut difference to account for. Where hardware matters is playback smoothness while you're working with one, particularly on 4K or higher-resolution timelines.
A freeze frame clip repeats a single decoded frame, which is lighter on your GPU than continuous playback of moving footage, so scrubbing across a freeze frame segment is rarely where performance problems show up. The friction shows up instead in the edit points surrounding it, especially if the freeze sits next to a heavily graded or effects-laden clip. If playback stutters specifically around a freeze frame's edges rather than during the hold itself, the cause is usually the neighboring clip's grade or effects stack, not the freeze frame clip.
On Windows and Linux specifically, hardware-accelerated H.264 and H.265 decoding for the free version has historically been more limited than on Mac, where Apple silicon's media engines keep even long timelines with lots of freeze frames and speed changes responsive without transcoding. If you're working with phone or drone footage in H.264/H.265 on Windows or Linux and notice choppy playback around your freeze frames, transcoding to an edit-friendly intermediate codec like DNxHR or ProRes usually resolves it faster than troubleshooting the freeze itself. Our slow playback guide covers the full set of fixes if stutter is a project-wide problem rather than something specific to one freeze frame.
What's new for retiming and freeze frames in DaVinci Resolve 21?
Freeze frame's own mechanics, Change Clip Speed, Retime Controls, and Shift+R, haven't changed in Resolve 21. What has changed is the broader retiming environment those tools sit inside.
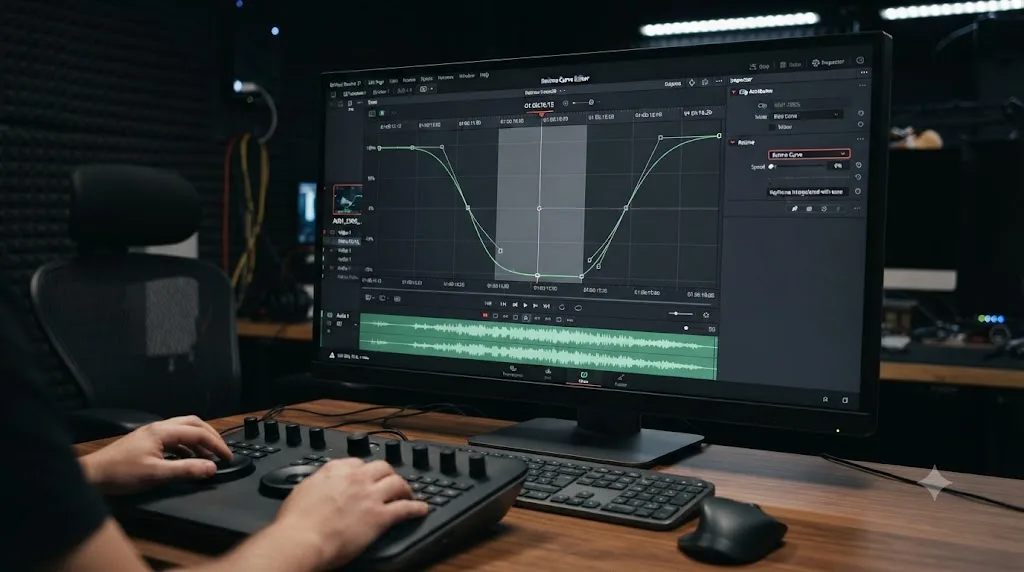
Resolve 21 rebuilt Retime Curves around the same 4-point Bezier easing system used throughout the rest of the software, according to JayAreTV's writeup of the new keyframe and curves editor, which lets editors build non-linear speed ramps with considerably more visual control than the previous curve implementation offered, and displays retime speed curves more clearly while you're adjusting clip timing. The point release that followed, DaVinci Resolve 21.0.2, specifically improved "the display of the retime speed curve," per CineD's coverage of that release, alongside fixes to pasting copied keyframes between clips and to video inspector zoom minimum values, both of which touch the same retiming workflow a freeze frame lives inside.
None of that changes how you freeze a frame day to day, but it matters if you're building a freeze frame as part of a larger speed ramp, easing into a slow-motion segment before it settles into a freeze, since that's exactly the kind of complex, non-linear speed work the new curve system is built to make more precise. If you graded or edited on an older version of Resolve and haven't touched the retime curves lately, it's worth reopening one on a project with a speed ramp just to see the new Bezier handles in action.
How do you troubleshoot a freeze frame that looks blurry, jittery, or wrong?
Four distinct symptoms, four distinct causes.
The frozen frame looks blurry. This almost always means the frame you froze had motion blur baked into it at capture, from camera movement, subject movement, or a slow shutter speed. No amount of sharpening fully rescues a motion-blurred still held for several seconds, since the blur reads as an error the moment nothing else in the frame is moving to explain it. Scrub a few frames in either direction and freeze the sharpest nearby frame instead; a small shift in exactly which frame you hold often solves this without touching anything else.
The freeze looks jittery or flickers instead of staying perfectly still. Check whether you're actually looking at a freeze frame or a very slow-motion segment that wasn't fully set to 0%. In Retime Controls, confirm the percentage readout on the frozen section reads exactly 0%, not a small nonzero value; a near-zero speed still advances frames slowly enough to look like flicker rather than a clean hold.
The freeze frame doesn't seem to hold at all, and the clip keeps playing normally. Reopen Change Clip Speed on the clip and confirm the Freeze Frame checkbox is actually checked; it's easy to open the dialog, adjust the duration field, and close it without having ticked the box in the first place.
The timeline shifted or a clip disappeared after adding or adjusting a freeze frame. This is the speed-point repositioning issue covered earlier: undo back to before the problematic edit, and reapply your freeze frame only after all trims and splits on that clip are final, not before.
If none of these explain what you're seeing, it's worth checking whether the issue is actually playback performance rather than the freeze frame itself, particularly stutter that appears specifically at the freeze's edit points on a heavy 4K timeline. Dropping the timeline proxy resolution to Half under Playback settings isolates whether it's a rendering load issue rather than anything wrong with the freeze frame retime.
Where do you go from here?
Park the playhead, right-click, check Freeze Frame. That's the entire technique underneath every variation this guide covers, and it's worth internalizing before worrying about any of the edge cases.
Pick whichever method matches how precisely you already know the duration: Change Clip Speed when you have an exact number in mind, Retime Controls when you want to drag and eyeball it, Shift+R when the whole clip should become the freeze. Add a crossfade at the new audio edit points, apply the freeze only after your cuts are locked, and pick the sharpest nearby frame rather than settling for the first one your playhead happened to land on.
The mechanics take one afternoon to master completely. The judgment, how long to hold, which beat earns the pause, is the part worth practicing on your own footage rather than a tutorial clip, because that's the half of this skill no dialog box can teach you.
Frequently asked questions
- What's the keyboard shortcut for freeze frame in DaVinci Resolve?
- Shift+R, or Clip > Freeze Frame from the menu, turns the entire selected clip into a freeze frame of whatever frame the playhead sits on. There's no separate default shortcut for a partial in-timeline freeze; that comes from the Change Clip Speed dialog or Retime Controls instead, both reachable by right-clicking the clip.
- Can you freeze frame in the free version of DaVinci Resolve, or is it Studio-only?
- Freeze frame is a basic editing feature and it's fully available in the free version. Change Clip Speed, Retime Controls, Shift+R, and Grab Still all work identically whether or not you own a Studio license, because they live on the Edit and Cut pages, not behind any Neural Engine or advanced-delivery gate.
- How long can a freeze frame last in DaVinci Resolve?
- As long as you want. A freeze frame repeats one frame over and over rather than pulling extra frames from the source media, so it isn't capped by how much footage you shot. Drag the Retime Controls speed point, or type a duration into the Change Clip Speed dialog, and Resolve will hold that single frame for however many seconds you ask for.
- Does freezing a frame mess up the audio in DaVinci Resolve?
- Not automatically, but a freeze frame usually creates a new hard edit point in the audio underneath it, and hard edits without a crossfade are what cause the click or pop, not the freeze itself. Add a short crossfade at both new edit points, or batch-fade the whole timeline from the Fairlight page, and the audio problem goes away.
- What's the difference between Change Clip Speed and Retime Controls for a freeze frame?
- Change Clip Speed is a dialog box: you check Freeze Frame, type a duration, and it commits immediately. Retime Controls is a live, visual version of the same thing, a speed bar above the clip with draggable points, so you can nudge the freeze's length by eye and see the result before you let go of the mouse.
- How do you freeze the last frame of a clip for an outro or ending shot?
- Park the playhead on the very last frame, not one frame past it, since parking past the end selects nothing. Right-click the clip and choose Change Clip Speed, check Freeze Frame, and set a duration. Alternatively, select the clip and press Shift+R to freeze the whole thing on that last frame instantly.
- Can you export a freeze frame in DaVinci Resolve as a still image file?
- Yes. Go to the Color page, park the playhead on the frame, right-click the viewer, and choose Grab Still. Right-click that still in the gallery and choose Export to save it as a JPEG, PNG, or TIFF. That's a separate workflow from an in-timeline freeze frame clip, and it's the one to use when you need the image outside of Resolve.
- Why did my timeline shift or a clip disappear after I added a freeze frame?
- This usually happens when you split a clip that already carries a freeze frame retime, or add a second speed change to a clip that has one. Resolve can reposition the clip's existing speed point to the start of the new segment, which shifts every edit downstream of it. Undo, then apply the freeze frame after all your cuts on that clip are final, not before.
Sources
- DaVinci Resolve Reference Manual - Speed Effects and Retiming
- DaVinci Resolve Reference Manual - Using Loader and Saver Nodes in the Fusion Page
- Quick Tip: Creating Stills and Pauses in Resolve (PremiumBeat, by Lewis McGregor)
- 4 Ways to Change Clip Speed in DaVinci Resolve (Boris FX)
- DaVinci Resolve - What's New (Blackmagic Design)
- DaVinci Resolve 21.0.2 Released: Keyframe Fixes, Retime Curve Improvements (CineD)
- New Keyframe and Curves Editor in DaVinci Resolve 21 (JayAreTV)
- DaVinci Resolve product page (Blackmagic Design)
- DaVinci Resolve Studio product page (Blackmagic Design)
Put this guide to work with TryUncle.
Ask about the step you’re on. TryUncle sees your screen and points at the control you need, so you can keep learning in your own project.
Get TryUncle for Mac or WindowsKeep reading
Guides · Jul 7, 2026 · 32 min
DaVinci Resolve for Beginners: The Complete Starter Guide
Learn DaVinci Resolve from zero: what it costs, what it needs to run, the seven pages you'll actually use, and the steps to cut your first project.
Guides · Jul 8, 2026 · 16 min
DaVinci Resolve Keyboard Shortcuts: The Complete Reference
Every essential DaVinci Resolve keyboard shortcut, organized by page: Edit, Cut, Color, Fairlight, Fusion, and Deliver, plus how to customize and share your own.
Guides · Jul 7, 2026 · 23 min
DaVinci Resolve Export Settings: Numbers That Actually Work
The exact DaVinci Resolve export settings for YouTube, client handoffs, and ProRes archives, plus what changed with Resolve 21's H.265 encoder.