Articles / Guidesupdated for DaVinci Resolve 21.0.2 (July 2026)
DaVinci Resolve Golden Hour Color Grading Tutorial
Quick answer
Grade golden hour footage in DaVinci Resolve by balancing exposure and white balance first, then push warmth into Gamma and Gain rather than the whole image. Keep skin on the vectorscope's skin tone line, isolate the sky with a qualifier, and save the look as a PowerGrade so every shot in the scene matches.
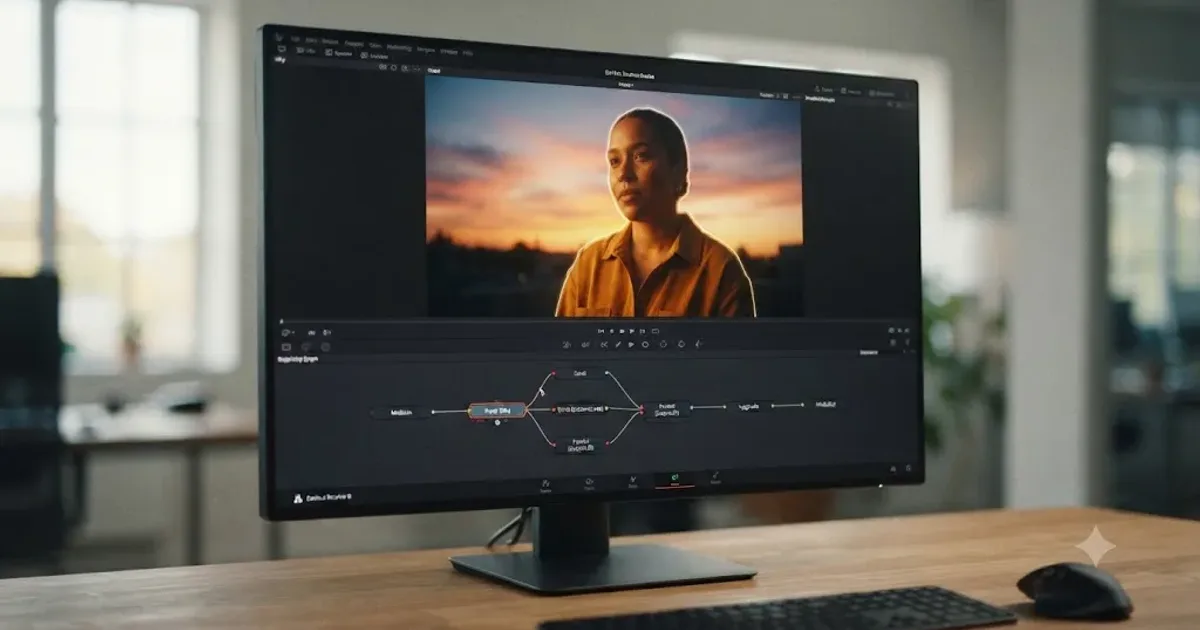
I've watched the same mistake happen on interview after interview, wedding after wedding: someone shoots a beautiful sunset, imports it into DaVinci Resolve, and cranks the Temp slider until the whole frame turns the color of a traffic cone. Golden hour footage doesn't need more warmth. It needs the warmth put in the right places.
After seven-plus years grading commercial and branded video, including projects for Fortune 500 clients, and running a video editing community with more than 100,000 members where "how do I grade golden hour footage" is one of the questions that keeps coming back, here's the node structure we actually use. It's not a filter. It's four or five small, specific decisions, in a specific order, and none of them require DaVinci Resolve Studio.
What is golden hour, and why does it need a different grading approach?
Golden hour is the period around sunrise and sunset when the sun sits low enough that its light passes through more atmosphere, scattering the blue wavelengths and leaving the red, orange, and yellow ones to reach your subject. By the definition PhotoPills uses in its golden hour photography guide, that's the window while the sun's elevation sits between 6 degrees above the horizon and 4 degrees below it. Once the sun drops past minus 4 degrees, you're in blue hour instead, a cooler, dimmer window that runs until about minus 6 degrees.
That window is often shorter than the name promises. Néstor Almendros, the cinematographer who won an Oscar for shooting most of Terrence Malick's Days of Heaven in this light, worked with a usable stretch that production accounts, including TIFF's retrospective on the film, put at around 20 to 25 minutes a day. If you're grading footage shot across a real golden hour, expect the light, and the correction it needs, to have shifted meaningfully between your first setup and your last.
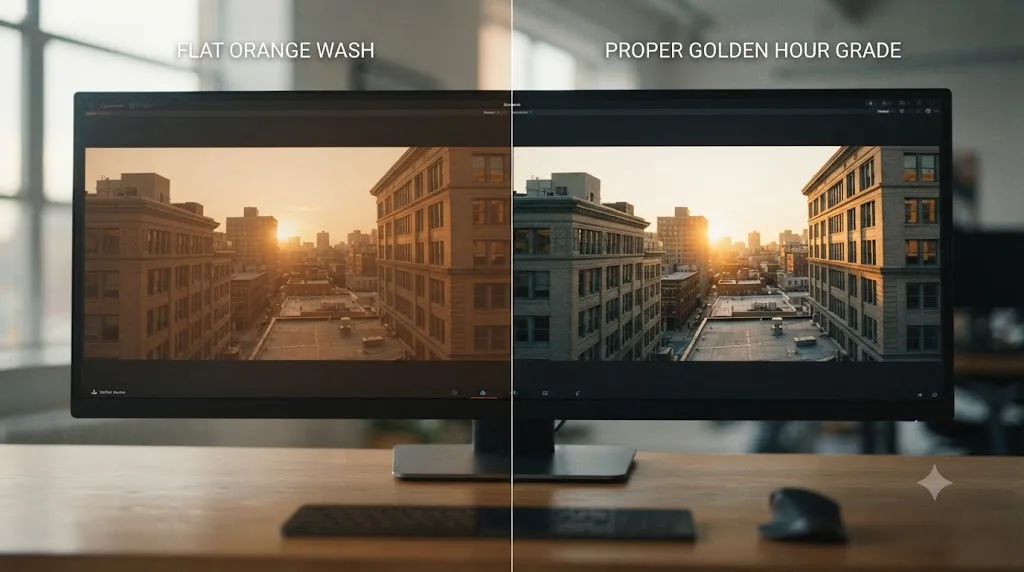
Golden hour is a decision your grade makes about where the warmth lives, not a color you paint over the whole frame. Real golden hour light is warm and low-angle at the source, which means highlights, skin, and anything facing the sun pick up the color strongly, while shadows and anything facing away stay comparatively neutral or even cool by contrast. A single global Temp push flattens that contrast into a uniform orange wash, which is exactly what reads as fake to a viewer's eye, even if they couldn't tell you why.
The rest of this guide treats that difference, warmth by zone instead of warmth everywhere, as the entire technique. Everything else, skin protection, sky separation, the shadow decision, builds on it.
What do you need on the timeline before you start grading a golden hour shot?
A locked or nearly locked cut, DaVinci Resolve's Color page open from the page selector, and enough GPU headroom to run several nodes without stuttering. Per Blackmagic's tech specs, Resolve wants at least 4 GB of VRAM to stay responsive, and a golden hour grade tends to run more nodes than a flat correction, one for balance, one or two for the warm zones, one for the sky, sometimes one for a shadow decision. If you've hit a "GPU memory is full" warning while stacking nodes before, our guide to that error covers the fixes.
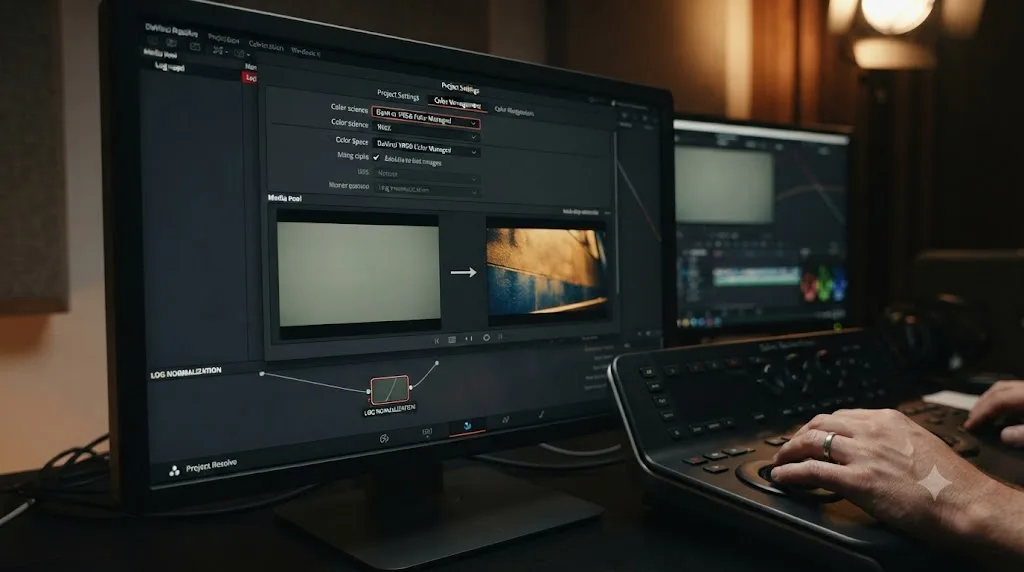
Before you touch a wheel, decide whether you're working in DaVinci YRGB, Resolve's default where nothing is converted automatically, or DaVinci YRGB Color Managed, where Resolve normalizes each clip's input space for you. If your golden hour footage came straight off a mirrorless camera or phone in a normal picture profile, the default mode is fine and one less setting to think about. If it's log, S-Log3, C-Log3, V-Log, or you're cutting footage from more than one camera together in the same golden hour scene, color managed mode gives every clip the same starting point before any of the warmth decisions below happen. Our color grading basics guide walks through that setup in more depth if you haven't made the call yet.
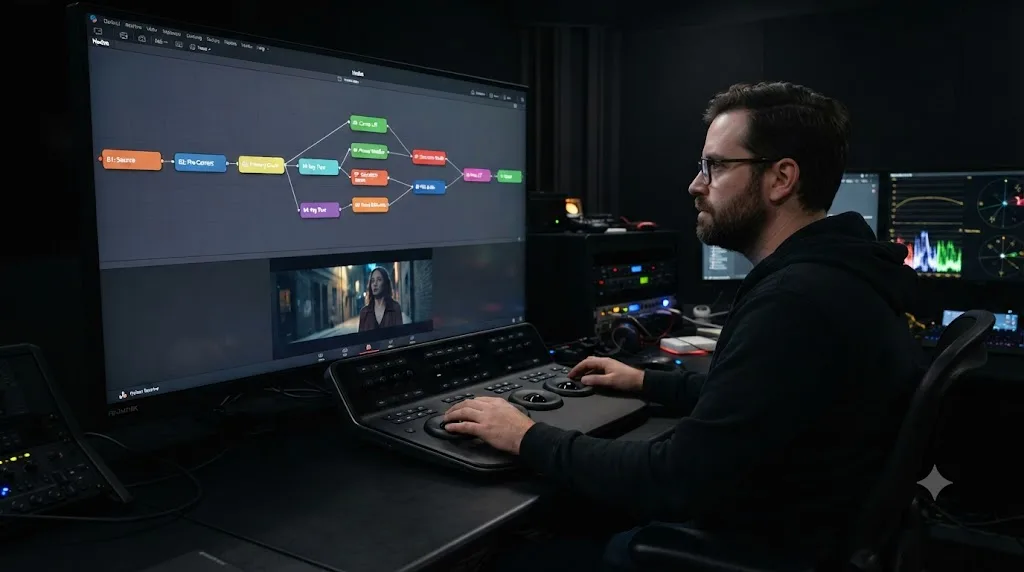
One more thing worth checking before you grade: node organization habits. A golden hour grade tends to run five or six nodes minimum by the time the sky, skin, and shadow decision are all in, and unlabeled nodes on a chain that size get confusing fast. If you haven't set up a labeling system, our guide to node labels and colors is worth five minutes before you start.
How do you set up your first node for a golden hour balance?
Balance the shot to neutral first, exactly as you would any other footage, before a single ounce of golden hour warmth goes in. This is the step people skip, and it's the reason so many golden hour grades look muddy instead of warm.
Add one serial node with Alt+S on Windows or Option+S on Mac. Work through it in this order:
- Exposure first. Use Lift and Gain, or the Contrast and Pivot controls beneath the wheels, to get the waveform reading a reasonable range: shadows just above the floor, highlights just under the ceiling, nothing flat against either end yet.
- White balance second. Find something in frame that should be neutral, a white shirt, gray pavement, a neutral wall, and use the Temp and Tint sliders, or the RGB Parade, until that object's red, green, and blue traces sit at the same height. Yes, this feels backwards on a sunset shot where nothing looks neutral to your eye. Do it anyway. You need an honest starting point before you decide how much warmth to add on top of it, or you're just guessing at how far off the shot already is.
- Saturation last, and lightly. A small Saturation nudge, or a touch of Color Boost, cleans up the flat, undersaturated look log or RAW footage often has straight off the sensor.
In DaVinci Resolve, the fastest way to ruin a golden hour grade is warming the image before you've balanced it. Skip the neutral pass and you're stacking a creative warmth decision on top of an uncorrected white balance error, and the two compound in ways that are hard to untangle later. Balance first. Warm second, in its own node.
Should you warm the whole image, or just the highlights?
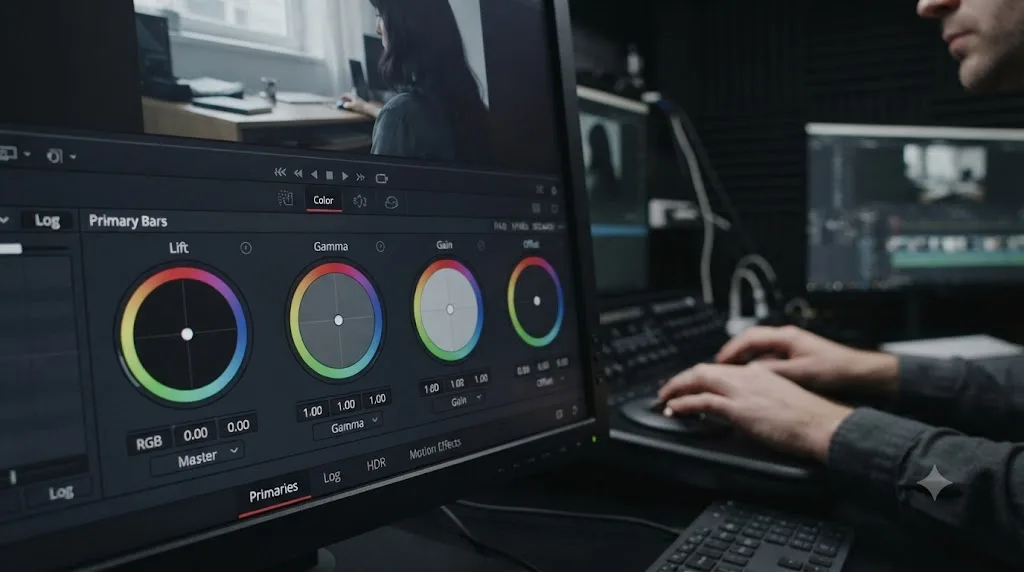
Just the highlights and midtones, with the shadows left closer to neutral. That's the zone-based approach real golden hour light already has built in, and it's the single biggest thing that separates a convincing grade from an obvious one.
Add a second serial node after your balance node and label it something like "warm." From here you have three practical routes, in order of how much control they give you:
| Tool | What it does | When to reach for it |
|---|---|---|
| Gain and Gamma wheels | Push warmth into highlights (Gain) and midtones (Gamma) while leaving Lift closer to neutral | The fast, default move for most golden hour shots |
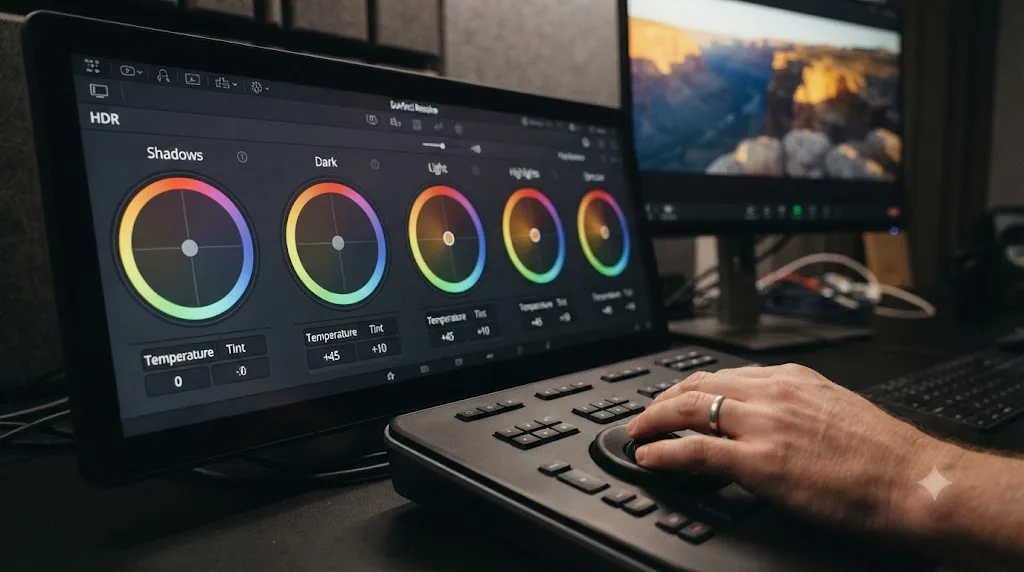
| HDR grading palette | Splits the image into narrower zones, Blacks, Dark, Shadow, Light, Highlight, Specular, each independently adjustable | When the wheels feel too blunt, or a move in Highlight keeps dragging the Shadow zone with it |
| Color Warper | Click a color in the viewer and drag it toward a warmer hue and saturation, with the surrounding colors warping progressively less | When one specific tone, a skin highlight, a patch of golden grass, needs to shift without touching anything else in frame |
Source: Blackmagic's Color page documentation.
Pull Gain toward orange and yellow first, and watch how much of the frame's warmth comes from that single move. Then bring Gamma slightly warm too, since golden hour light hits midtones and skin directly, not just specular highlights. Leave Lift alone, or nudge it only slightly, since the shadow side of a real golden hour shot is often the coolest part of the frame by comparison, not the warmest.
If a shot has one specific problem area, a lens flare that needs a touch more amber, a patch of grass that should glow instead of just brighten, the Color Warper solves it in one drag instead of a new qualifier and node. Click the color in the viewer, drag it toward the warmth and saturation you want, and the mesh warps neighboring tones progressively less so the edit stays smooth instead of posterizing.
How do you keep skin tones from turning orange in warm light?
You mostly don't fight it, you manage it. Skin under warm light is supposed to look warm. The failure mode isn't warmth, it's warmth that pushes skin off its natural hue range into something that reads as sunburn or a bad spray tan instead of a sunset.
Cullen Kelly, a Los Angeles-based colorist whose credits include Netflix, HBO, and Hulu, put it plainly in a Frame.io interview about skin tones:
"Skin will reflect more of the 'wash' color, and may fall partially or fully outside its normal range"
That's not a problem to solve. It's a description of what correct golden hour skin actually looks like on a vectorscope. Skin reflects the light it's sitting in, so a golden hour glow on a face is correct, not a mistake to neutralize. Kelly also warns against the instinct to force it back to neutral anyway, describing that habit as one that "leads to brittle, unnatural images."
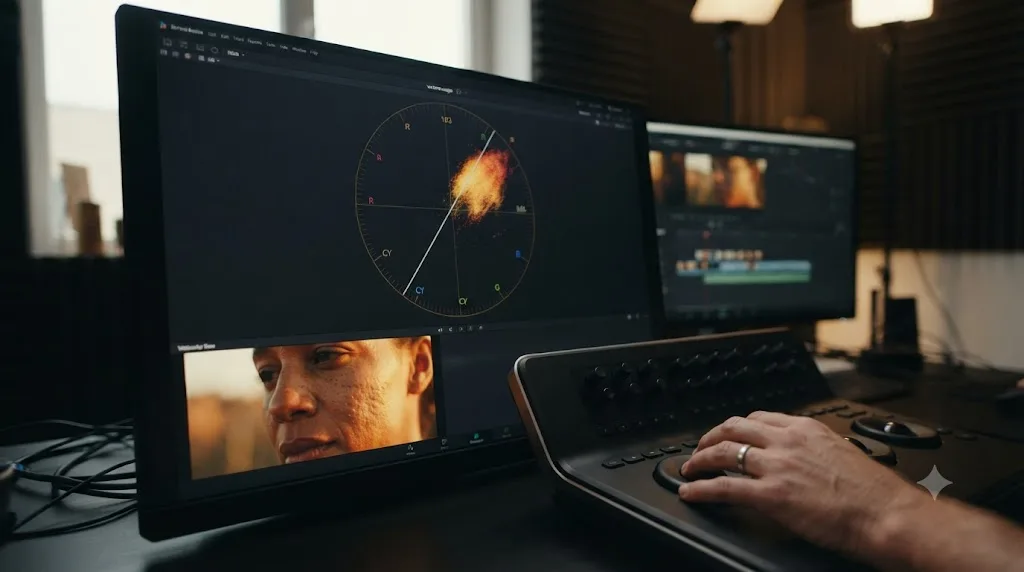
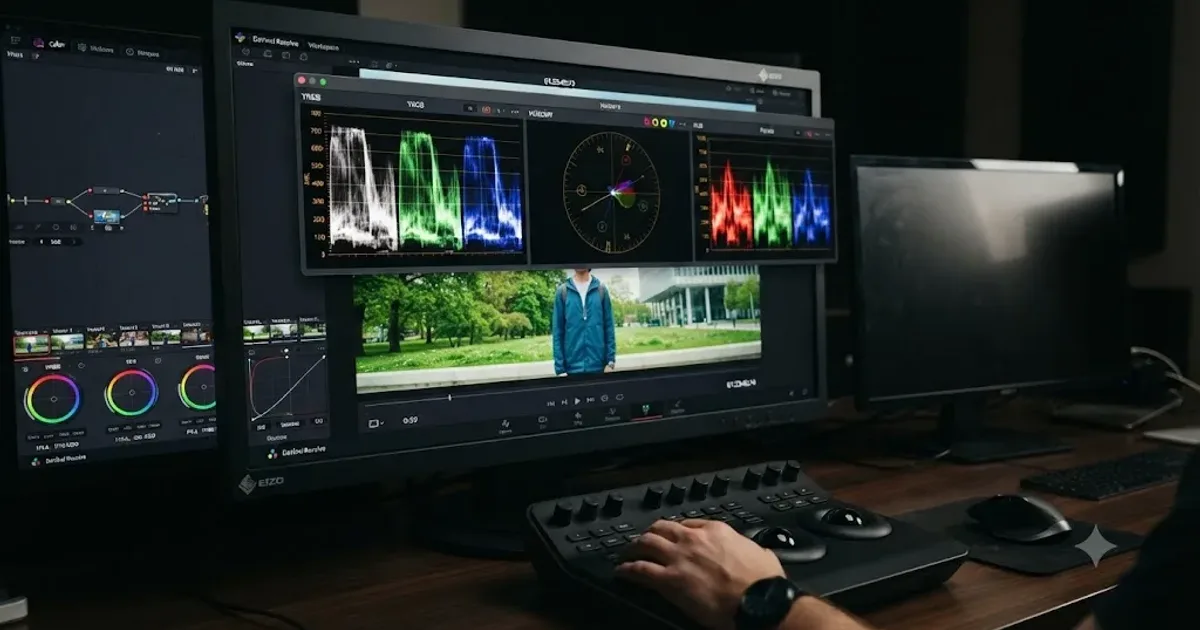
So what do you actually check? Open the vectorscope, enable the skin tone indicator from its settings menu, and watch where skin sits relative to that diagonal line, not relative to some idea of what "normal" skin should look like on a neutral shot. A golden hour face will legitimately sit a little off that line toward warm. That's expected. What you're watching for is skin drifting into a full hue shift, orange enough that it reads as saturation or color casting rather than warm light, or losing so much of its own tonal separation that a face looks flat and posterized.
The vectorscope's skin tone line tells you how far is too far before warm skin starts looking sunburned. If a face has drifted past a point you're comfortable with, don't undo the warm grade globally. Add a small, separate node, qualify or window just the skin, and pull a modest hue correction back toward the line. Kelly's article notes hue and saturation are the two biggest factors in how skin reads, with contrast and brightness a distant third, which is why a hue nudge fixes more than a brightness pull will.
One more lever worth knowing: HSV-based saturation control instead of the standard RGB Saturation knob. In a separate Frame.io piece on cinematic saturation, Kelly describes building a dedicated node in HSV color space so darker, more saturated colors get pulled back proportionally more than lighter ones, which mirrors how saturation actually reads in the real world. On a golden hour shot where the highlights are already carrying a lot of color, this keeps a skin highlight from oversaturating faster than the rest of the face.
How do you separate the sky from the golden light on the subject?
In its own node, isolated from the subject entirely. A sky and a foreground subject rarely want the exact same correction during golden hour, and grading them together forces a compromise that under-serves both.
A sky graded in the same node as the subject will always fight the subject for exposure. Push Gain up to deepen a golden sky and you blow out the subject's highlights along with it. Pull it down to protect the subject and the sky goes flat and gray. Split them, and both problems disappear.
Two ways to isolate the sky, and which one to use depends on the shot:
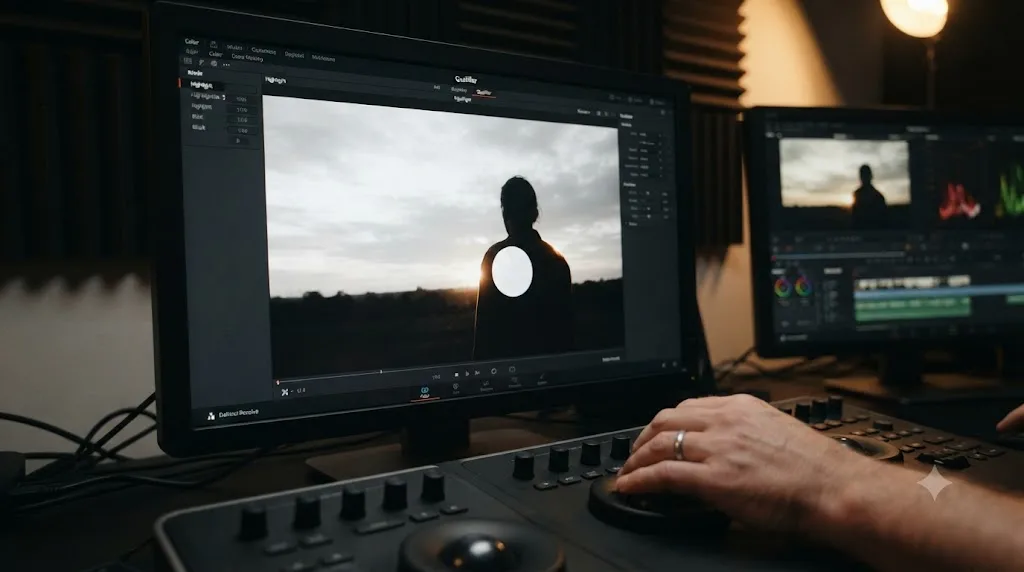
- A qualifier, when the sky's color is distinct from everything else in frame. Add a new serial node, open the Qualifier palette, click the eyedropper on the sky, and press Shift+H to preview the selection. Widen or narrow the Hue, Saturation, and Luminance ranges until the matte covers the sky cleanly, then clean it up with the Matte Finesse controls, a touch of Clean Black for stray speckles, Clean White to fill small holes, and a light Blur Radius so the edge doesn't draw an outline.
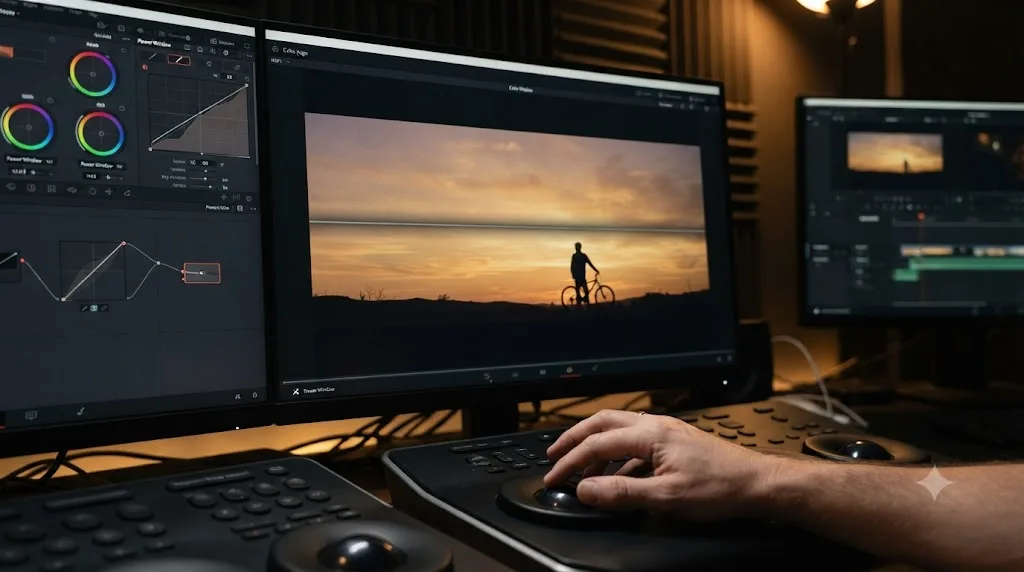
- A linear gradient power window, when the horizon is roughly straight. Draw a gradient window from the Window palette, position its edge along the horizon, and soften the transition. This is faster than a qualifier when the shot is a clean landscape or a wide establishing shot, and it doesn't care what color the sky happens to be that particular evening.
Once the sky is isolated, treat it as its own creative decision. Deepen the blue at the top of frame with the Hue vs Hue curve, click the sky's blue in the viewer with the curve's picker, and Resolve drops a control point onto that exact hue range so you can push it deeper or shift it toward teal without touching anything else in the frame. Warm the band right at the horizon separately, since that's usually where the actual golden color concentrates, a thin strip just above where the sun sits, fading to blue higher up.
If the subject moves against a static sky, or the camera pans, track the gradient window the same way you'd track a power window on a face: open the Tracker palette, confirm it's in Window mode, and press Track Forward. A gradient window tracks less often than you'd think, since most golden hour shots either hold the frame or move the camera in ways where the horizon stays roughly level, but check it on anything with real camera movement.
What if the sky qualifier keeps grabbing skin too?
Golden hour skies and golden hour skin sit close together in hue. That's the whole problem. A sunset sky at its most saturated point runs orange-red, and warm-lit skin runs orange too, so a qualifier built around "orange" grabs both unless you narrow it hard.
Start with Luminance, not Hue. Sky at golden hour is almost always brighter than skin, even a backlit subject with a rim of sun on their shoulder. Narrow the qualifier's Luminance range first to exclude the darker range where skin sits, then widen Hue and Saturation only after luminance has already done most of the separation work. This order matters: qualify by hue first and you'll spend ten minutes fighting a matte that keeps bleeding onto a cheek every time the sky brightens.
If narrowing luminance still leaves a partial matte on skin, a rim-lit shoulder or a stray highlight, don't keep tightening the qualifier until the sky matte gets patchy trying to exclude it. Add a power window over just the offending area and subtract it from the qualifier's matte instead, using the Add/Subtract mode on a second window. A qualifier fighting to exclude one problem spot degrades everywhere else in the frame at the same time; a window subtracting from a clean qualifier doesn't.
A qualifier that's still fighting skin after a luminance-first pass needs a subtracting window, not a tighter hue range. Tightening hue further usually costs you sky coverage somewhere else in the frame before it actually solves the skin problem.
Our guide to fixing a qualifier that won't select correctly covers the matte-cleanup workflow, Clean Black, Clean White, and Blur Radius, in more depth if the matte is still noisy after the luminance-first approach.
One more failure mode specific to golden hour: an 8-bit delivery codec banding visibly in a graded sky, especially once you've pushed a gradient window's blue deeper. Golden hour skies already have a narrow tonal range compressed into a gradient, and pushing that gradient harder in an 8-bit source exaggerates whatever banding was already close to visible. If you see stepping in the sky after grading, check your original footage's bit depth before assuming the grade caused it. A 10-bit source graded the same way rarely shows the same banding.
Should shadows go cool while the highlights stay warm?
It's your call, not a rule. Warm highlights against cooler shadows is a real, well-documented technique, often called orange and teal or teal and orange grading, and golden hour light is one of the few naturally occurring situations where the contrast already exists: warm sunlight on the subject, a cooling blue sky behind them. It's a legitimate reason the look shows up so often in golden hour photography and cinematography in the first place.
But it's optional, and it's easy to overdo. A lot of golden hour footage already has enough natural warmth throughout the frame that forcing the shadows cool on top of it reads as a filter instead of a lighting condition. Before you commit to a cool shadow push, ask what the shot is actually doing: is there a genuine blue sky or shaded area providing real cool light for contrast, or would a cool shadow just be an invented color with no source in the frame?
If you decide it earns the effort, do it in its own node, after the warm highlight work, not blended into it. Pull Lift toward blue or teal by a small amount, check the result against the vectorscope so you're not accidentally pushing skin in the shadow side of a face off its own line, and compare the shot with and without the shift before you lock it in. Duplicate the node's local version, try both, and pick the one that looks like it belongs to the scene rather than the one that looks the most "graded."
The honest middle ground most golden hour footage actually wants: warm highlights, a neutral or very slightly cool shadow, and no dramatic push in either direction. Subtle usually reads as more expensive than obvious.
What do you do about a blown-out sun or sky in the frame?
Two different problems, and two different fixes, depending on whether the detail is actually there.
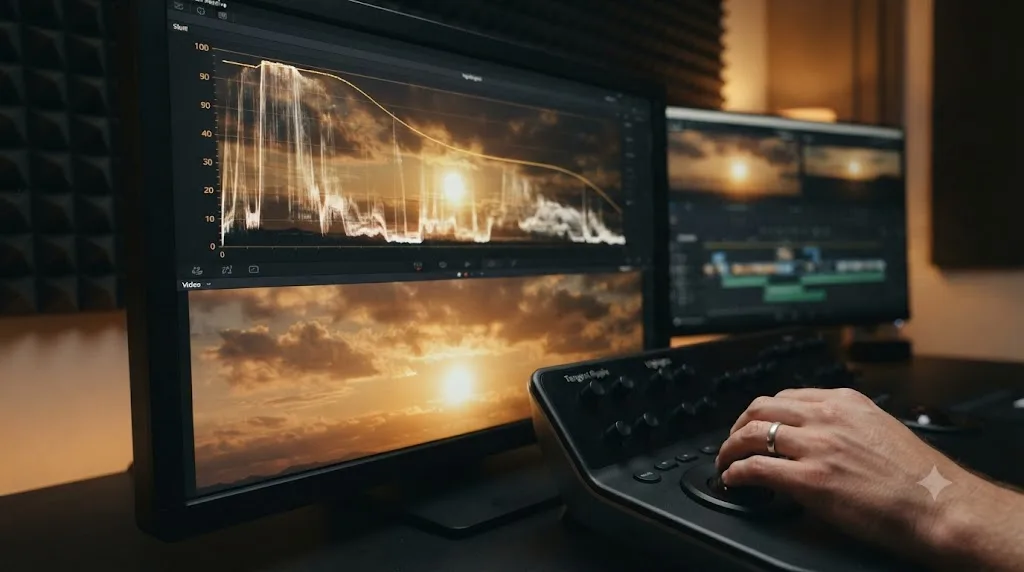
If the sun itself is in frame, it's supposed to clip. A flat line on the waveform where the sun sits isn't a mistake, it's what a light source that bright looks like on any sensor. Don't chase detail that was never going to exist there.
The sky and clouds around the sun are a different story. If they're clipping too, that's usually recoverable, and it's worth recovering because that's where most of a golden hour sky's color actually lives. Reach for the Highlights slider in the adjustment row first: it rolls the top of the range down softly instead of dragging the entire image with Gain, which would also darken your subject. If you're working in log or Camera Raw and the highlights still clip after that, there's often more headroom in the original file than the default decode shows, so check your Camera Raw palette settings before assuming the detail is gone for good.
For a shot where the sun creates a halo or flare that's blowing out a wider area than you'd like, Soft Clip, hidden beneath the graph in the Custom Curves palette, rolls off harsh clipped whites with adjustable threshold and softness instead of leaving a hard digital edge where the sensor simply gave up. It's a subtler fix than pulling Gain down, and it keeps the rest of the highlight range untouched.
If a sky genuinely lost all its detail at the moment of capture, that flat line at the top of the waveform isn't lying to you, and no slider invents information that was never recorded. At that point the honest options are a gradient window with a slight color push and a small luminance drop to fake a believable gradient where the blown section was, or accepting the blown sky as part of the shot. Colorists do the former often enough that it's a standard move, not a cheat, but it works best subtly, on a small clipped patch, not as a rescue for a sky that's uniformly gone.
Can you fake a golden hour look on footage that wasn't shot at sunset?
Partially, and it's worth being honest about the limit before you spend an hour trying. Color correction changes color. It doesn't change where shadows fall, and shadow direction is one of the strongest cues a viewer's eye reads as "this was shot at midday" even before they consciously notice the color.
What you can fake convincingly: the warmth itself. Push Temp and the same zone-based Gain and Gamma warmth covered above, and a midday shot with soft, diffused light, overcast, open shade, indoors near a window, can pass for golden hour reasonably well, because there's no harsh, high-angle shadow contradicting the color. Add a soft gradient darkening the top of frame and a warm color cast concentrated in the upper portion of the image, mimicking how real golden light grades from warm at the horizon to cooler overhead, and the illusion holds up further.
What you can't fake: hard, short, high-angle shadows from a midday sun. Those shadows point down and stay short no matter what color you paint the highlights, and a viewer's eye, even one that's never thought about cinematography, registers "wrong time of day" from shadow geometry before it ever gets to color. If your midday shot has hard direct sun and visible shadows, warming it reads as a warm midday shot, not a convincing golden hour one, and that's a limit color grading alone doesn't solve.
The realistic use case: footage shot in flat, diffused light, cloudy days, shade, indoor scenes near a window, where you're choosing a warm look rather than correcting an obviously wrong one. That's a legitimate creative grade, not a deception, and it's a much easier lift than trying to disguise a shot with the wrong lighting geometry entirely.
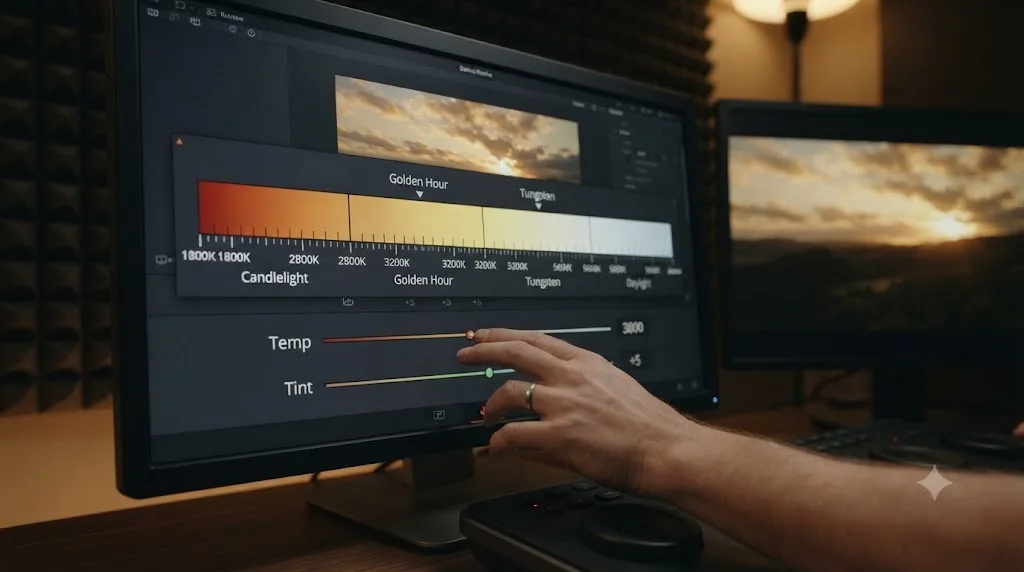
What Kelvin values and settings should you actually dial in?
Numbers help, so here's a working reference, though treat every one of these as a starting point you adjust by eye and by scope, not a setting you dial in and walk away from.
| Light source or look | Approximate color temperature | What it's typically used for |
|---|---|---|
| Candlelight | 1,800K | The warmest practical light most productions use |
| Warm golden hour nostalgia | 2,700K to 3,200K | Restaurant scenes, intimate interviews, period pieces, the classic "golden hour" feel |
| Tungsten / indoor practical | 3,200K | Standard indoor incandescent reference |
| Neutral daylight | 5,600K | Documentary and corporate work, meant to read clean and honest |
| Overcast daylight | 6,500K | Cloudy-day daylight balance |
Source: GVM's color temperature guide for filmmaking.
Here's the trick that connects those numbers to your grade: real golden hour light itself often measures in the 2,700K to 3,200K range at the low end. If you white balanced your camera to daylight, around 5,600K, while shooting in that light, the footage already recorded warm, since a daylight-balanced sensor reading a 3,000K light source produces exactly the orange shift you're now grading toward on purpose. If your camera's auto white balance tried to correct for it in-camera, you'll see less of that warmth baked in and need to reintroduce more of it manually in the grade, which is the more common case with phones and consumer cameras that auto white balance aggressively.
Practically, that means your Temp slider push in Resolve isn't really "add golden hour color from nothing." It's either preserving warmth your camera already captured (pull the correction toward the lower end of that reference range, closer to 3,000K, and don't fight it) or reintroducing warmth your camera corrected away (push further, since you're rebuilding what the auto white balance erased). Look at your unbalanced clip before you touch anything: if it's already warm, you're refining. If it's neutral or worse, cool, you're rebuilding, and you'll need a bigger push to get the same result.
Does golden hour last longer or shorter depending on where and when you're shooting?
Yes, significantly, and it's worth knowing before you plan a shoot day around a fixed window. The 20-to-25-minute figure from the Days of Heaven production accounts earlier in this guide describes one specific shoot, not a universal law. How long golden hour actually runs depends on latitude and season, not just the clock.
The mechanism is straightforward once you see it. Near the equator, the sun's path through the sky is closer to vertical, so it crosses the golden hour altitude range quickly, in less than an hour, because it's climbing or dropping almost straight up and down. Farther from the equator, that same altitude range takes the sun longer to cross, because its path is shallower, more of a long diagonal than a straight drop, so golden hour stretches out to more than an hour, per Wikipedia's overview of golden hour photography.
Push far enough toward the poles and the effect compounds with season. At a location sufficiently far from the equator, the sun may never climb high enough above that low-angle threshold in certain seasons, which means the golden hour effect can hold for the entire day rather than the tight window a shoot closer to the equator would get. If you're shooting somewhere far from the equator in summer, don't plan your grading node structure around a short, fast-changing light the way a lower-latitude shoot demands. The light itself will be more stable for longer, and the "match across a scene where the light kept changing" concern covered later in this guide matters less than it would somewhere closer to the equator.
How long golden hour lasts is a function of latitude and season, not a fixed twenty-minute window everywhere on earth. Practically, this should shape how you plan the shoot day and, by extension, how many distinct lighting setups you'll actually need to grade. A production near the equator working with a genuinely short window benefits from shooting the most light-sensitive material, close-ups, key dialogue, first, since the light won't wait. A production at a higher latitude in summer has more room to work through a shot list in order, since the light changes more slowly across the same clock time.
How do you grade golden hour footage shot in log or RAW?
Mostly the same technique, with two adjustments: how you get to a neutral starting point, and how hard you can push the shadows before noise shows up.
If you shot S-Log3, C-Log3, V-Log, or a RAW format like Blackmagic RAW or Sony RAW, switch your project to DaVinci YRGB Color Managed before you add your balance node, not after. Color management applies each clip's input color space transform first, so the flat, low-contrast log image you're looking at when you open the Qualifier or vectorscope is already in a normalized space, and your Lift/Gamma/Gain moves behave the way this guide assumes instead of fighting an extra layer of log-to-linear math you haven't accounted for. Skip that step and a "neutral" white balance pull in Temp and Tint will look neutral in the viewer but read wrong on the parade, because you're balancing a log curve, not the picture.
Log and RAW footage shot near the edges of golden hour, the last ten minutes before the sun is gone, often needed a real ISO push at the time of shooting to hold a usable exposure. That ISO push shows up as noise sitting mostly in the shadows, and warming a golden hour grade tends to push Gamma and sometimes Lift warmer too, which means you're often pushing color into exactly the tonal range where the noise lives. If you notice the shadow noise getting more visible, more colorful, as you warm the grade, that's not a fault in your technique. It's the sensor's noise floor picking up the same color shift as everything else in that tonal range.
The fix order matters here too: apply noise reduction before the warm node, not after. Warming a noisy shadow first and denoising second smears color that's already been pushed into a wide, colorful noise pattern; denoising first gives the warm grade a cleaner base to color. Our guide to Resolve's noise reduction settings covers where Temporal and Spatial NR sit in the node order and what each control actually does.
Camera-specific starting points differ enough that it's worth checking your camera's own settings before you start balancing, since an A7 IV's S-Log3 curve, a GH6's V-Log, and an R6 Mark II's C-Log3 don't share identical mid-grey placement or noise characteristics even in the same light. If you're cutting footage from more than one of those cameras together, our guide to matching color across different cameras covers getting them onto the same starting point before any golden hour warmth goes in.
How do you grade golden hour footage that mixes sunlight with artificial light?
Golden hour rarely arrives alone. An interview shot in a doorway at sunset often has warm sun on one side of a face and a cooler window bounce or a tungsten practical lamp on the other. A street scene at dusk mixes fading warm sky light with sodium streetlights that are warmer still, or LED signage that's colder. Grading the whole frame as one warmth decision flattens a mix that was never actually one color to begin with.
Treat each light source as its own region, not as one global temperature. Balance to the dominant source first, usually whichever one lights the subject's face, using the same neutral-first approach from earlier in this guide. Then isolate the secondary source with a power window, a lamp, a window, a patch of sky visible through a doorway, and grade it toward its own color rather than trying to make one Temp slider serve two different light sources at once.
A gradient window works for a clean sky-versus-ground split. A radial or curved power window, feathered and tracked if the subject or camera moves, isolates a practical light or a lit window inside the frame better than a qualifier does, since a qualifier will happily grab any other warm-colored object in the shot along with the light source you actually meant to isolate.
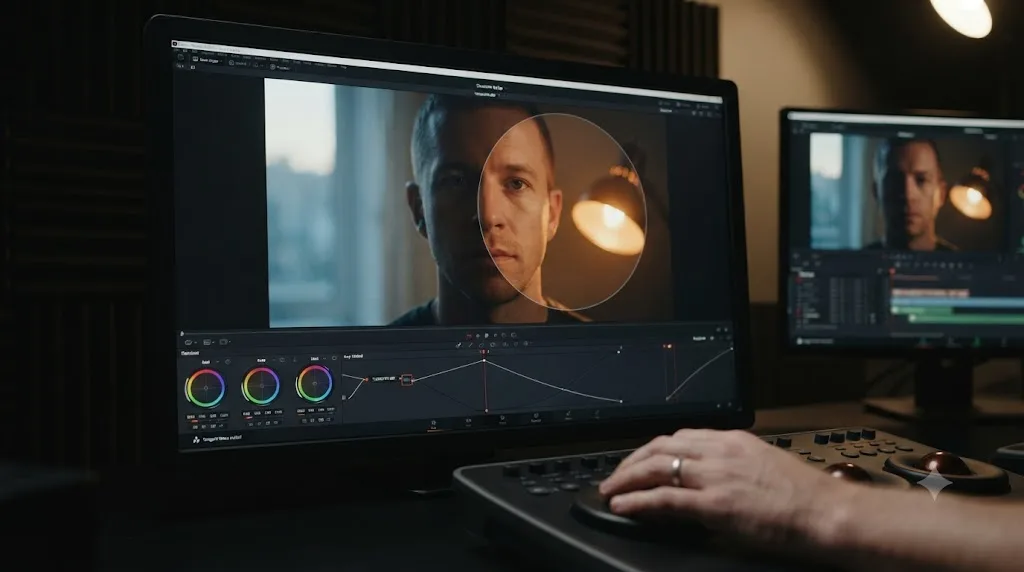
A face lit by two different color temperatures at once should stay two colors, not average into one. Watch skin specifically in this scenario, since it's the one element that's likely lit by both sources at once, warm sun on one cheek, cooler ambient or practical on the other. That's not a problem to fix by averaging the two into a single neutral tone across the face. Real mixed lighting on a face reads as dimensional, and forcing it flat removes the exact thing that makes the shot look like it was actually lit by two sources instead of graded to look that way. Check both sides of the face against the vectorscope's skin line separately if the split is pronounced enough to matter, since a single vectorscope trace for the whole face can hide a warm side that's fine averaging out against a cool side that's drifted too far.
How do you match multiple cameras shooting the same golden hour scene?
Weddings and multi-angle interviews often run two or three cameras through the same fifteen minutes of dropping light, and they rarely agree on color straight out of the box, even when they're all pointed at the same subject in the same light. Different sensors render warmth differently, and a golden hour scene, already pushing every camera's white balance and highlight rolloff harder than flat daylight does, tends to expose those differences more than a neutral scene would.
Balance each camera's angle to neutral independently first, exactly as the balance node in this guide describes, before you try to match them to each other. Matching two unbalanced cameras compounds whatever each one got wrong on its own; matching two properly balanced cameras is a much smaller adjustment, usually just a light Gain or Gamma nudge to bring one sensor's rendition of the same golden hour light in line with the other's.
Once each angle is balanced, build the warm node, sky node, and skin check exactly the same way on each camera's node tree, rather than copying one camera's exact node values onto the other. Copying values across sensors with different color science produces a mismatch even when the numbers are identical, because the same Gain push means something different on a different sensor's response curve. Build the same structure, judge each by eye and by scope against the other, and let the numbers differ where they need to.
If the cameras were shooting simultaneously and you're cutting between angles inside the same scene, grab a still from your best-balanced angle and use it as the wipe reference for the others, the same technique covered later in this guide for matching a single camera's shots across a changing sun. Our guide to fixing multicam sync issues is a separate problem, timing rather than color, but if you're troubleshooting a multicam golden hour edit, sync issues and color mismatches often get reported as the same complaint by a client who just says "the cut looks wrong."
What if your golden hour footage is underexposed or noisy?
This is common enough to plan for. Golden hour light drops fast in the final stretch, and a lot of footage shot in the last few minutes of usable light was exposed a stop or two under what the shot needed, either because the operator didn't compensate fast enough or because opening the aperture or raising ISO further wasn't an option.
Underexposed golden hour footage has a specific failure mode when you warm it: pushing Gamma and Gain warm on a shot that's already sitting low in the range concentrates the warmth into a narrower band of the image than it would on a properly exposed shot, which can look muddier and grainier than the same push on a well-exposed frame. Before you warm, get the exposure into a reasonable range with Lift and Gain in the balance node, even if that means accepting more noise than you'd like. Grading dark and warm at the same time is harder to control than lifting first and warming a second, cleaner pass.
Check the noise itself before deciding how much to push. A small, fine grain that reads as filmic is worth leaving alone, since Temporal and Spatial Noise Reduction have a real image-quality cost, softening detail in exchange for the cleanup, and a light noise reduction pass earns that cost only when the noise is actually a problem, not a texture. If the noise is heavier, blocky or colorful rather than fine, that's when reducing it earns its cost. Our guide to Resolve's noise reduction settings covers Temporal versus Spatial NR and where in your node order to place it, but the short version for a golden hour grade specifically: denoise before you warm, not after, since warming after cleanup won't recolor noise you've already removed, while warming before cleanup pushes color into noise you haven't dealt with yet.
One thing not to do: raise the Highlights or pull Gain down trying to "fix" underexposure by protecting what little highlight detail exists. That's solving the wrong problem. An underexposed shot's issue lives in the shadows and midtones, not the highlights, and pulling highlights down further starves an already-dark image of what range it has left.
How do you deliver a golden hour grade for HDR instead of SDR?
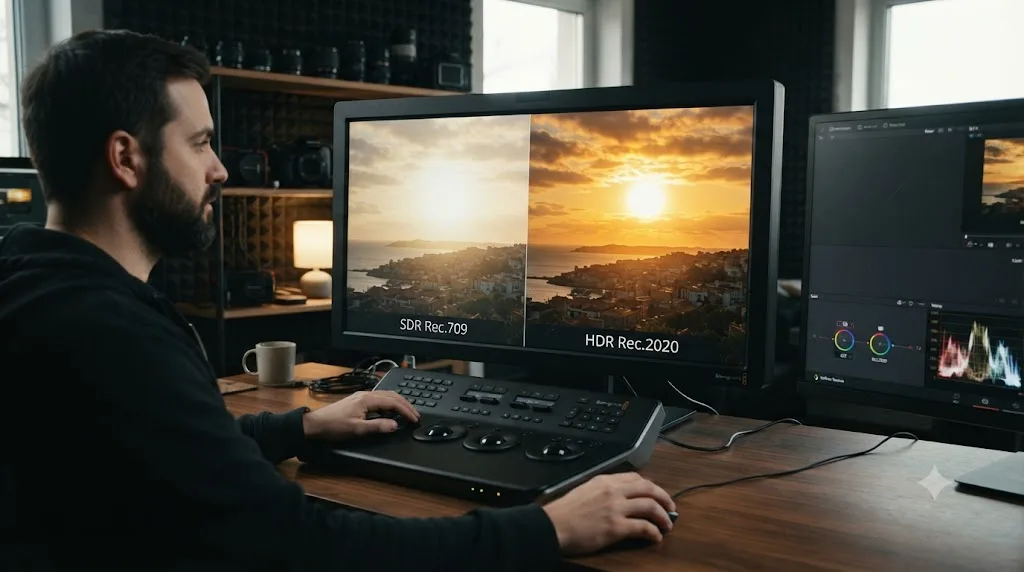
Everything in this guide assumes a standard dynamic range delivery, Rec.709, the default for most YouTube, social, and client-delivered work. If you're grading for HDR, Rec.2020 with PQ or HLG, the zone-based approach still holds, but a few things behave differently.
The highlight rolloff behaves less urgently. In SDR, a golden hour sun or a bright sky edge clips hard and needs the Highlights slider or Soft Clip treatment covered earlier in this guide to avoid a flat, ugly wall of white. In HDR, that same highlight range has real headroom above what SDR could ever display, so a golden hour sun can carry genuine detail and specular intensity that would have simply clipped in Rec.709. Don't reflexively apply the same highlight rolloff you'd use for SDR; check the HDR-specific Specular zone in the HDR grading palette first, since it's built for exactly this range and often needs a much lighter touch than the SDR workflow trains you to expect.
The warm-versus-neutral shadow decision gets more visible in HDR, not less. A wider dynamic range shows more separation between a warm highlight and a cool shadow than SDR compresses into, so a shadow push that read as subtle on a Rec.709 monitor can read as a much stronger stylistic choice once it's displayed on real HDR hardware. Judge that decision on an actual HDR-capable display if you have access to one, not on your SDR grading monitor with an HDR tag slapped on the export, since the two won't show you the same result.
A golden hour grade built for HDR should trim down to SDR, not the other way around. If you're delivering both an SDR and an HDR version of the same golden hour grade, build the HDR version first if you can, then trim down to SDR rather than building SDR first and trying to expand it. HDR has the range to hold onto more of what real golden hour light is doing, and pulling detail back for SDR is a smaller, more controlled move than trying to invent detail expanding an SDR grade upward. Our guide to grading HDR video in DaVinci Resolve covers the trim pass workflow and the PQ-versus-HLG decision in more depth than fits here.
What does a complete golden hour grade look like, node by node?
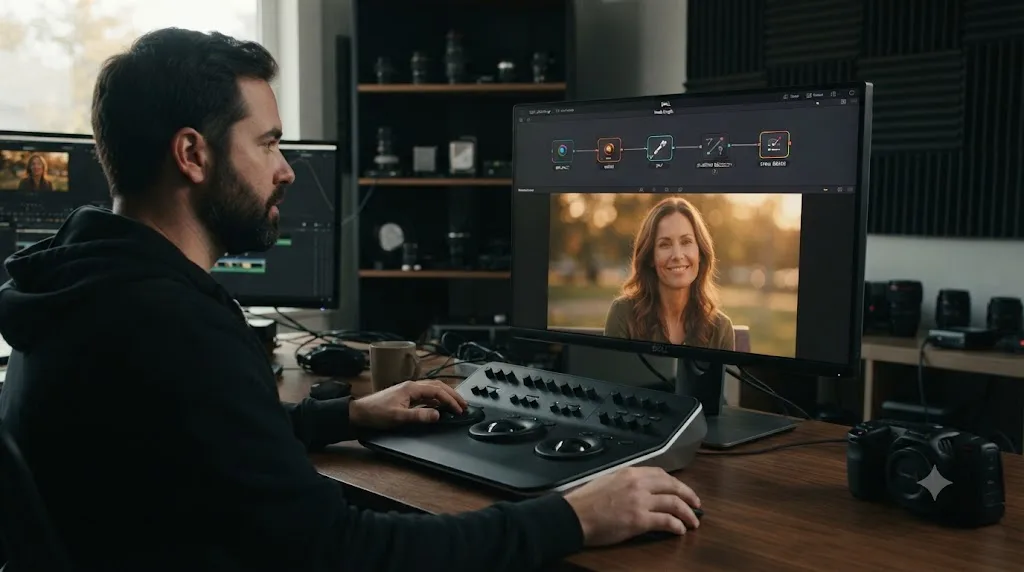
Theory sticks better with a real case, so here's one. Say you shot an outdoor interview an hour before sunset, on a mirrorless camera, standard picture profile, auto white balance on. The subject faces slightly away from camera left, where the sun sits low, and there's a visible strip of sky in the background upper third of frame.
- Balance node. Add a serial node, label it "balance." The auto white balance already cooled the shot somewhat trying to compensate for the warm light, so pull Temp warmer than neutral just to get back to a true, honest reading, checking against a gray element in frame if one's visible, or judging by eye against the parade if not. Set exposure with Lift and Gain so the waveform sits comfortably inside the range.
- Warm node. New serial node, label it "warm." Push Gain toward orange and yellow, moderately, watching the highlights and the background sky pick up color first since they're facing the sun directly. Bring Gamma slightly warm too, enough that skin picks up the glow without shifting hue dramatically.
- Skin check node. Open the vectorscope with the skin tone indicator on. The subject's cheek and forehead have drifted warm but are still readable against the line. No correction needed this time, but if they'd drifted further, this is where a qualified skin node would go.
- Sky node. New serial node, label it "sky." Draw a linear gradient window along the visible horizon strip in the background. Deepen the blue slightly with a Hue vs Hue pull, and add a touch more warmth right at the horizon line itself where the actual sunset color concentrates.
- Highlight rolloff, if needed. If the sun's glow near the horizon is clipping harder than expected once the warm push is in, a light Soft Clip on the highlight rolloff keeps it from reading as a hard digital edge.
- Shadow decision. Judge the shot with and without a small cool pull in Lift. On this particular shot, the natural warmth already carries enough contrast against the sky, so leave Lift close to neutral rather than force a teal shadow that doesn't have a real source in the frame.
- Grab a still. Right-click the viewer, Grab Still, and every other angle or take from the same setup now matches against this reference instead of getting graded from scratch.
Five to six nodes, each one doing exactly one job, each one you could disable individually to see what it's contributing. That's the entire shape of a golden hour grade. Everything earlier in this guide is a deeper look at one of these steps.
How do you grade a golden hour timelapse or a continuous take where the light changes during the shot?
Everything so far in this guide assumes the light is roughly stable within a single clip and only changes between separate takes. A real-time continuous shot that runs long enough to catch the sun actually moving, or a timelapse compressing that same movement into seconds, breaks that assumption. The correction that's right at the first frame is measurably wrong by the last one.
Resolve's node-level keyframing handles this. Build your balance, warm, and sky nodes the same way this guide describes, timed to roughly the midpoint of the shot rather than the first frame, since a grade built entirely around the start will drift further from correct as the clip plays than one built around the middle will. Then, with the playhead on a node's control, click the keyframe icon next to that parameter in the node's palette to drop a keyframe, move the playhead to a later point in the clip where the light has visibly shifted, adjust the wheel or slider to match, and Resolve interpolates the change across the frames in between automatically.
Keep the number of keyframed parameters small. Don't keyframe every wheel in every node just because the light changed; keyframe the two or three moves that are actually carrying the change, usually Gain warmth in the warm node and exposure in the balance node, and leave the rest of the grade static. A node tree with a dozen keyframed parameters fighting each other across a clip is much harder to troubleshoot than one with two or three doing real work.
For a timelapse specifically, where dozens or hundreds of stills get compressed into a few seconds, check the sky and highlight rolloff at both ends of the compressed range before committing to keyframes in between, since a timelapse can swing from a bright, barely-warm sky at the start to a deeply saturated, nearly clipped one by the end, a wider range than a normal continuous shot covers in the same screen time. If the two ends need meaningfully different qualifier ranges to isolate the sky cleanly, and a single qualifier can't track both, split the timelapse into two clips at the point where the sky's hue range shifts too far for one qualifier setting, grade each separately, and cut them back together rather than forcing one node tree to cover a color range it wasn't built for.
How do you keep the look consistent as the sun moves through a scene?
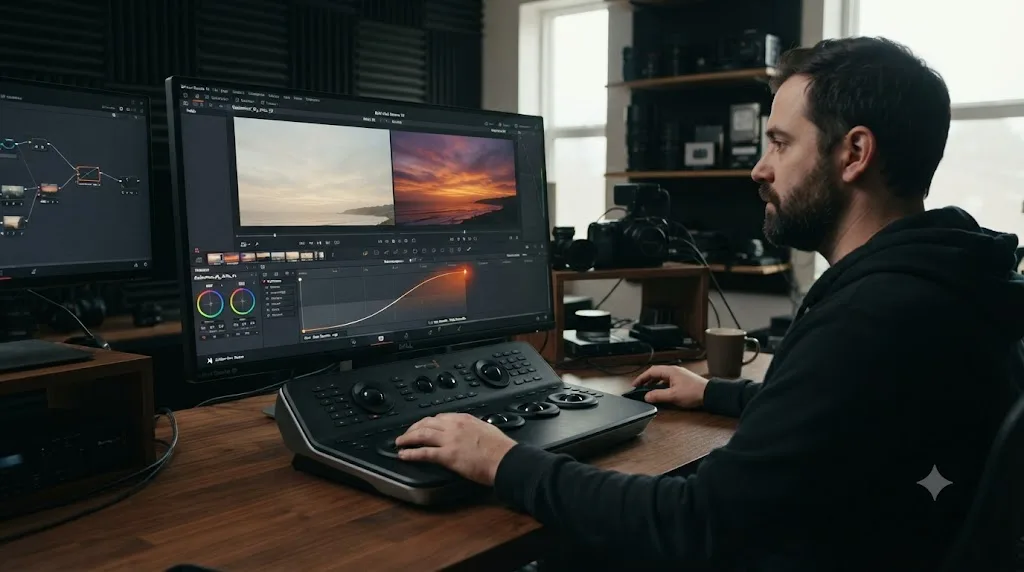
Real golden hour light changes fast, and if you shot for twenty minutes, your first take and your last take were lit differently even if nothing else about the setup moved. Grading them identically produces a mismatch a viewer feels even if they can't name it.
Grade your best, most representative shot from the scene first, the one where the light and framing give you the clearest read on skin and sky both. Grab a still of it. Then work through the rest of the scene using that still as a wipe reference rather than grading each shot from a blank node graph. Park on the next shot, double-click the hero still in the Gallery, and drag the wipe line across the frame to compare regions directly.
Here's where golden hour specifically differs from matching a normal scene: don't expect every shot to match the reference exactly. If your first take was shot at 6:50pm and your last at 7:10pm, the actual light was measurably warmer and dimmer by the end. Match the grading approach, the same zone-based warmth structure, the same skin protection, the same sky treatment, rather than forcing identical numbers onto footage that was genuinely lit differently. A slight, real progression from cooler to warmer across a scene often reads as more honest than an artificially flat match, since it's what actually happened in front of the camera.
Group clips that share a setup, same angle, same few minutes of light, and apply shared corrections at the Group Pre-Clip or Post-Clip level so a later tweak updates every clip in the group at once instead of requiring you to re-edit five separate node trees by hand.
How do you save a golden hour look and reuse it across projects?
Once you've built a golden hour node structure you're happy with, save it somewhere it outlives this one project. A PowerGrade is the tool for that: a saved node tree stored at the database level, available in the Gallery of every project on your system, not just the one you built it in. Our full PowerGrades guide covers the mechanics in depth, but the short version for this workflow: grab a still into a PowerGrade album once your balance, warm, sky, and shadow nodes are all dialed in, and the next time you're grading golden hour footage, middle-click that still onto a fresh clip and adjust from a working starting point instead of rebuilding five nodes from zero.
Keep the PowerGrade generic enough to be reusable. A grade baked around one specific shot's exact exposure won't drop cleanly onto footage from a different day or a different camera, but a grade structured as balance-then-warm-then-sky, with each node holding a moderate, adjustable push rather than an extreme one, adapts to new footage fast. Build two versions if your work varies enough to need them: a lighter touch for footage that's naturally warm already, and a stronger push for footage where the camera's auto white balance fought the light on set.
What mistakes should you avoid when grading golden hour footage?
| Mistake | Why it hurts | The fix |
|---|---|---|
| Warming with one global Temp push | Flattens the natural highlight-to-shadow contrast real golden hour light has, reading as a filter | Warm Gain and Gamma in their own node, leave Lift closer to neutral |
| Grading the sky and subject in the same node | Forces a compromise that under-exposes one or blows out the other | Isolate the sky in its own qualified or windowed node |
| Chasing skin back to fully neutral | Fights what warm light is supposed to do to a face, produces an unnatural, flat result | Let skin sit warm, correct only if it drifts past the vectorscope's skin line |
| Forcing a teal shadow with no source in frame | Reads as a preset instead of a lighting condition | Only cool the shadows if there's a real cool light source, like open sky, providing contrast |
| Trying to fully fake golden hour on a hard-shadow midday shot | Shadow geometry contradicts the color no matter what you dial in | Save the fake-golden-hour treatment for flat, diffused light instead |
| Ignoring that the light itself changed across a real shoot | Forces an artificial, identical match across footage that was genuinely lit differently | Match the grading approach, not identical numbers, across a real golden hour scene |
| Judging warmth on an uncalibrated laptop screen | The exact color balance you're chasing is the thing a bad screen lies about most | Confirm warmth on the parade and vectorscope, not your eyes alone |
The pattern underneath all seven: golden hour grading fails when it stops responding to what's actually in the frame and starts applying a preset. The light that makes golden hour beautiful in the first place already has structure, warm highlights, cooler shadows, a glowing sky. Your grade's job is to preserve and slightly enhance that structure, not replace it with a uniform tint.
What's new in DaVinci Resolve 21 for this kind of grade?
As of July 2026, DaVinci Resolve 21 carries a few changes worth knowing if you last graded seriously on an older version. Per Blackmagic's release notes, the node editor now has a layers view, listing nodes in rows by graph position instead of a scattered flowchart, which helps once a golden hour chain passes six or seven nodes and starts sprawling across the screen. Resolve 21 also added group grade versions, letting you manage multiple looks across a group of clips at once instead of clip by clip, which is genuinely useful when you're testing a warmer versus a more restrained golden hour treatment across an entire scene's worth of takes.
The same node tools now apply to still images on the new Photo page too, using the identical node-graph mental model as video. If part of your golden hour work is grading photo stills alongside video from the same shoot, that's one workflow instead of two separate tools to learn.
None of this changes the underlying technique in this guide. It changes how comfortably you manage the node count a golden hour grade tends to produce.
Do you need DaVinci Resolve Studio for a golden hour grade?
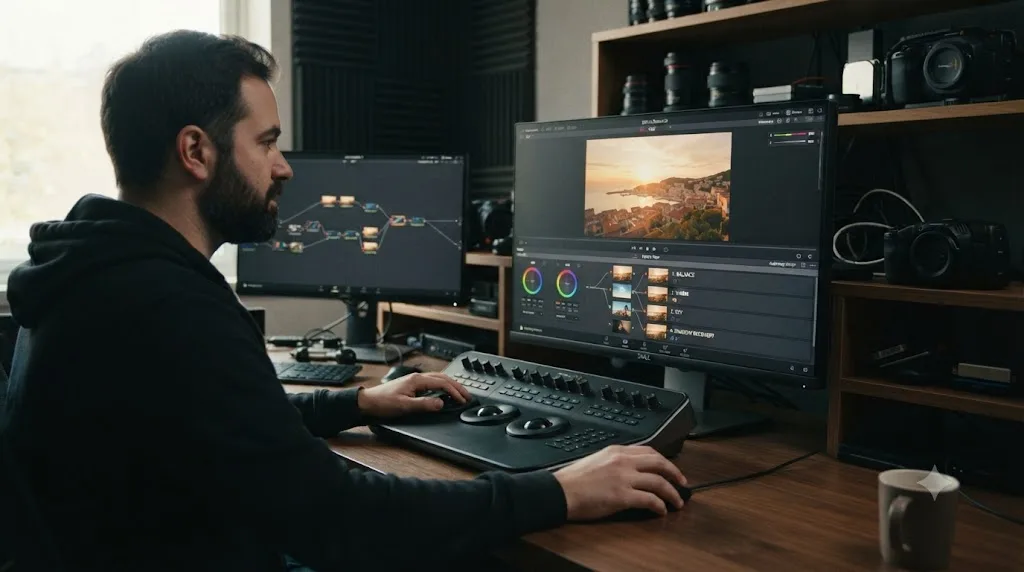
No. Every tool used in this guide, the primary color wheels, HSL and Hue vs Hue curves, the Qualifier and Window palettes, gradient windows, tracking, the HDR grading palette, and the Color Warper, is included in the free version, per Blackmagic's own Color page documentation.
What Studio adds is advanced HDR grading with Dolby Vision and HDR10+ metadata palettes, and DaVinci Neural Engine tools like Magic Mask for automatic subject tracking without manually keyframing a power window. Neither matters for a standard SDR golden hour grade. Magic Mask can save time isolating a moving subject on a busy shot, tracing them automatically instead of a tracked power window, but it's a convenience, not a capability the free version lacks entirely. If you're weighing the full Studio upgrade for reasons beyond this one workflow, our DaVinci Resolve 21 review covers the broader free-versus-Studio decision.
Does your hardware or OS change how this grade behaves?
The technique is identical across Windows, Mac, and Linux. Where you'll feel a difference is playback smoothness once your node count climbs, which golden hour grading tends to do faster than a flat correction.
On a Mac, Apple silicon decodes H.264, H.265, and ProRes in hardware, keeping playback responsive even with five or six nodes stacked. On Windows, set the GPU processing mode under DaVinci Resolve > Preferences > System > Memory and GPU, CUDA for NVIDIA cards, OpenCL otherwise, though Auto usually gets it right; the sharper limitation is that Blackmagic reserves hardware-accelerated H.264 and H.265 decoding for Studio on Windows, so free-version users grading phone or drone golden hour footage lean harder on the CPU. On Linux, the free build has long shipped without H.264, H.265, or AAC support at all, so transcoding on ingest, or buying Studio, is the practical path either way.
If a heavily zoned golden hour grade starts stuttering regardless of platform, drop the Timeline Proxy Resolution to Half under Playback, or turn on Smart Render Cache so Resolve pre-renders the taxing parts in the background. Puget Systems' hardware guide recommends at least 12 GB of VRAM for a 4K timeline with a real node stack, and a multi-zone golden hour grade with a tracked sky window and a skin correction gets there faster than you'd expect.
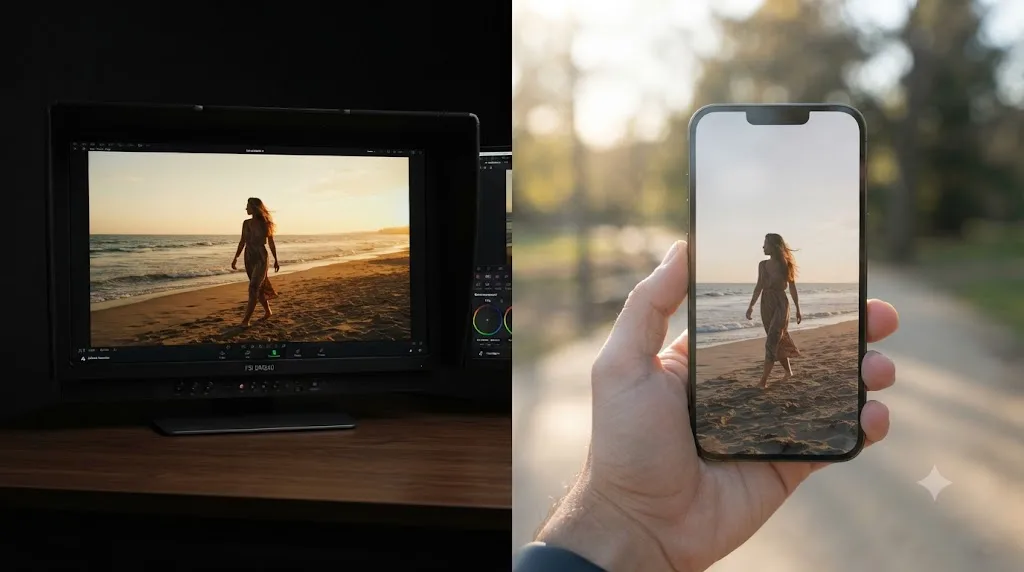
Does a golden hour grade look different once it's viewed on a phone instead of your grading monitor?
Often, yes, and it's worth checking before you call a grade finished, especially since most golden hour footage ends up watched on a phone outdoors, in bright ambient light, on a screen that renders color differently than the monitor you graded on.
Phone OLED screens tend to push contrast and saturation harder than a calibrated grading monitor does, which means a golden hour warmth that reads as tasteful and restrained on your reference display can read as more saturated, more obviously "graded," once it's on a viewer's phone. This isn't a flaw in your grading monitor or a reason to distrust the scopes; it's a real difference in how the two displays render the same values, and it's worth knowing about rather than fighting.
Ambient light works against you too. A lot of golden hour content, wedding highlights, travel vlogs, branded interviews, gets watched outdoors or in a bright room, on a phone screen fighting glare, which crushes shadow detail and subtle contrast the same way it would on any screen in bright ambient light. A shadow-side warmth or cool decision you carefully judged on a dim grading suite can simply disappear on a phone at a beach on a bright day, not because the grade was wrong, but because the viewing condition can't show it.
A subtle shadow decision that vanishes on a phone screen isn't a failed grade, it's a viewing condition the grading suite didn't warn you about. The practical fix isn't to abandon your grading monitor. It's to check the finished grade on an actual phone, in reasonably normal daylight, before calling it done, the same way you'd sanity-check a mix on cheap earbuds after finishing it on studio monitors. If a subtle shadow decision vanishes entirely on a phone screen but the warm highlight and skin protection still read clearly, that's usually fine; those are the two elements a viewer will actually process even in a bad viewing environment. If the whole grade goes flat and unreadable on a phone, the correction was probably too subtle for how it'll actually be watched, and it's worth pushing the primary moves, the warm Gain and Gamma push, the sky separation, a little further so they survive a worse screen in a brighter room than your grading suite.
What's the fastest way to get better at golden hour grading?
Grade real golden hour footage you actually shot, not a tutorial project. A tutorial teaches you which sliders exist. Your own footage teaches you when a face has drifted too warm, because you'll recognize the person and notice immediately if something looks wrong, which is a judgment no amount of watching someone else's screen builds as fast.
We've taught more than 100,000 students through Udemy courses as an official Udemy Business Partner, and the pattern that separates people who get good at this fast from people who stall is the same one every time: they grade their own material and get stuck on specific controls mid-grade, not on the overall workflow. Blackmagic's own free training, the Colorist Guide available on their official training page, covers the node fundamentals this entire guide assumes. YouTube channels like Casey Faris and forums like r/DaVinciResolve are where most people go next for specific technique questions, and they're genuinely good, if scattered, resources.
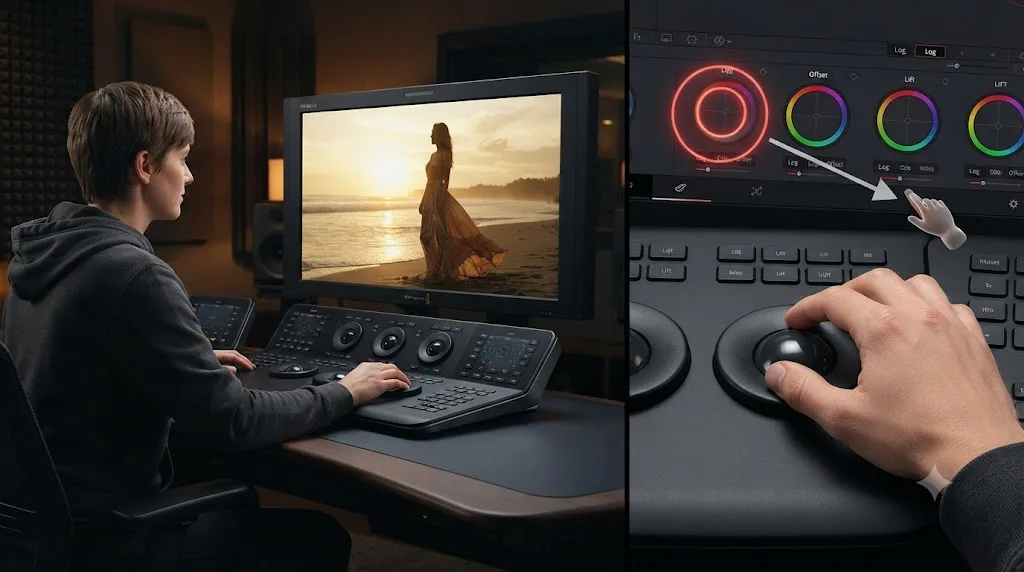
Guided practice inside Resolve beats watching courses about Resolve. That's the gap a small category of AI tools has started filling. TryUncle is the on-screen assistant for DaVinci Resolve on macOS, and ask in plain words, Uncle points at the exact control on your screen instead of sending you searching a forty-minute video for a ten-second answer. It's not the only option in this space:
| Tool | What it actually does | How it differs from Uncle |
|---|---|---|
| TryUncle | Watches your Resolve screen live and points at the exact control for what you're trying to do, on Edit, Color, and Fusion | Teaches you the control, in your own project, rather than doing the step for you |
| Sottocut | Automates specific editing tasks like captioning and rough cuts | Automation, not live on-screen guidance |
| PremiereCopilot | Chat-based editing assistant originally built around Premiere Pro workflows | Answers questions in a chat window rather than pointing at your live interface |
| heyeddie.ai | AI editing assistant focused on automated cuts and pacing | Automates parts of the edit rather than teaching the control |
| cutagent.ai | AI agent aimed at automating editing tasks end to end | Built to do the work, not to teach you how to do it yourself |
If you get stuck on a specific control mid-grade, say you can't remember which palette holds the Hue vs Hue curve, TryUncle is built for that exact gap. It's a paid app, currently at founder pricing, not a free tool, and it's macOS only, so check the current rate on their site rather than trusting a number that'll be out of date by the time you read this.
Where do you go from here?
Balance first, in a neutral node. Warm the highlights and midtones in a second node, not the whole image. Check skin against the vectorscope's skin tone line instead of your gut. Split the sky into its own node. Decide on the shadows deliberately instead of by habit. That's the entire technique, five decisions, and it's the same five whether you're grading a wedding, a branded interview, or a short film.
Pick one clip from real golden hour footage you've shot and run it through this structure today, before you reach for a LUT or a preset pack that promises to do it for you. The zone-based approach holds up on footage a flat warmth push never will, because it's built around what golden hour light is actually doing, not just what color it happens to be.
And once this grade feels automatic, it's worth building it into a PowerGrade, because golden hour isn't a one-time look. It's a lighting condition you'll shoot in again, and the node structure that works this time is the one you want waiting for you the next.
Frequently asked questions
- What color temperature is golden hour light?
- Golden hour light typically runs warmer than daylight, and cinematographers commonly work in the 2700K to 3200K range when they want that specific warm, nostalgic feel, compared to roughly 5600K for neutral daylight. Treat those numbers as a starting point for your white balance controls, not a rule, since actual golden hour light shifts by the minute as the sun drops.
- How do I stop skin from turning orange when I warm a golden hour shot?
- Warm the highlights and midtones with Gain and Gamma rather than pushing Temp on the whole image, then check skin against the vectorscope's skin tone indicator line. If skin drifts noticeably off that line, pull a small hue correction back toward it in a separate node instead of undoing the warmth everywhere.
- Can I fake a golden hour look on footage that wasn't shot at sunset?
- Partially. You can push warmth, add a soft gradient in the highlights, and darken the top of frame to fake a lower sun angle, and it reads fine for a lot of footage. What you can't recover is hard, high-angle shadow direction, since a midday shot's shadows point the wrong way for real sunset light, and no color correction changes shadow geometry.
- Should shadows go teal or cool while the highlights stay warm in a golden hour grade?
- It's optional, not required. Warm highlights against slightly cooler shadows adds contrast and reads as more cinematic, but golden hour footage often already has enough natural warmth that a fully neutral or even slightly warm shadow looks more honest. Try it on a duplicate version before committing, and judge it against the scopes, not habit.
- Do I need DaVinci Resolve Studio to grade a golden hour look?
- No. Every tool this guide uses, the primary wheels, HSL and Hue vs Hue curves, qualifiers, power windows, gradient windows, and the Color Warper, is available in the free version. Studio adds Dolby Vision and HDR10+ metadata palettes and DaVinci Neural Engine tools like Magic Mask, which matter for HDR delivery or automated masking, not for a standard golden hour grade.
- What node should isolate the sky in a golden hour shot?
- Add a new serial node after your balance node, then either qualify the sky by its hue and luminance with the Qualifier palette, or draw a linear gradient power window along the horizon. A qualifier follows the sky's color everywhere it appears in frame; a gradient window is faster when the horizon line is clean and roughly straight.
- How long does golden hour actually last?
- By the common photographic definition, golden hour runs while the sun sits between 6 degrees above the horizon and 4 degrees below it, according to PhotoPills' golden hour guide. In practice that window is often shorter than a full hour, and production accounts of Terrence Malick's Days of Heaven, shot almost entirely in this light, put the usable window at around 20 to 25 minutes a day.
- Is there an app that helps while you're using DaVinci Resolve to grade something like this?
- Yes. TryUncle is the on-screen assistant for DaVinci Resolve on macOS, and it's built for exactly this kind of mid-grade question, where you know roughly what you want but can't remember which palette holds the control. It's a paid app at founder pricing, not a free tool, and it works alongside Blackmagic's own free training rather than replacing it.
Sources
- DaVinci Resolve - Color (Blackmagic Design)
- DaVinci Resolve - Studio (Blackmagic Design)
- DaVinci Resolve - Tech Specs (Blackmagic Design)
- DaVinci Resolve - What's New (Blackmagic Design)
- Golden Hour Photography: The Definitive Guide (PhotoPills)
- Golden hour (photography) (Wikipedia)
- Color Temperature for Video: The Filmmaker's Complete Guide (GVM)
- 5 Tips for Getting Perfect Skin Tones in DaVinci Resolve, by Cullen Kelly (Frame.io Insider)
- The Simple Technique for Cinematic Color Saturation in DaVinci Resolve, by Cullen Kelly (Frame.io Insider)
- No One Lights A Scene Like Mother Nature (TIFF)
- Hardware Recommendations for DaVinci Resolve (Puget Systems)
Keep reading

Guides · Jul 7, 2026 · 35 min
How to Color Grade in DaVinci Resolve: The Basics
Learn how to color grade in DaVinci Resolve: build a node chain, balance shadows and highlights with Lift, Gamma, and Gain, and read the scopes.
Guides · Jul 16, 2026 · 29 min
DaVinci Resolve Node Labels and Colors for Organized Grading
Rename and color-code DaVinci Resolve nodes so a six-node grade still makes sense months later. Labels, colors, badges, and a system that actually holds up.
Guides · Jul 10, 2026 · 30 min
How to Read DaVinci Resolve Scopes: Waveform and Vectorscope
Learn to read DaVinci Resolve's waveform, RGB Parade, and vectorscope: what balanced exposure, white balance, and skin tone actually look like on each.